Documentation
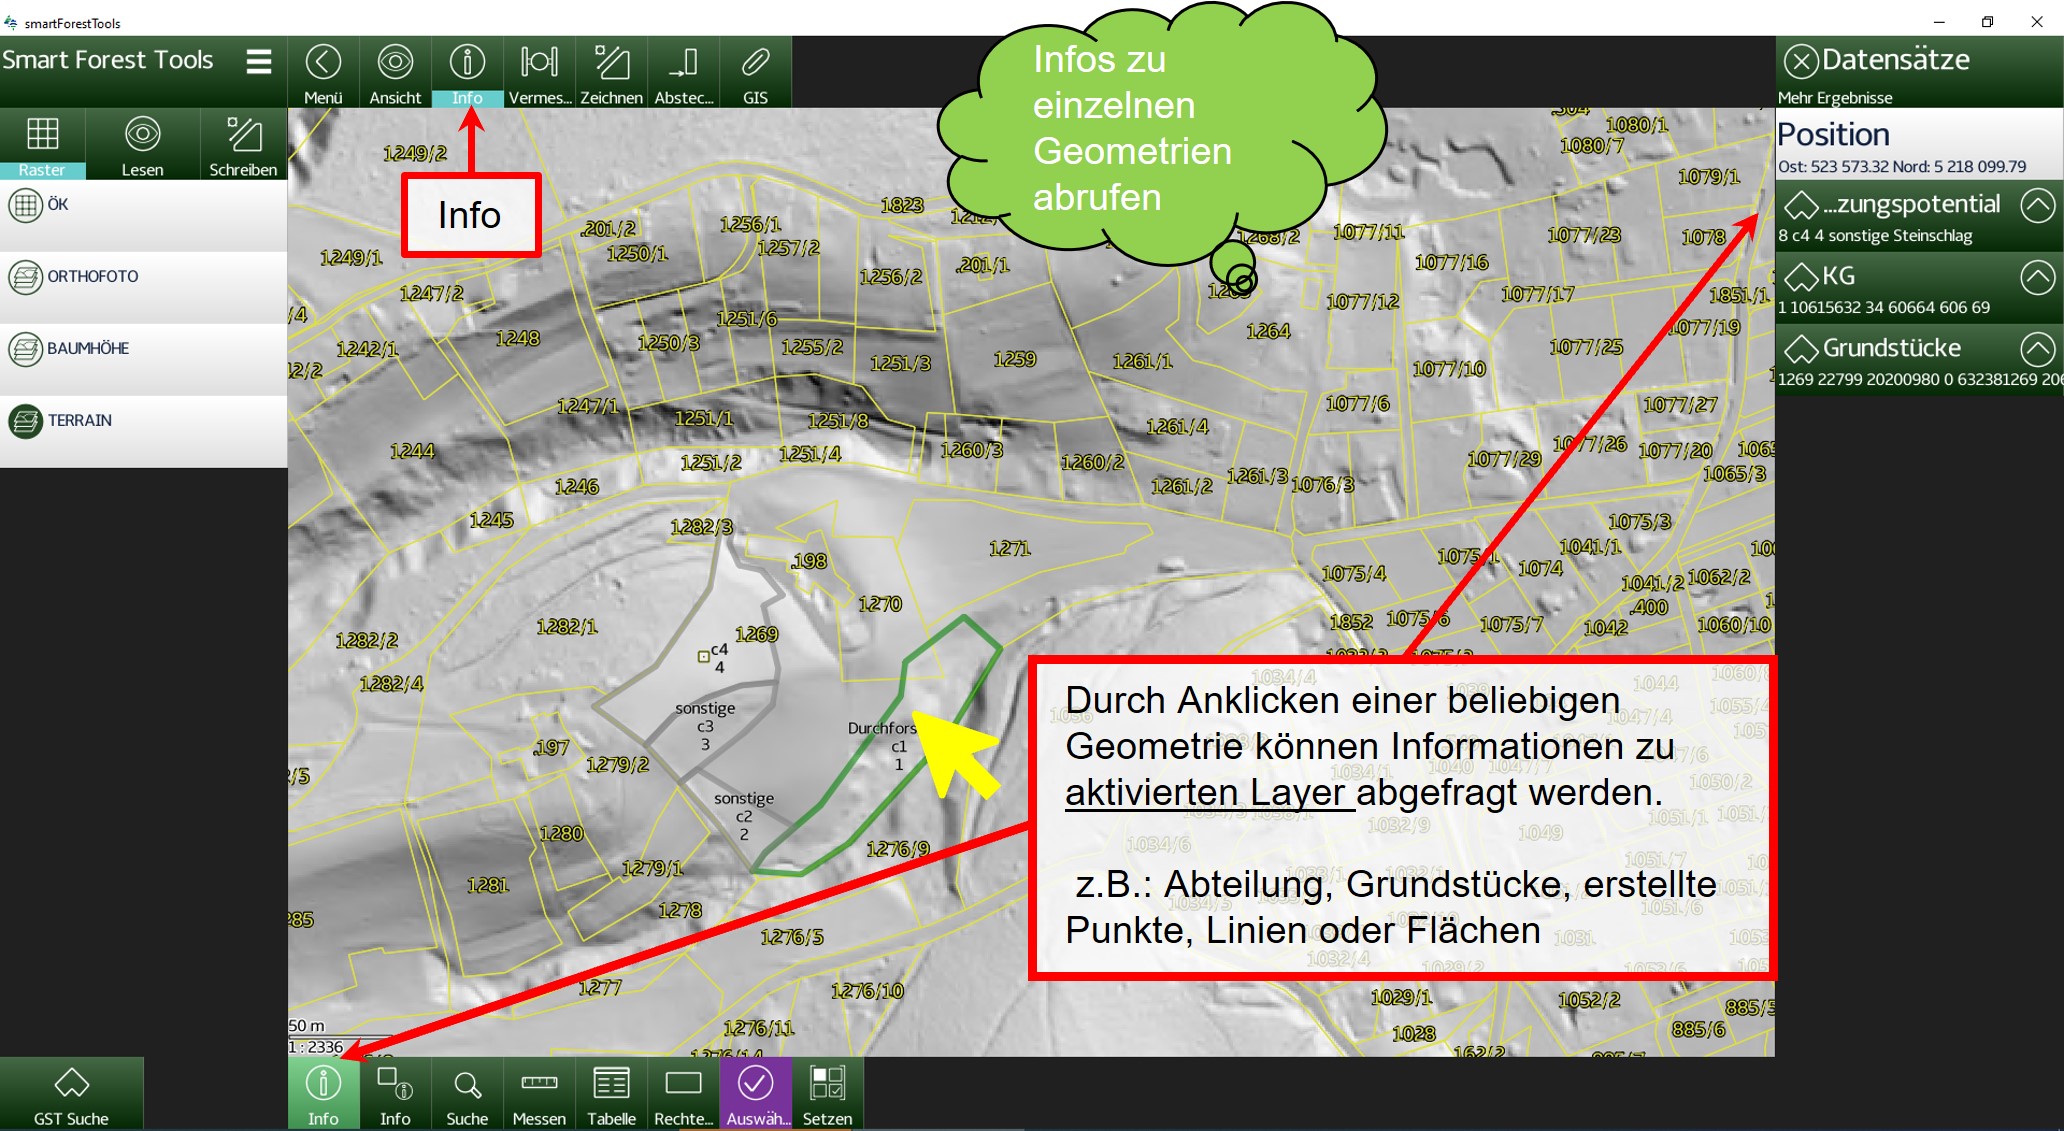
Info
Surveying and staking out
SmartForestTools is a multifunctional geographic information system (GIS) from the company Umweltdata GmbH.
It can be used both online (with internet access) and offline (outside, without internet access). A series of morphological, cartographic and forestry-related geodata is stored on each device.
Cloud.
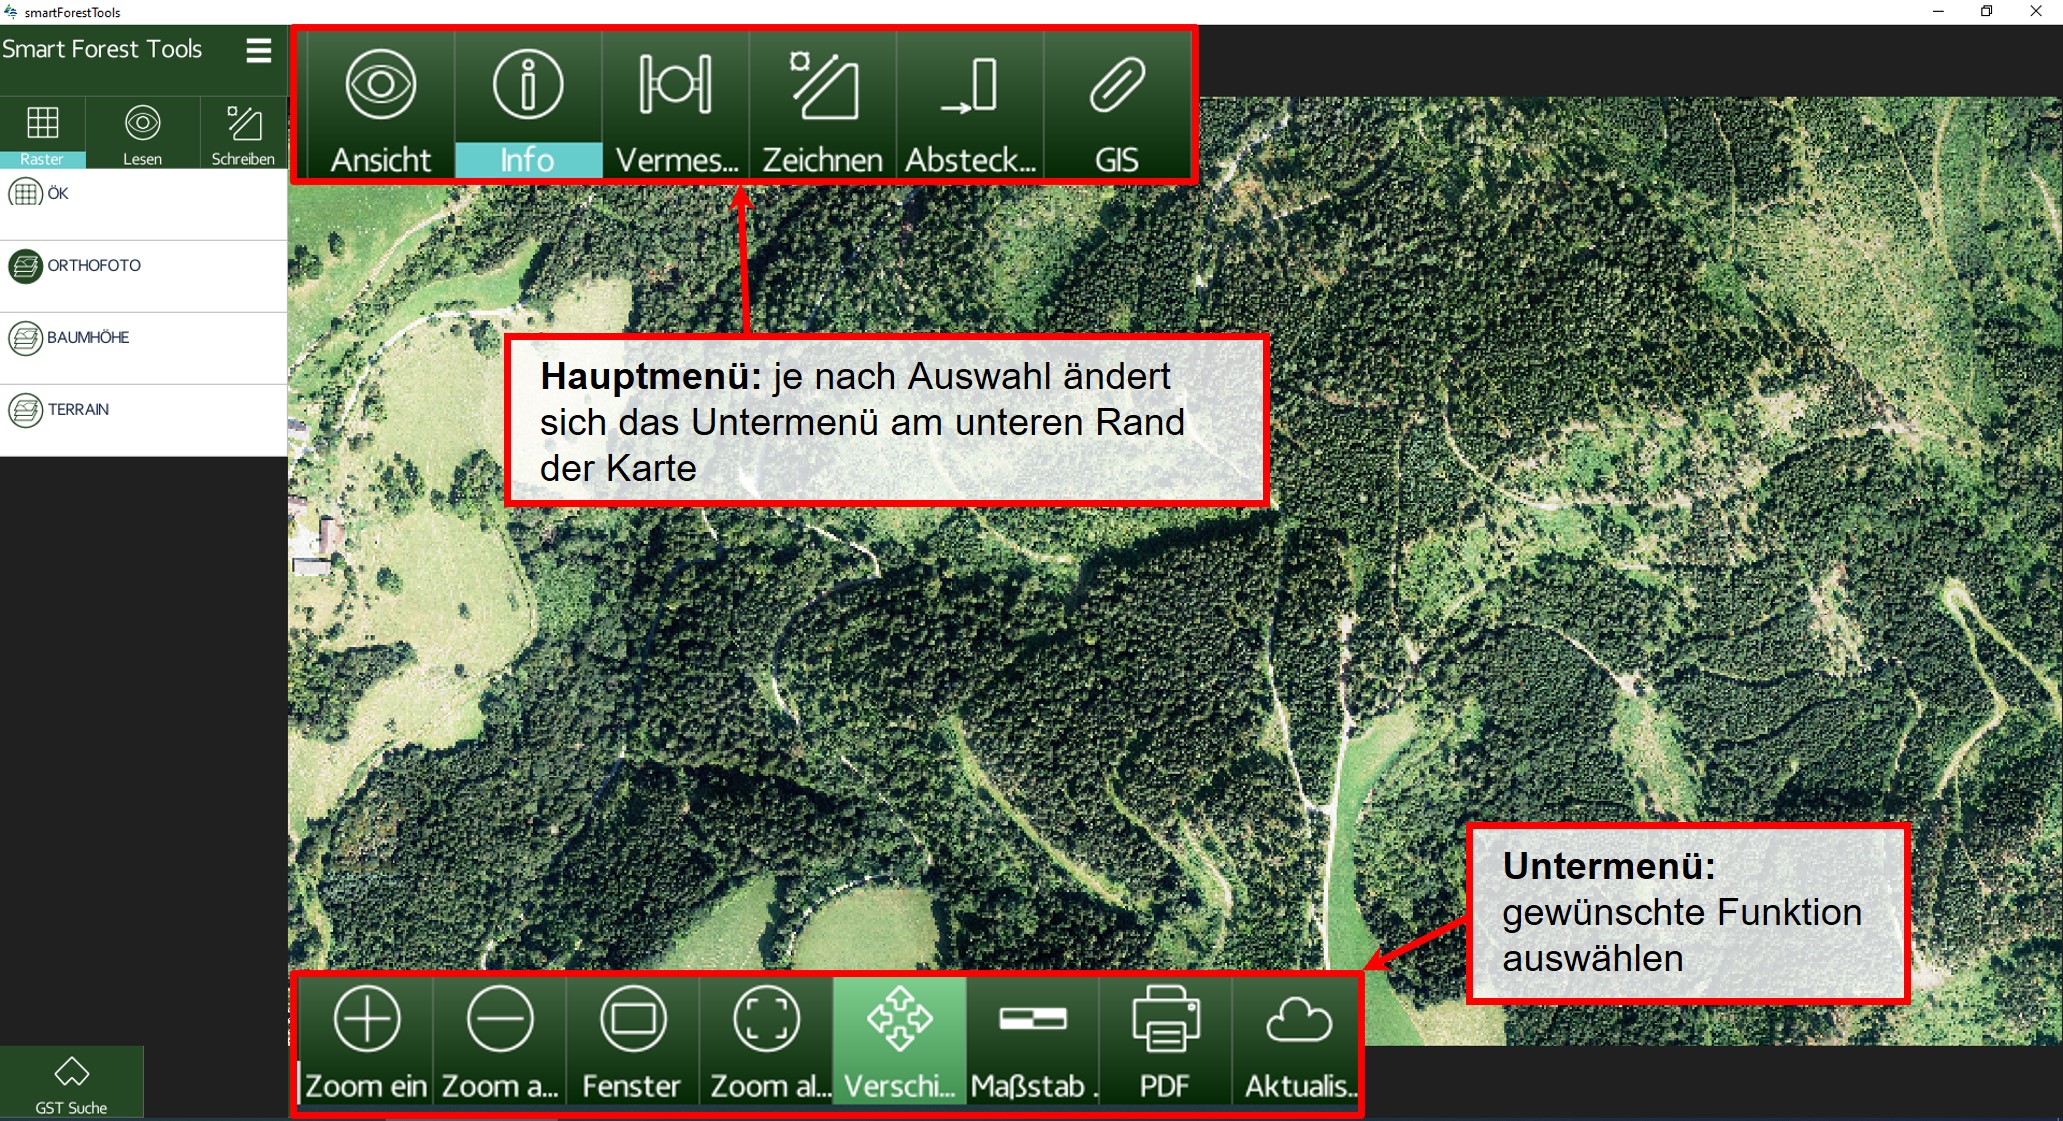
Geometries that are created in the field (offline) and filled with information end up in a shared cloud when there is internet access and are then distributed to all other devices. This happens automatically and can be accelerated by the user by clicking on the 'Refresh' button (see View->Refresh).
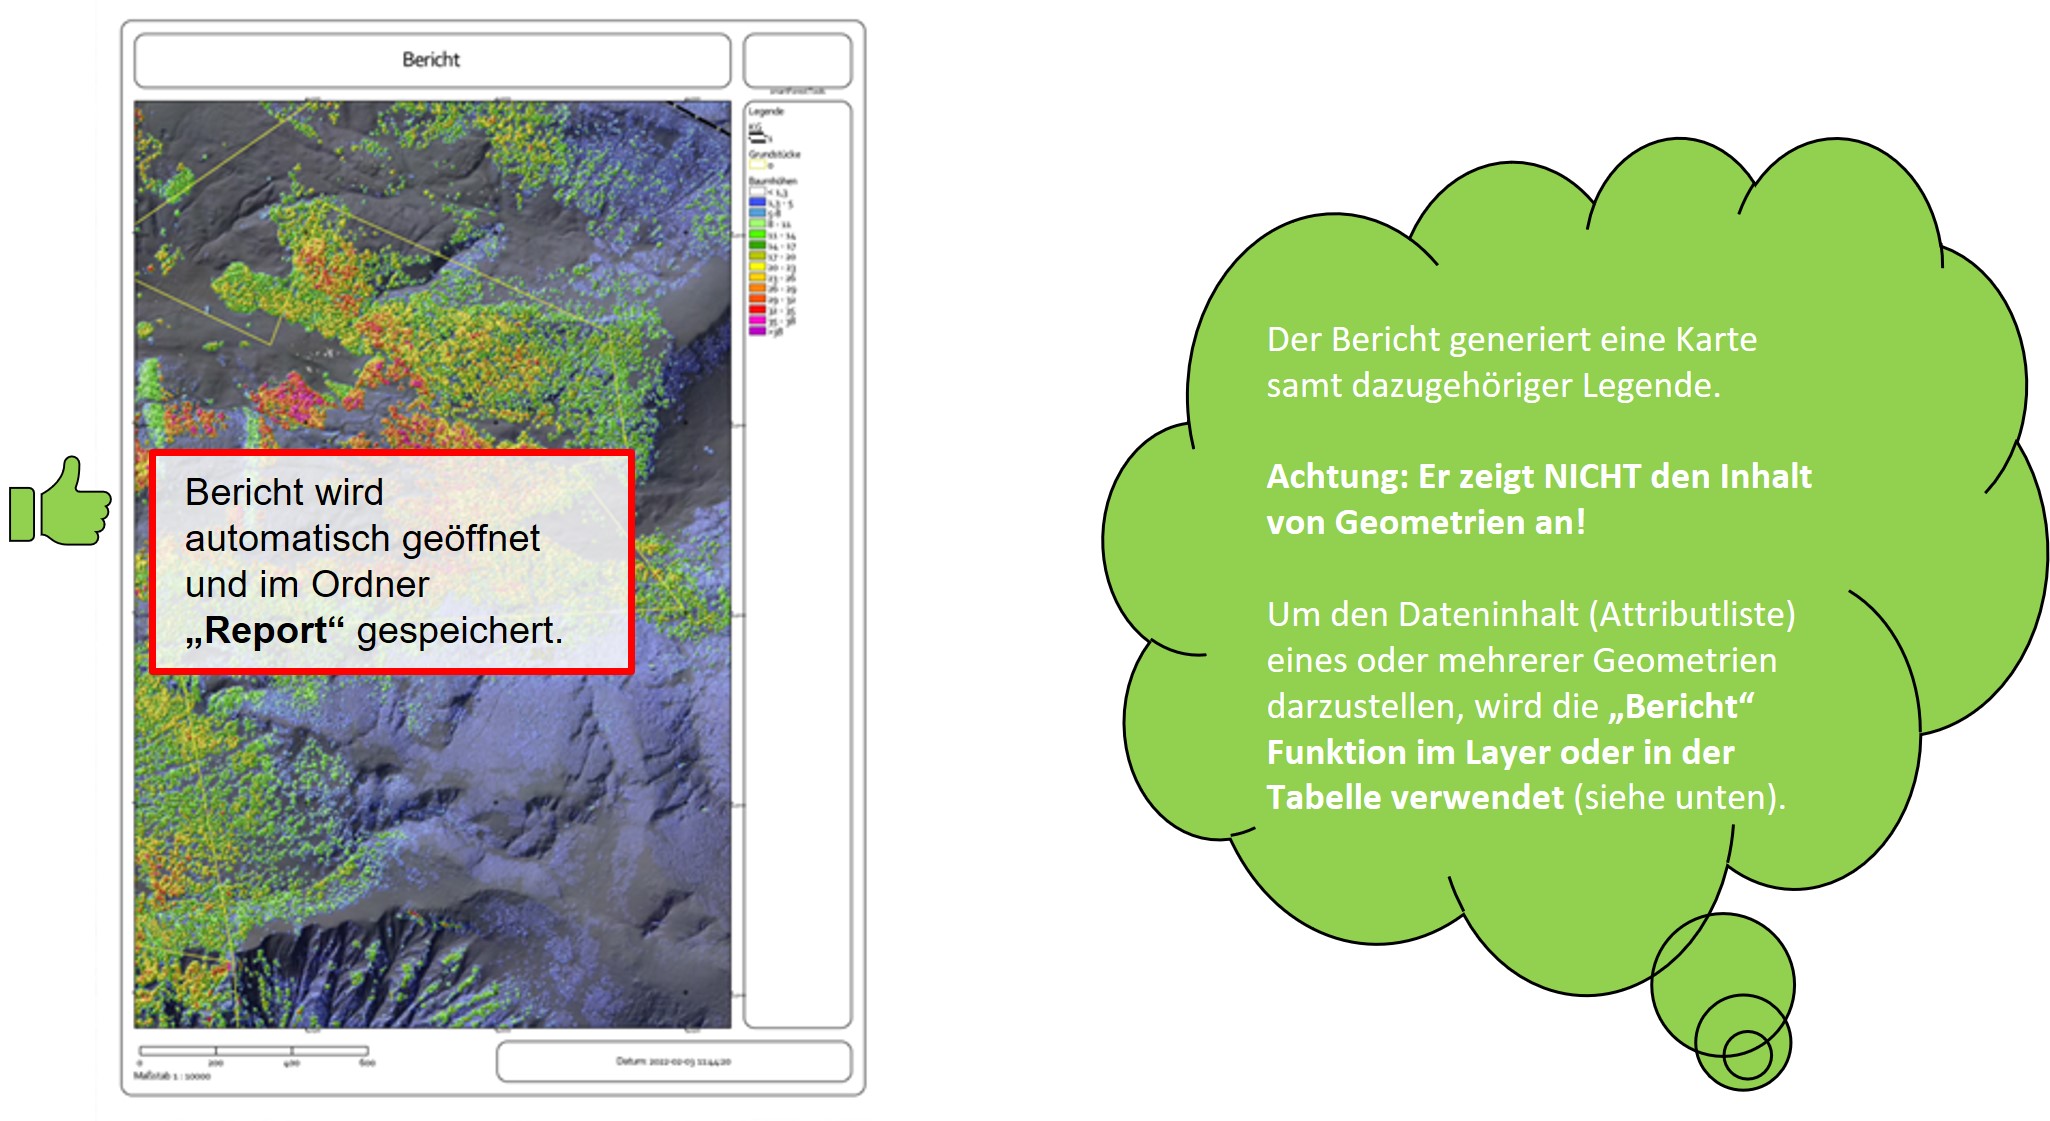
Reports and export of data.
SmartForestTools have extensive features for actively creating maps and reports. Layers can be shown or hidden in these maps at will and appear in a legend as known from other GIS applications. Furthermore, all geometries can be exported in the form of shape files for further processing. This applies to self-created geometries (points, lines, polygons) and to existing background layers such as street layers or property registers from the cadastre.
In these operating instructions you will always find the following auxiliary symbols to help you with this. to highlight important facts:


New software updates are regularly provided by Umweltdata GmbH.
Under Settings → Refresh app → App download
Can be checked if a new version of SmartForest Tools is available.
In this case, your internet browser will open automatically and you can decide to download. The software update can be carried out by confirming and executing the downloaded file (.apk) the software update can be carried out.


Simple report with legend

Report with nodes and data content
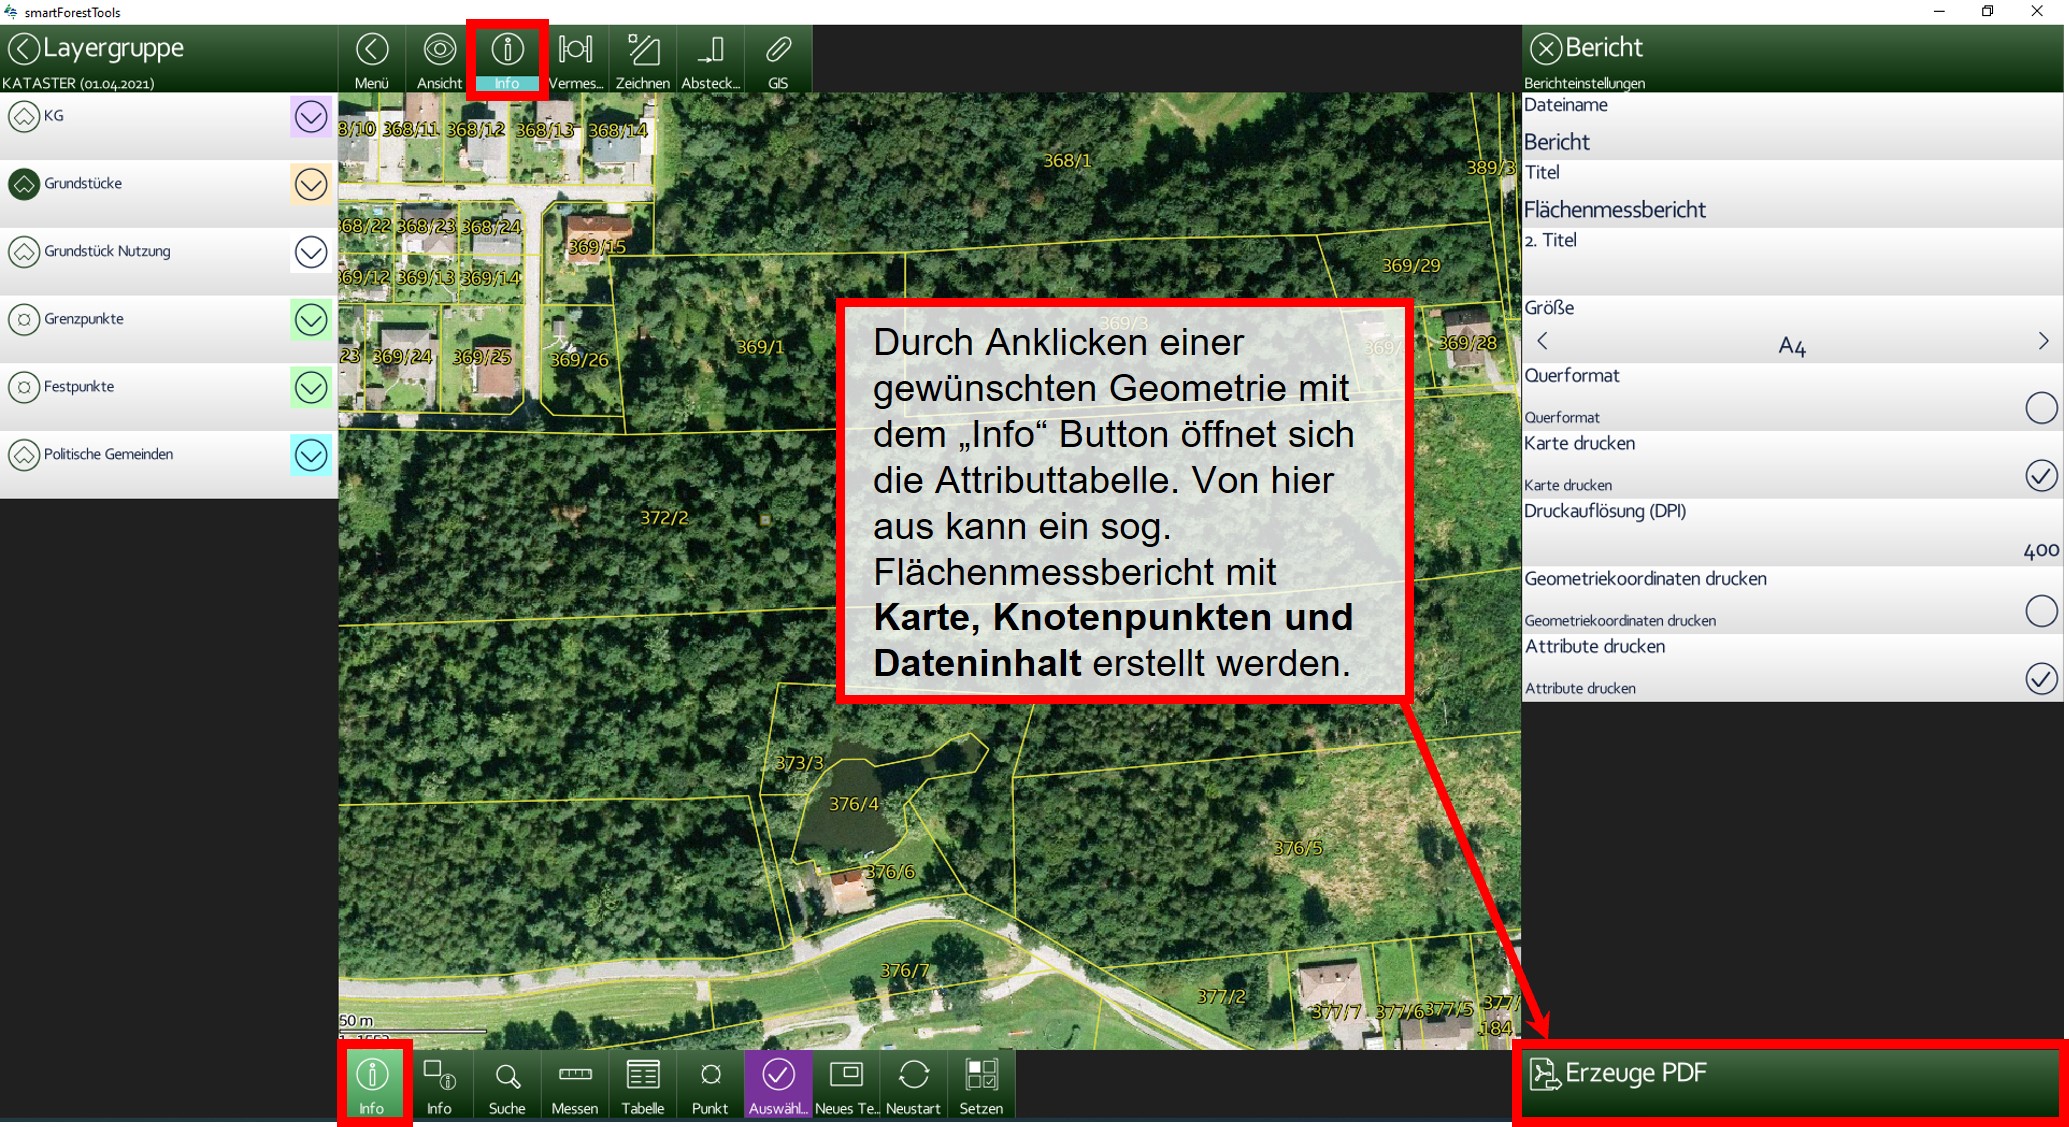


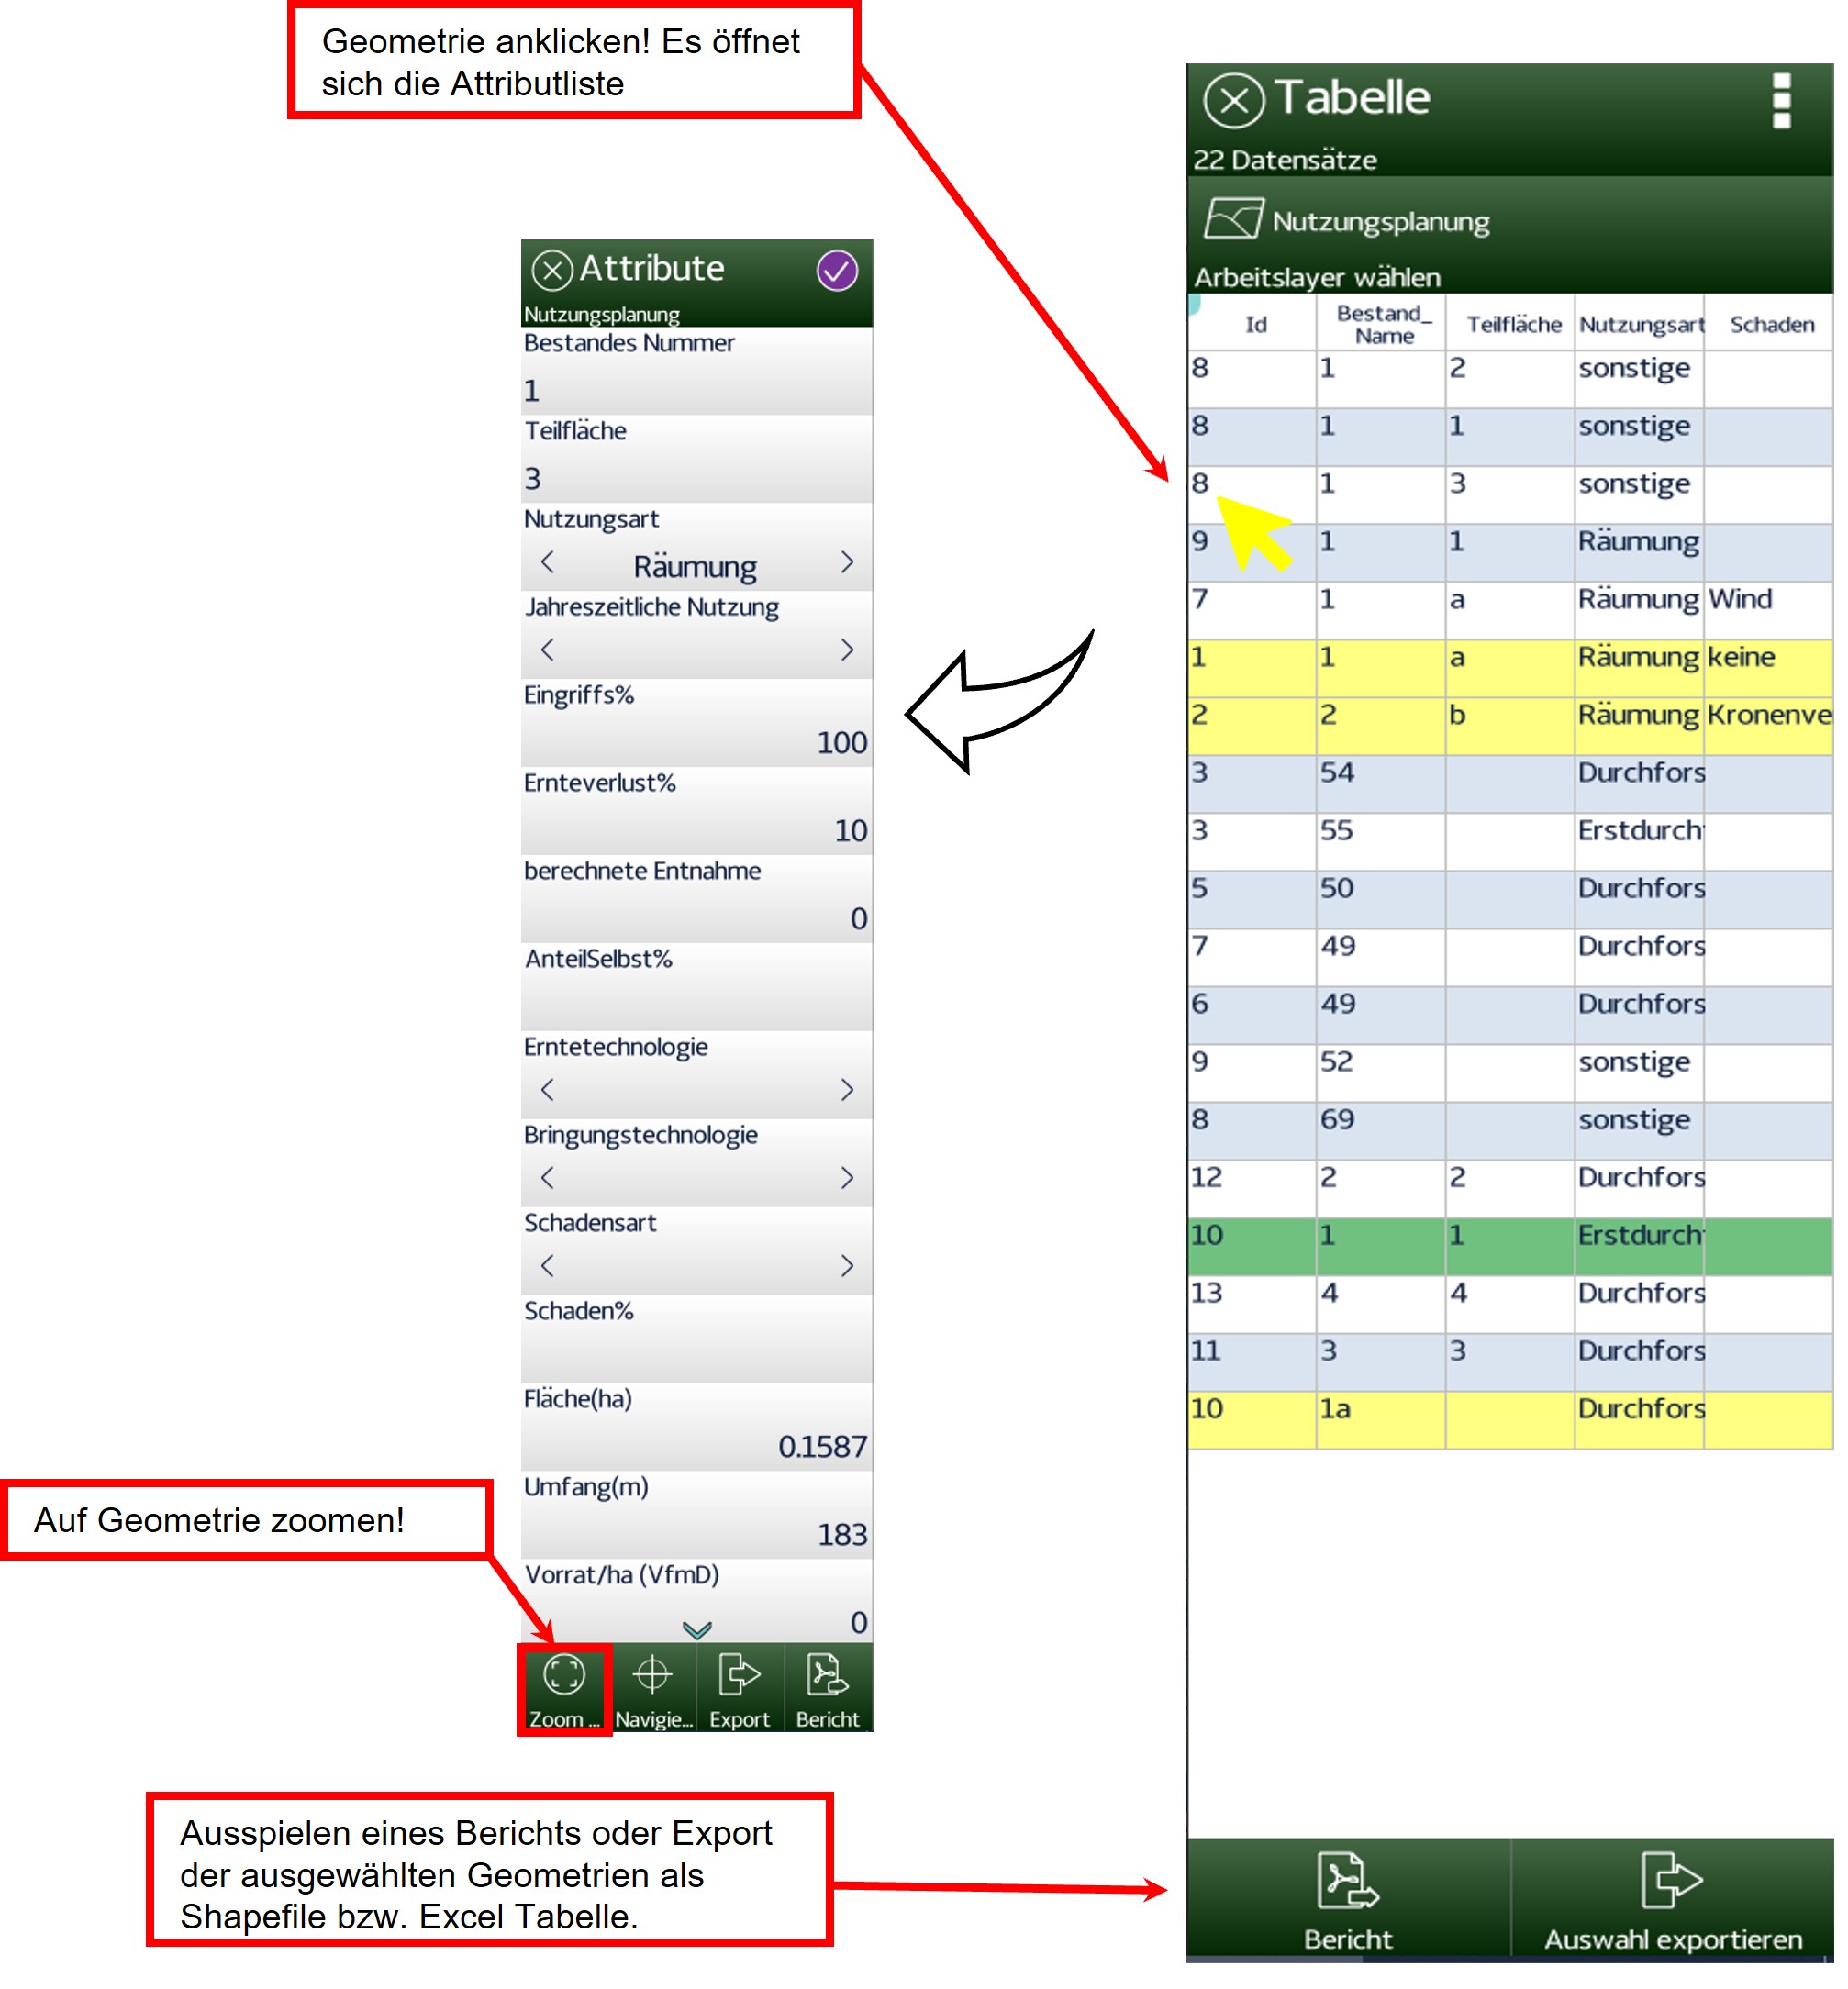
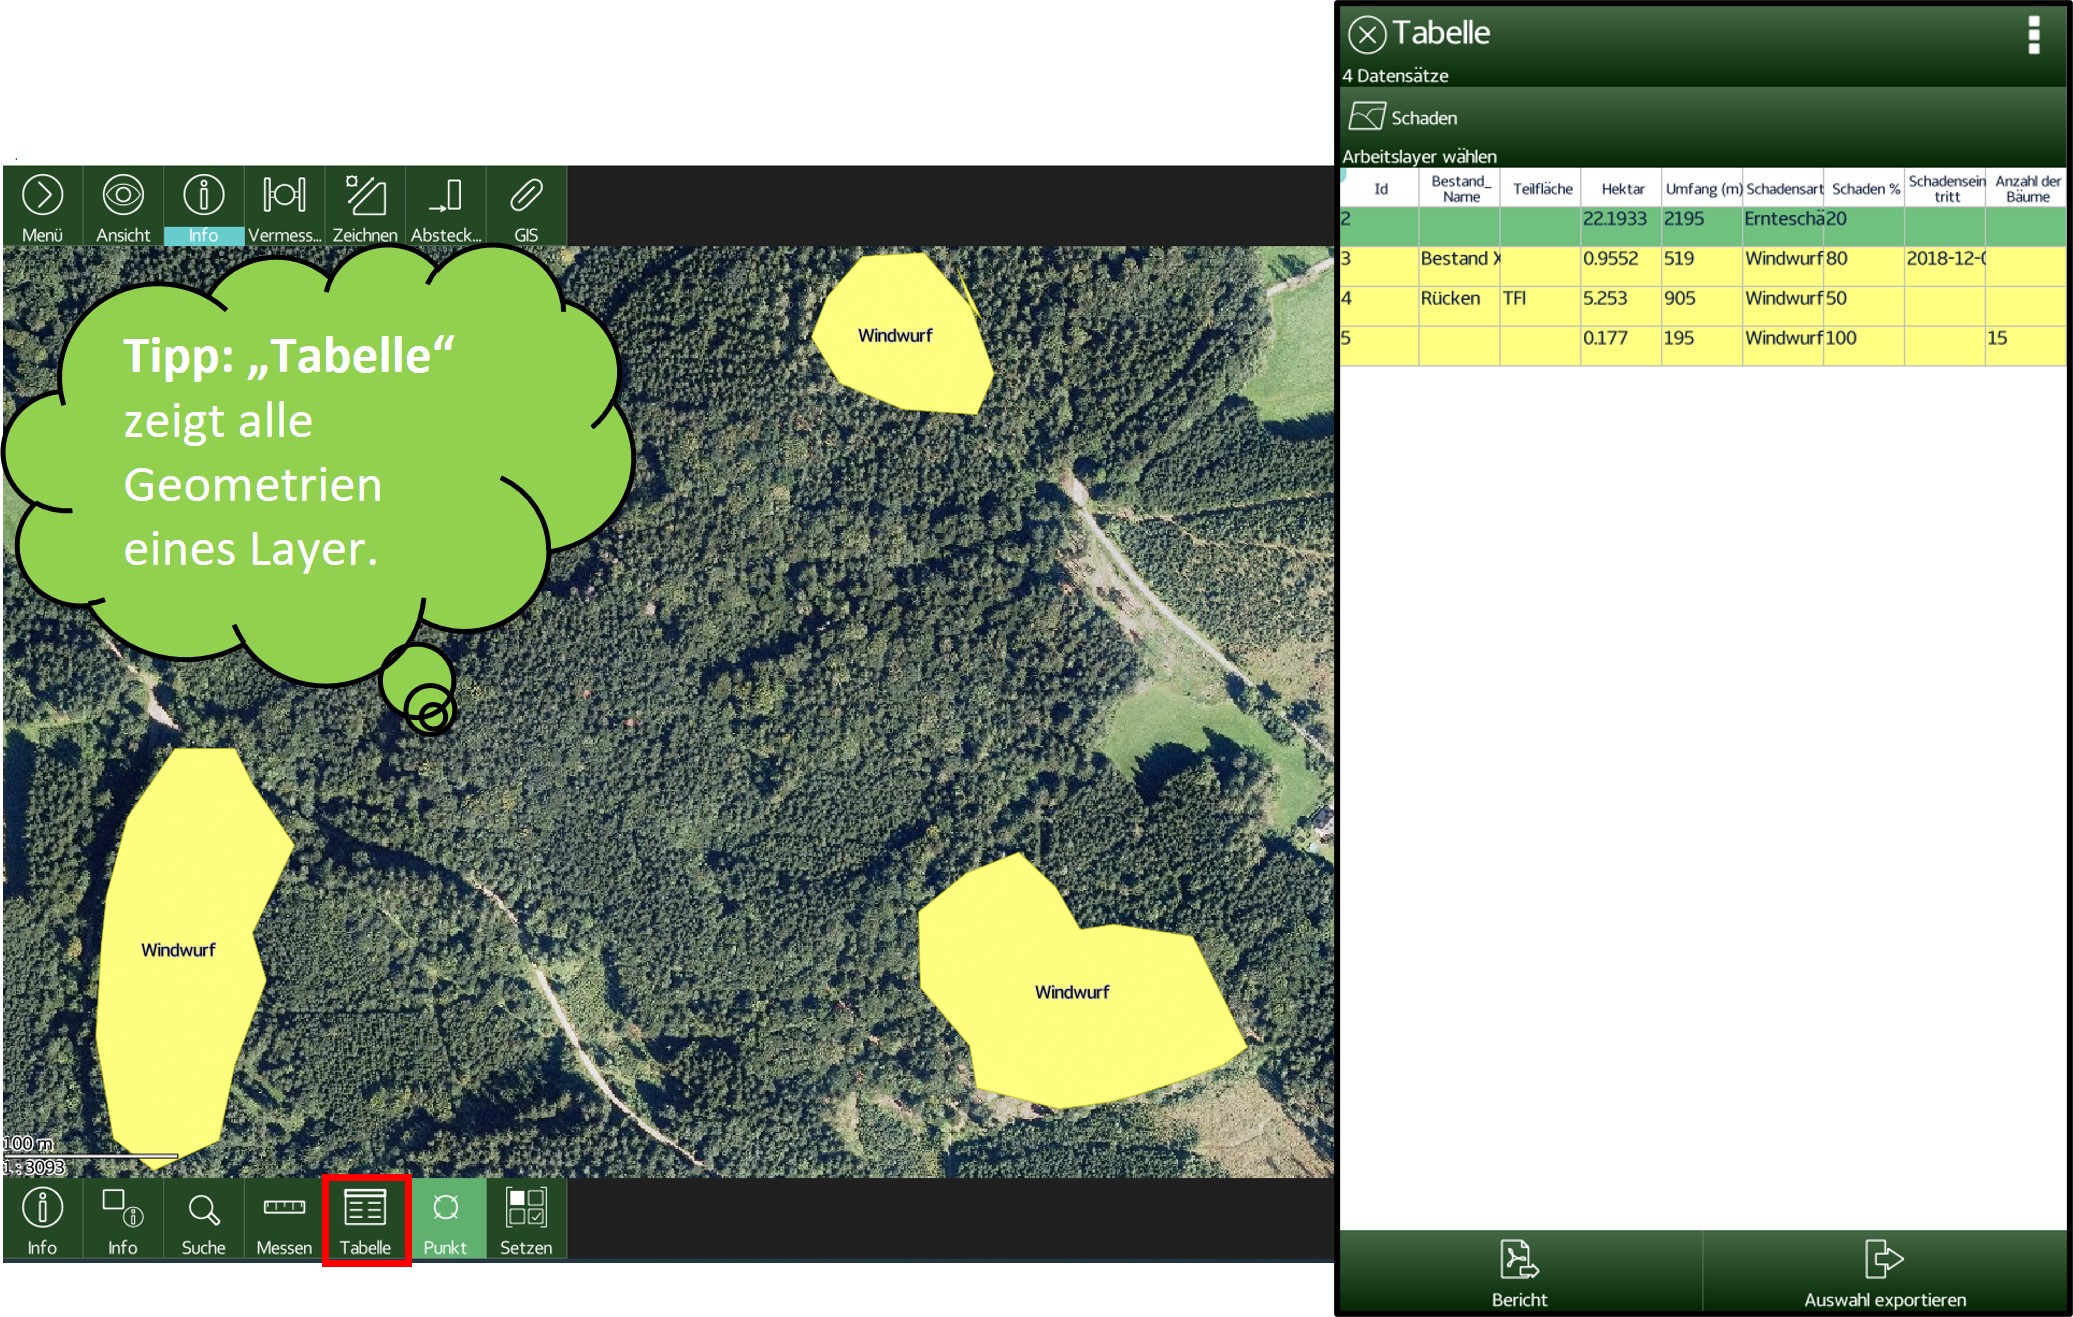
In the "Table" all geometries of a layer are listed

Each geometry in the table can be clicked. The attribute list opens and you can zoom in on the geometry.
Each field name in the table can be clicked in order to be able to sort and collect statistical values in the attribute list within the field name column.
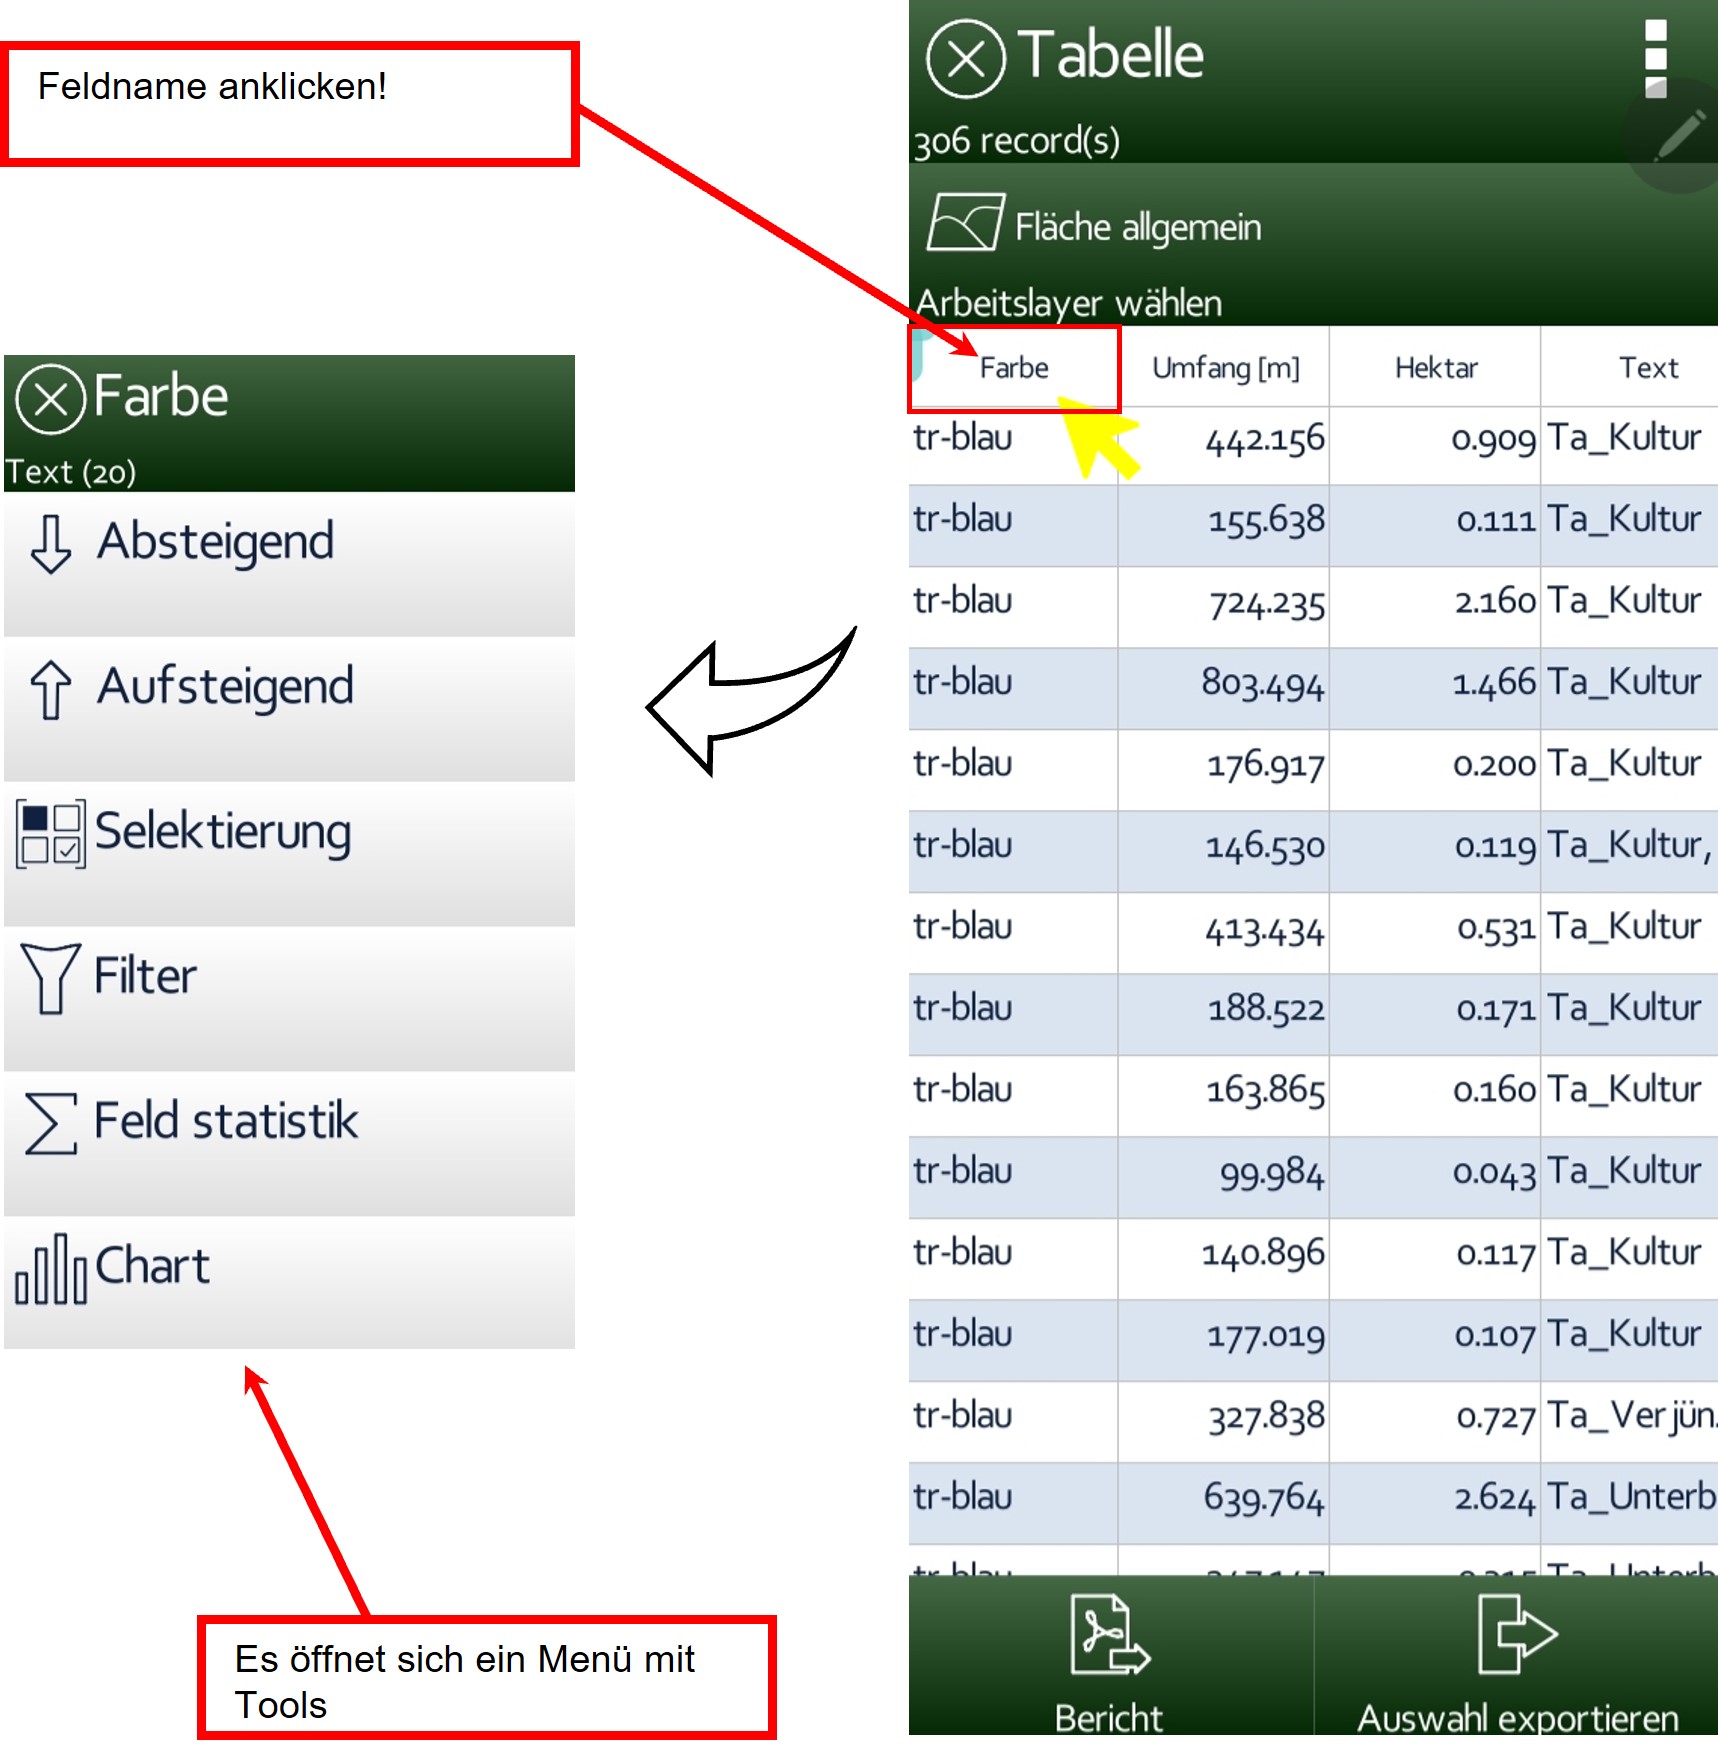
With the "Descending" tool, the geometries within the working layer are sorted numerically descending or alphabetically from A to Z. The example below shows the alphabetical sorting of the geometries in the "Color" work layer.

The geometries within the working layer are sorted numerically ascending or alphabetically from Z to A with the "Ascending" tool. The example below shows the alphabetical sorting of the geometries in the "Color" work layer.

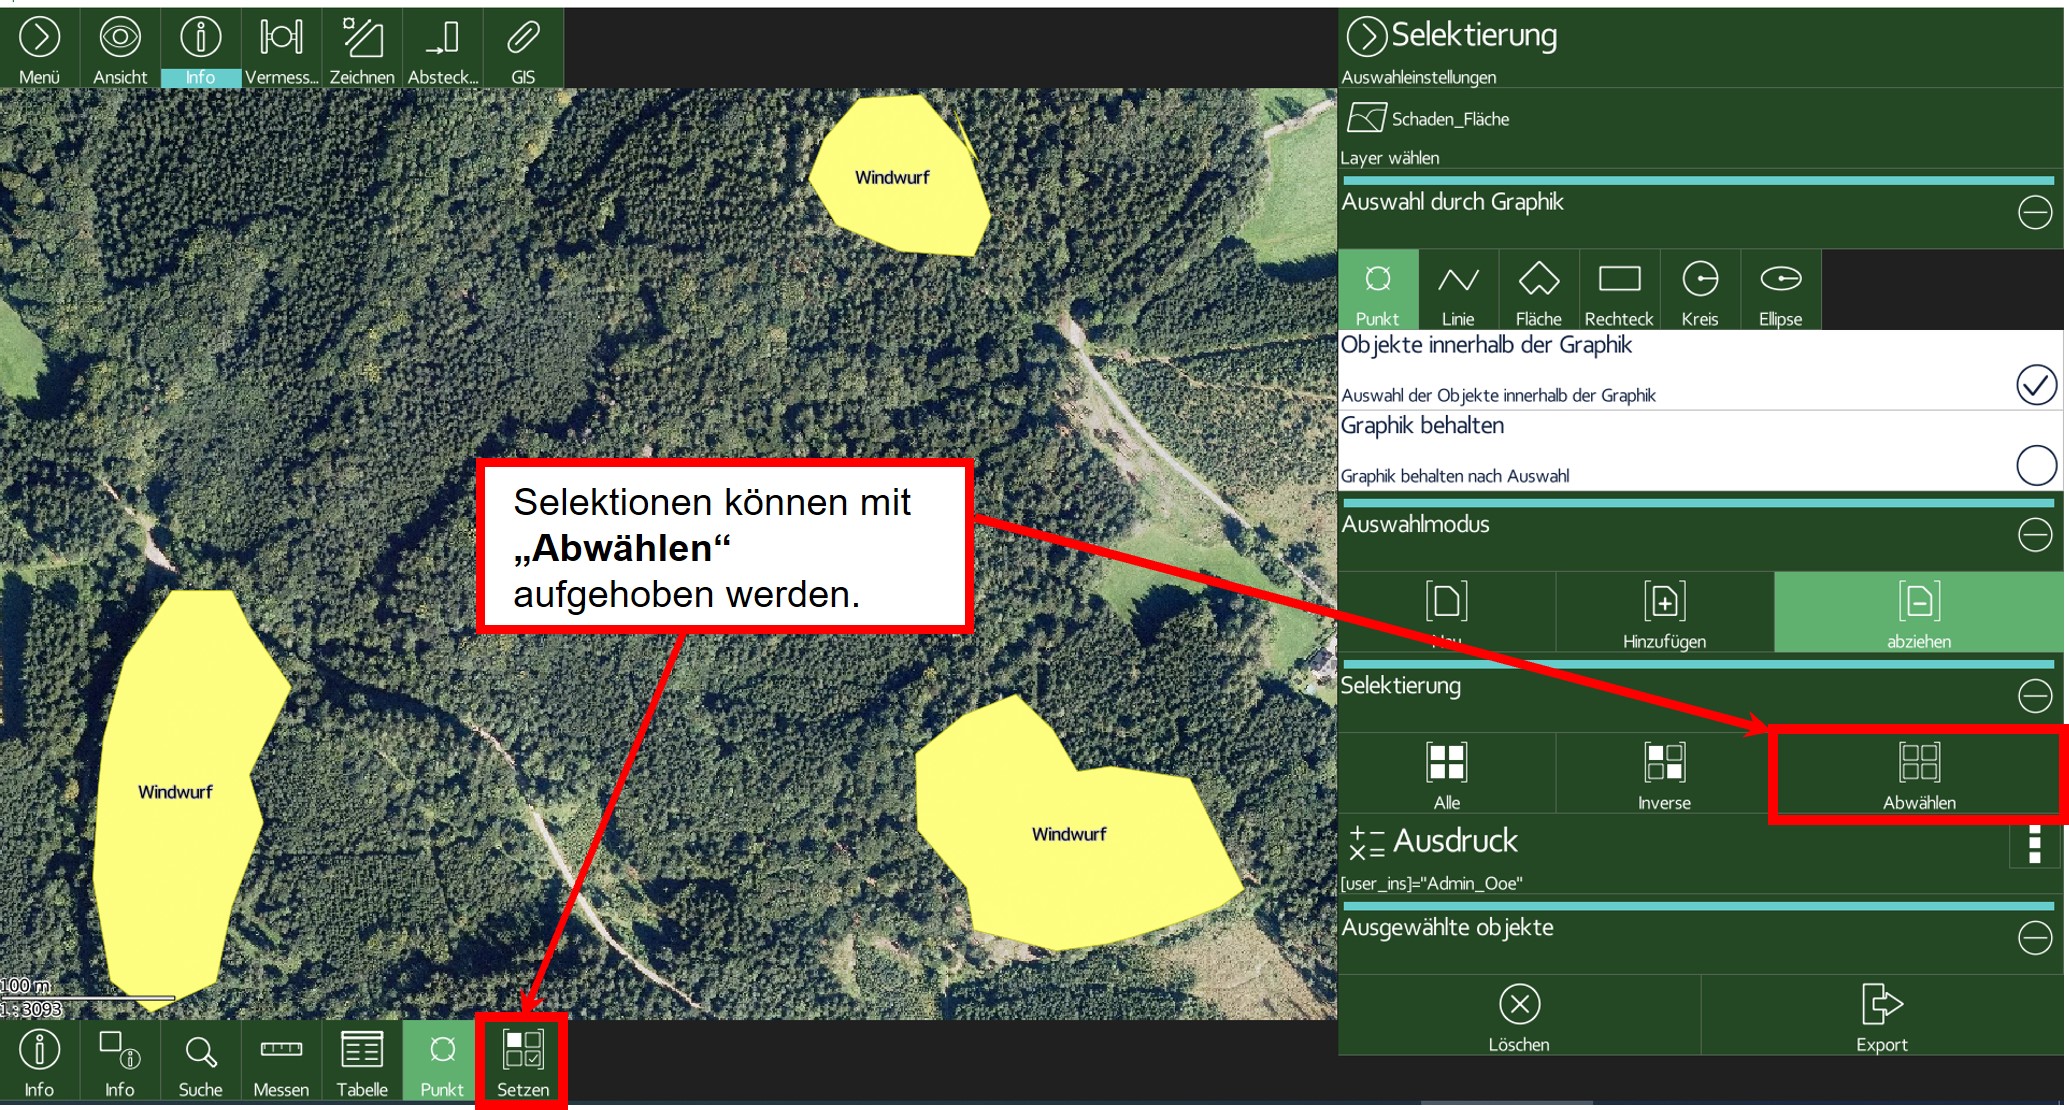
The geometries within the working layer are selected and marked with the "Selection" tool. The example below shows the alphabetical sorting of the geometries in the "Reserve facility" work layer.

The "Filter" tool is used to filter the geometries within the working layer. This means only the selected geometries are displayed. The example below shows the filtering of the geometries in the "Reservation facility" work layer.

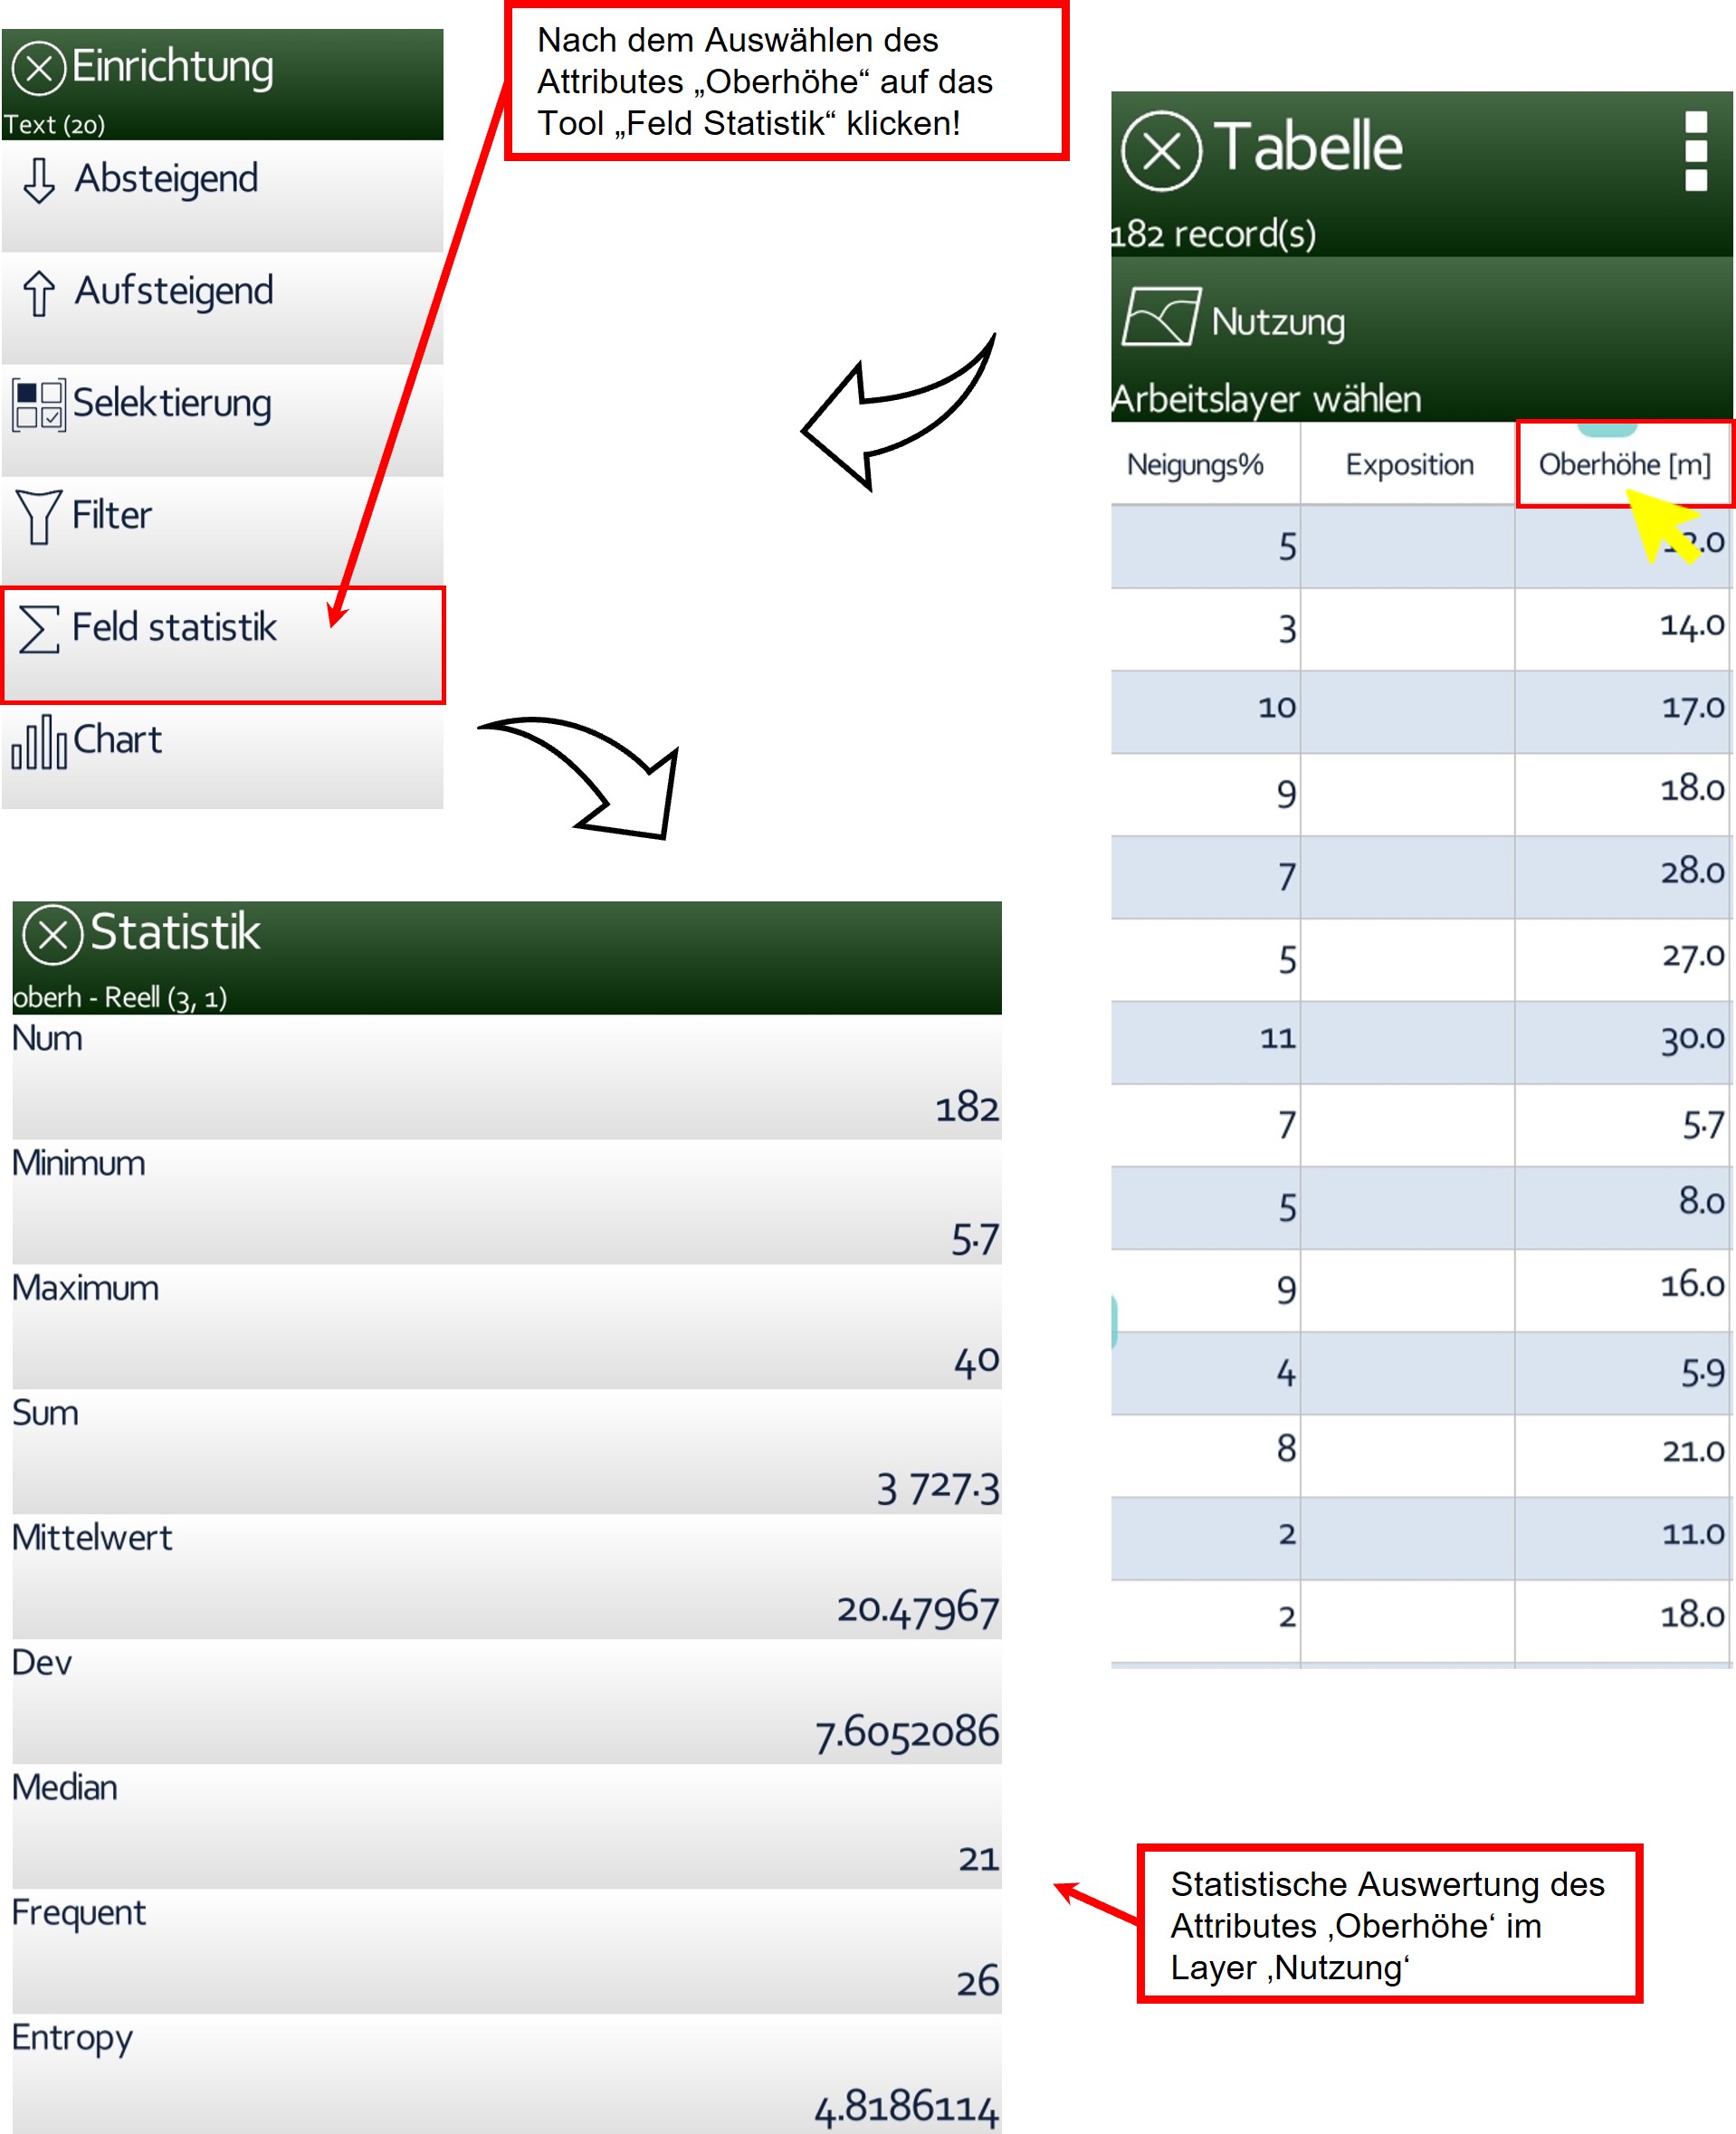
Analyze a layer using Statistics Field: The example below shows the statistics for the Utilizations layer.
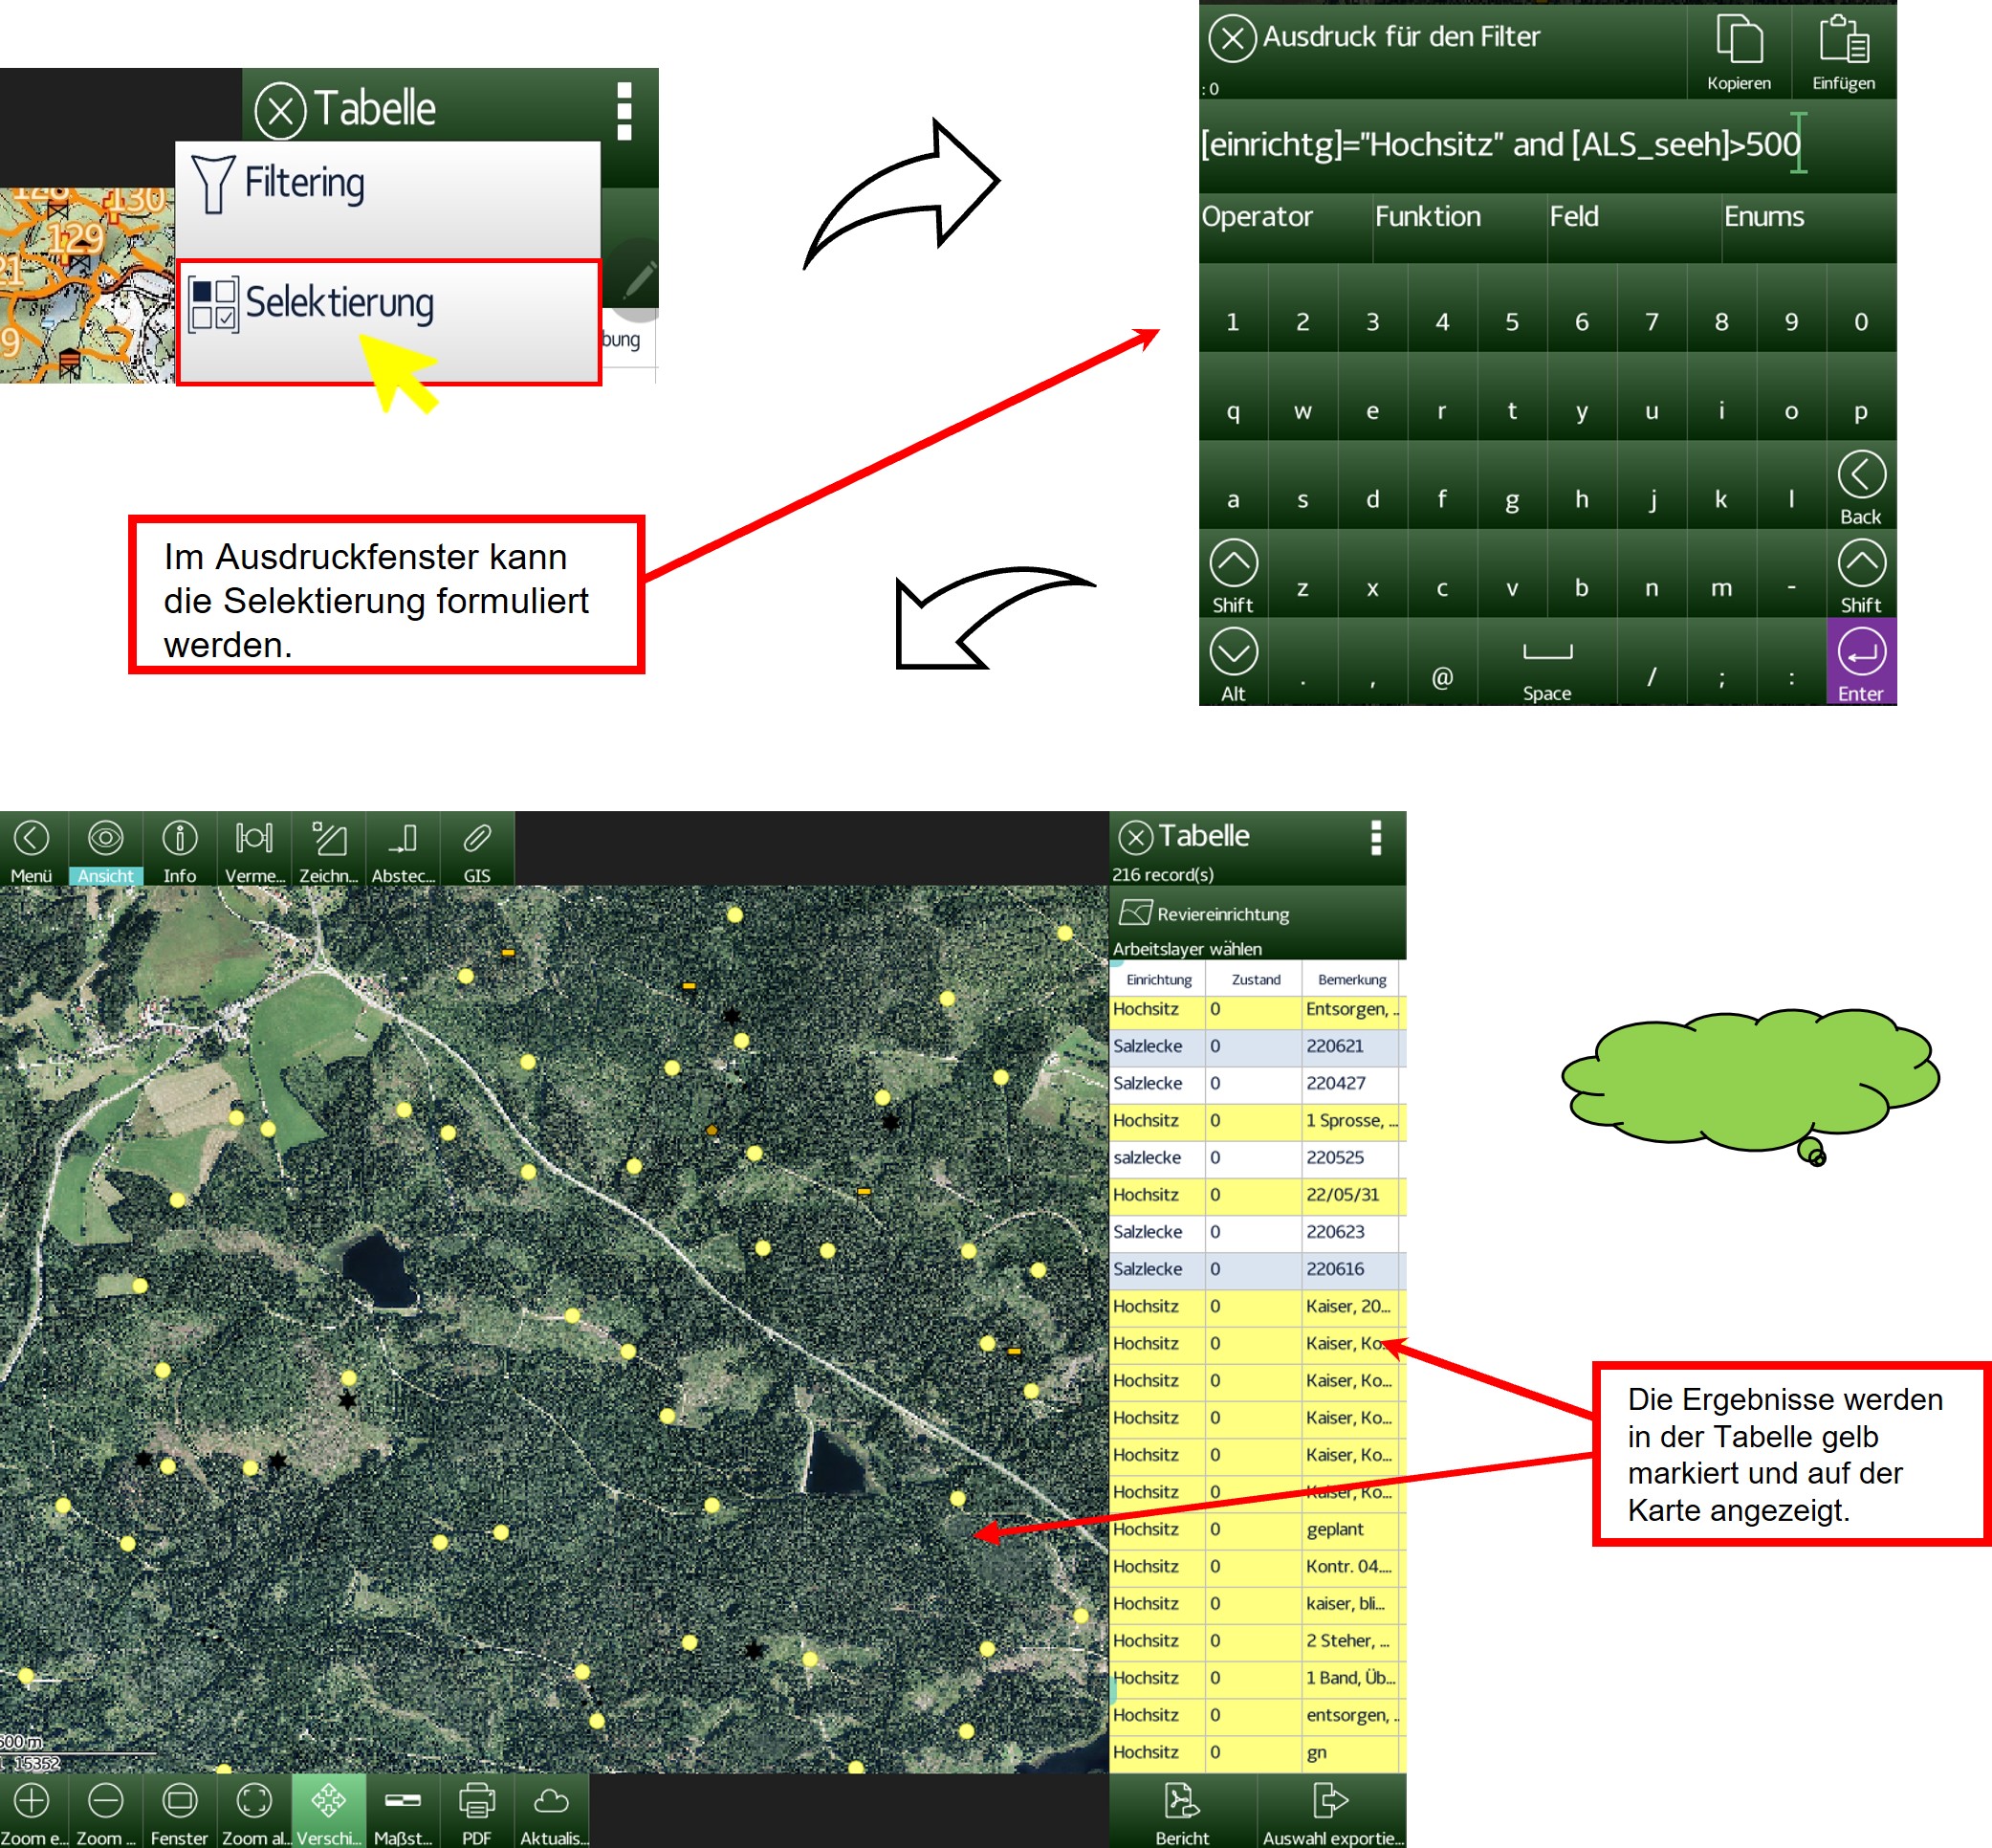
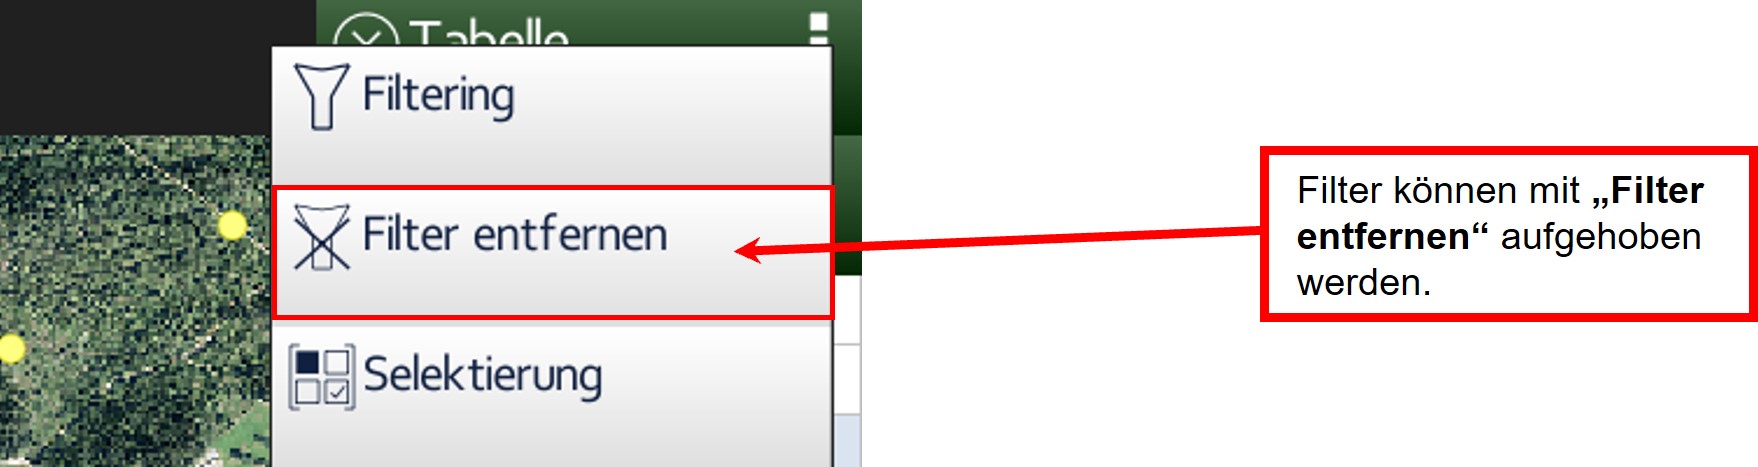
Execute further commands within a layer with the "three-point menu": After clicking, a menu appears with the options "Filter" and "Selection". Queries about several attributes can be made here. e.g. Show me all salt licks created in 2022

Filter geometries of a layer using the Filter tool: The results are shown in the table and on the map. Example: a filter is used here for the polygon facilities layer:

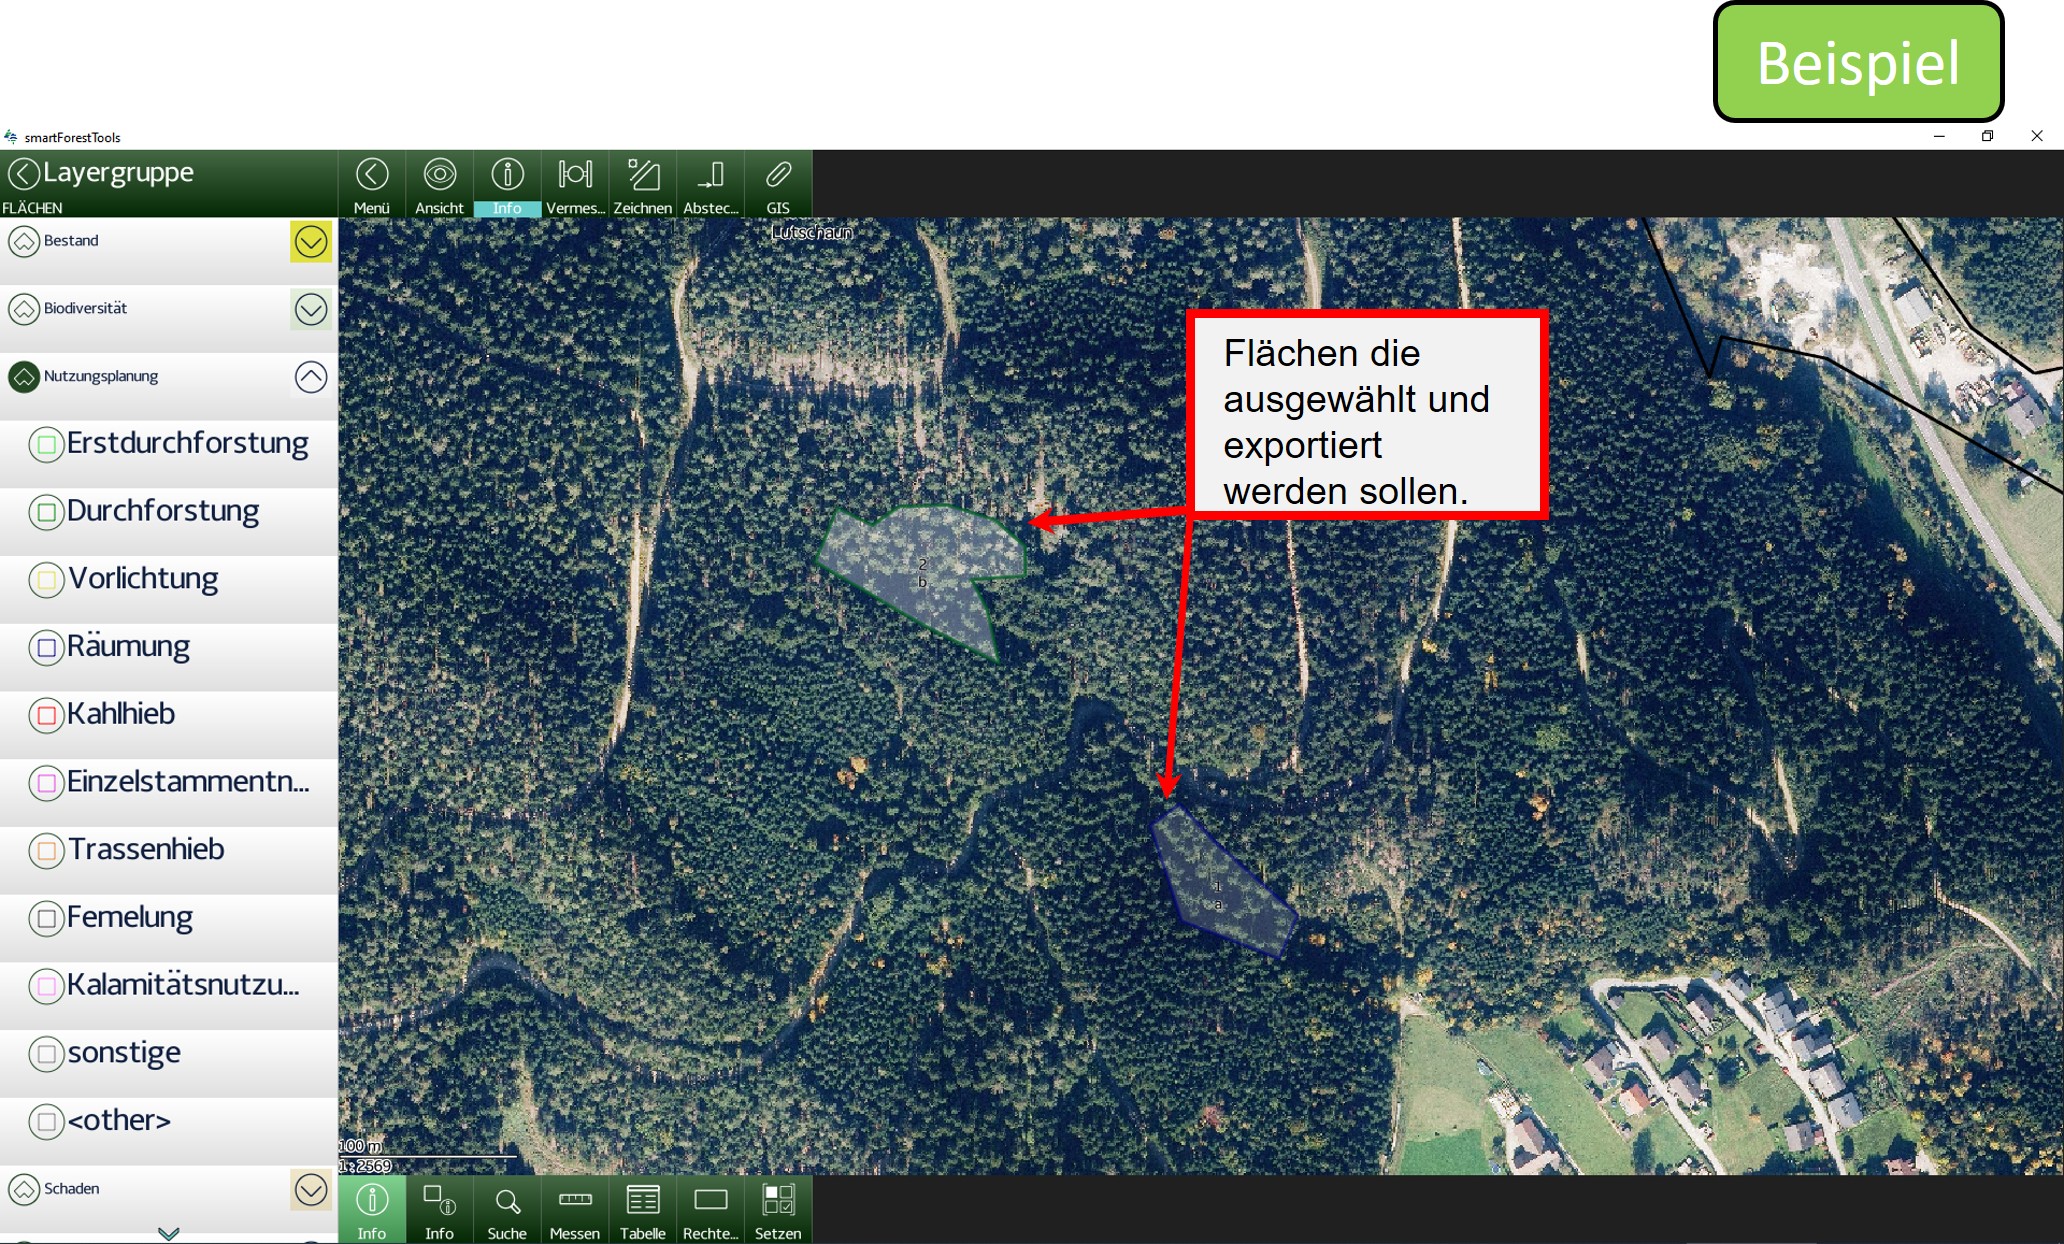
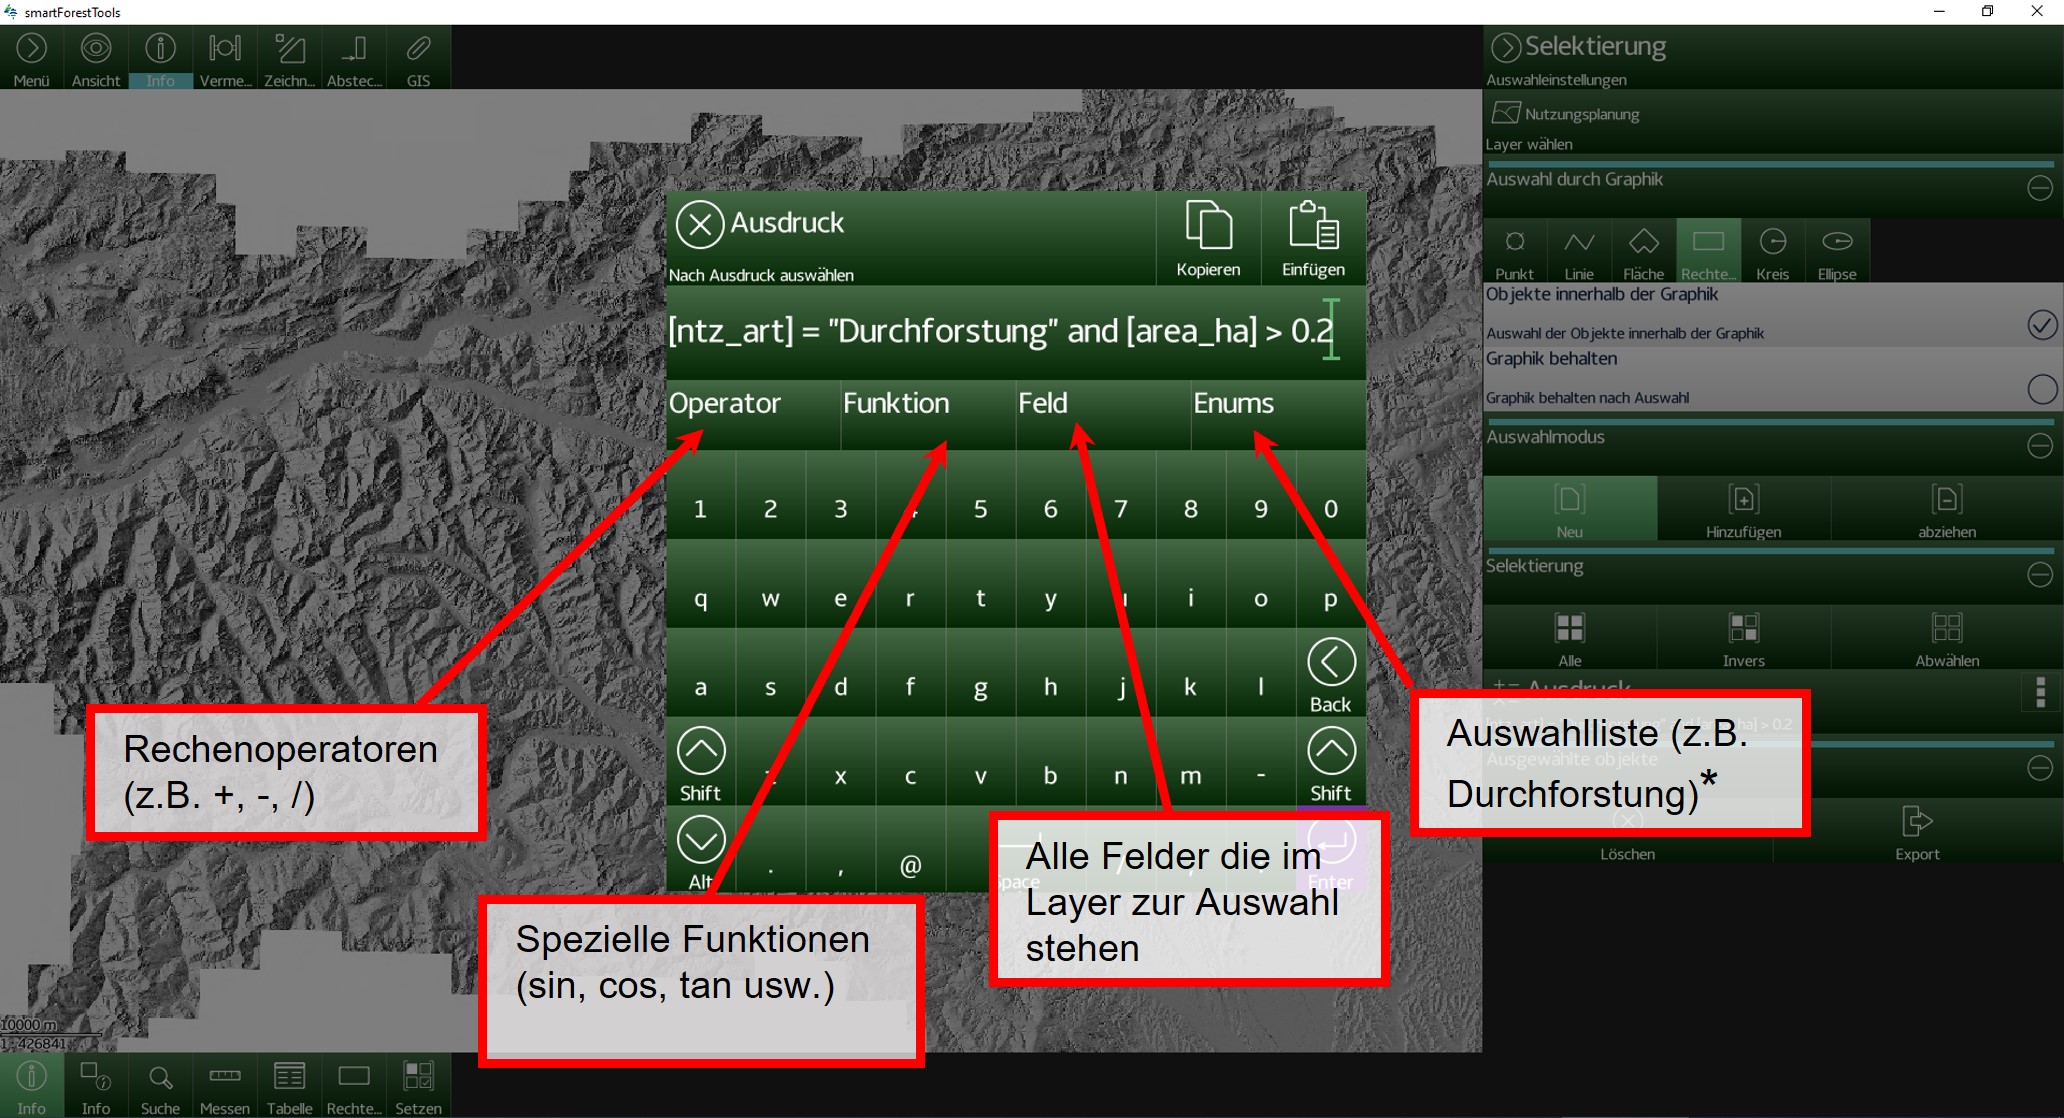
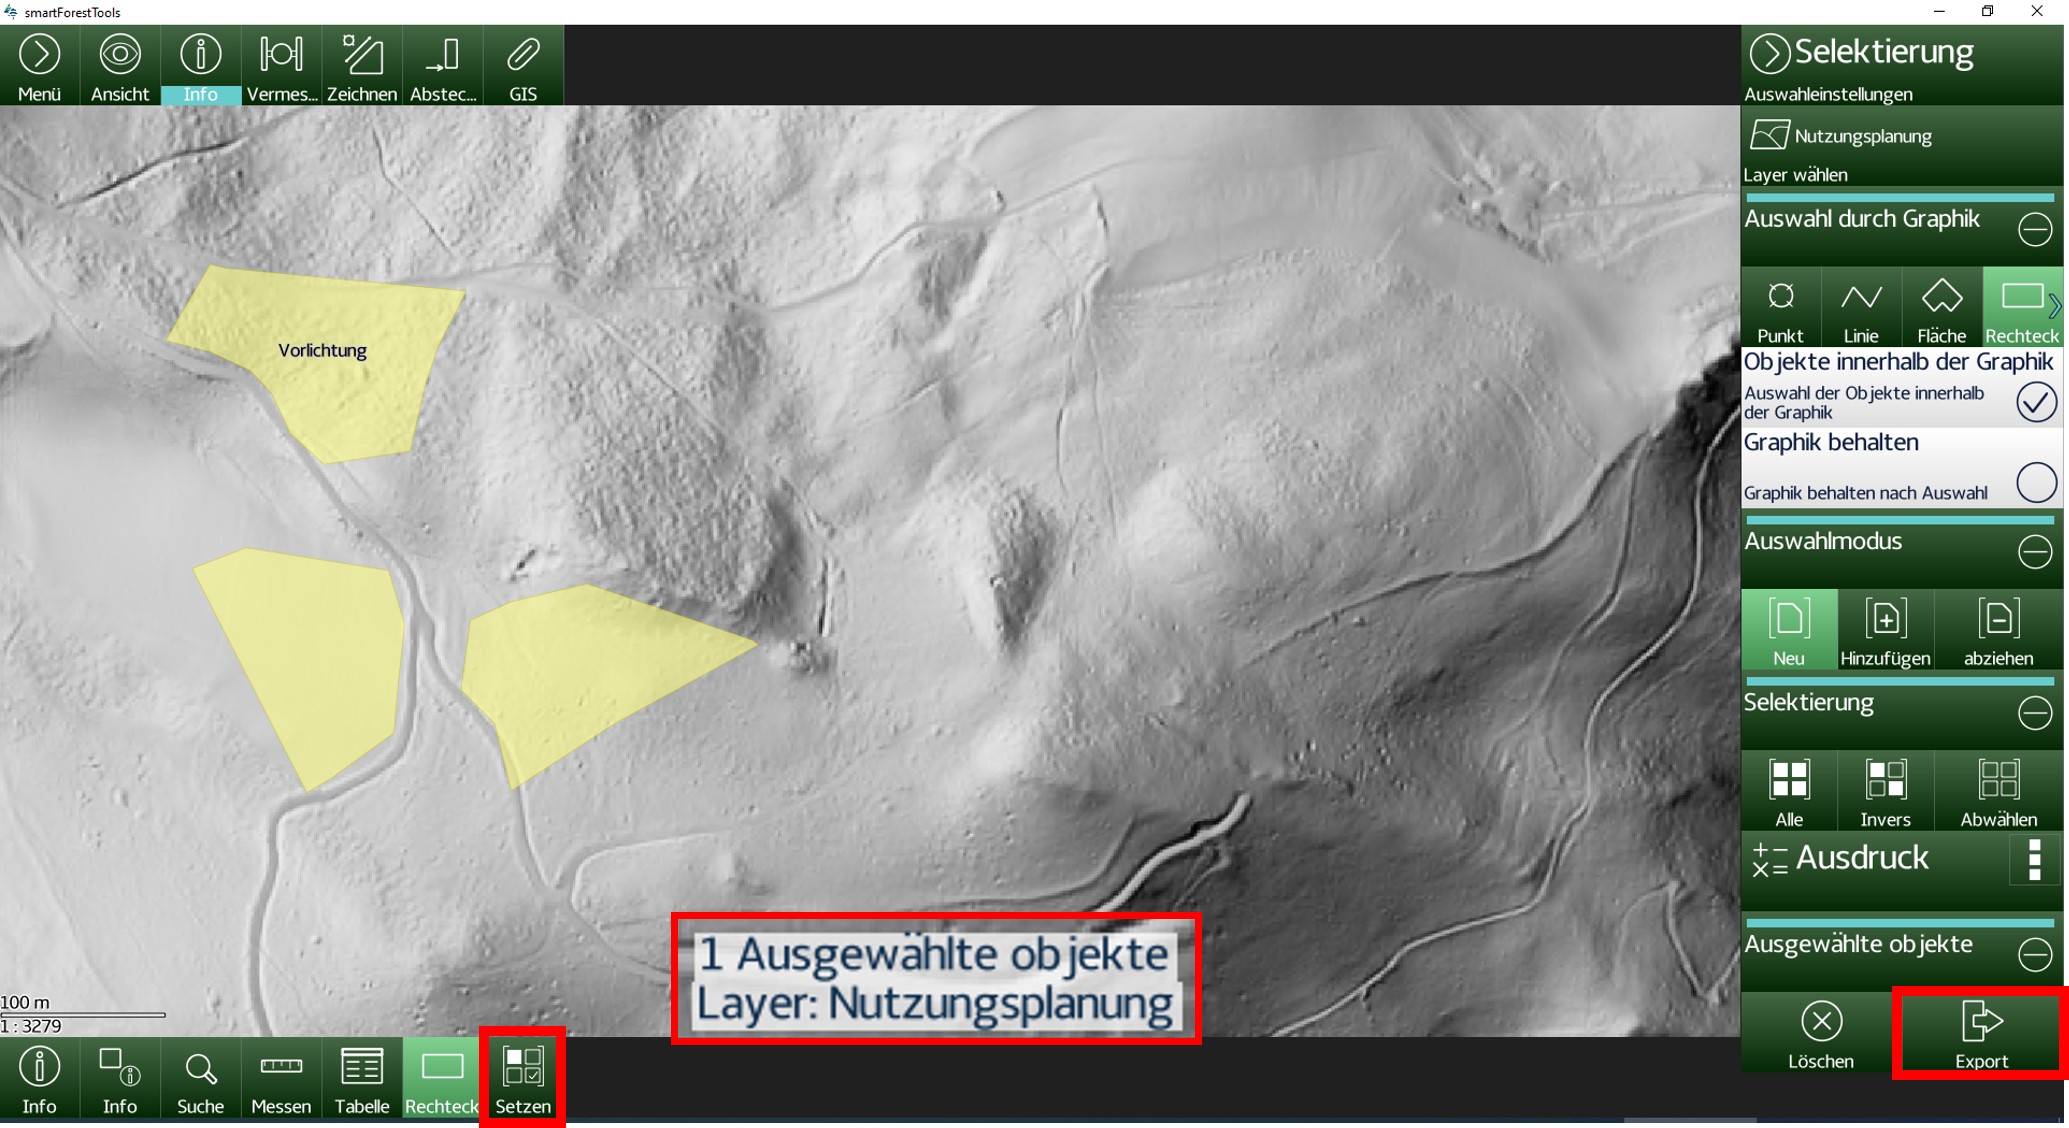
With the "Selection" tool, geometries can be filtered within the. The results are shown in the table and on the map. For example, a selection is used here for the polygon facilities layer:
Filters and selections in the three-dot menu can be removed with a simple click:


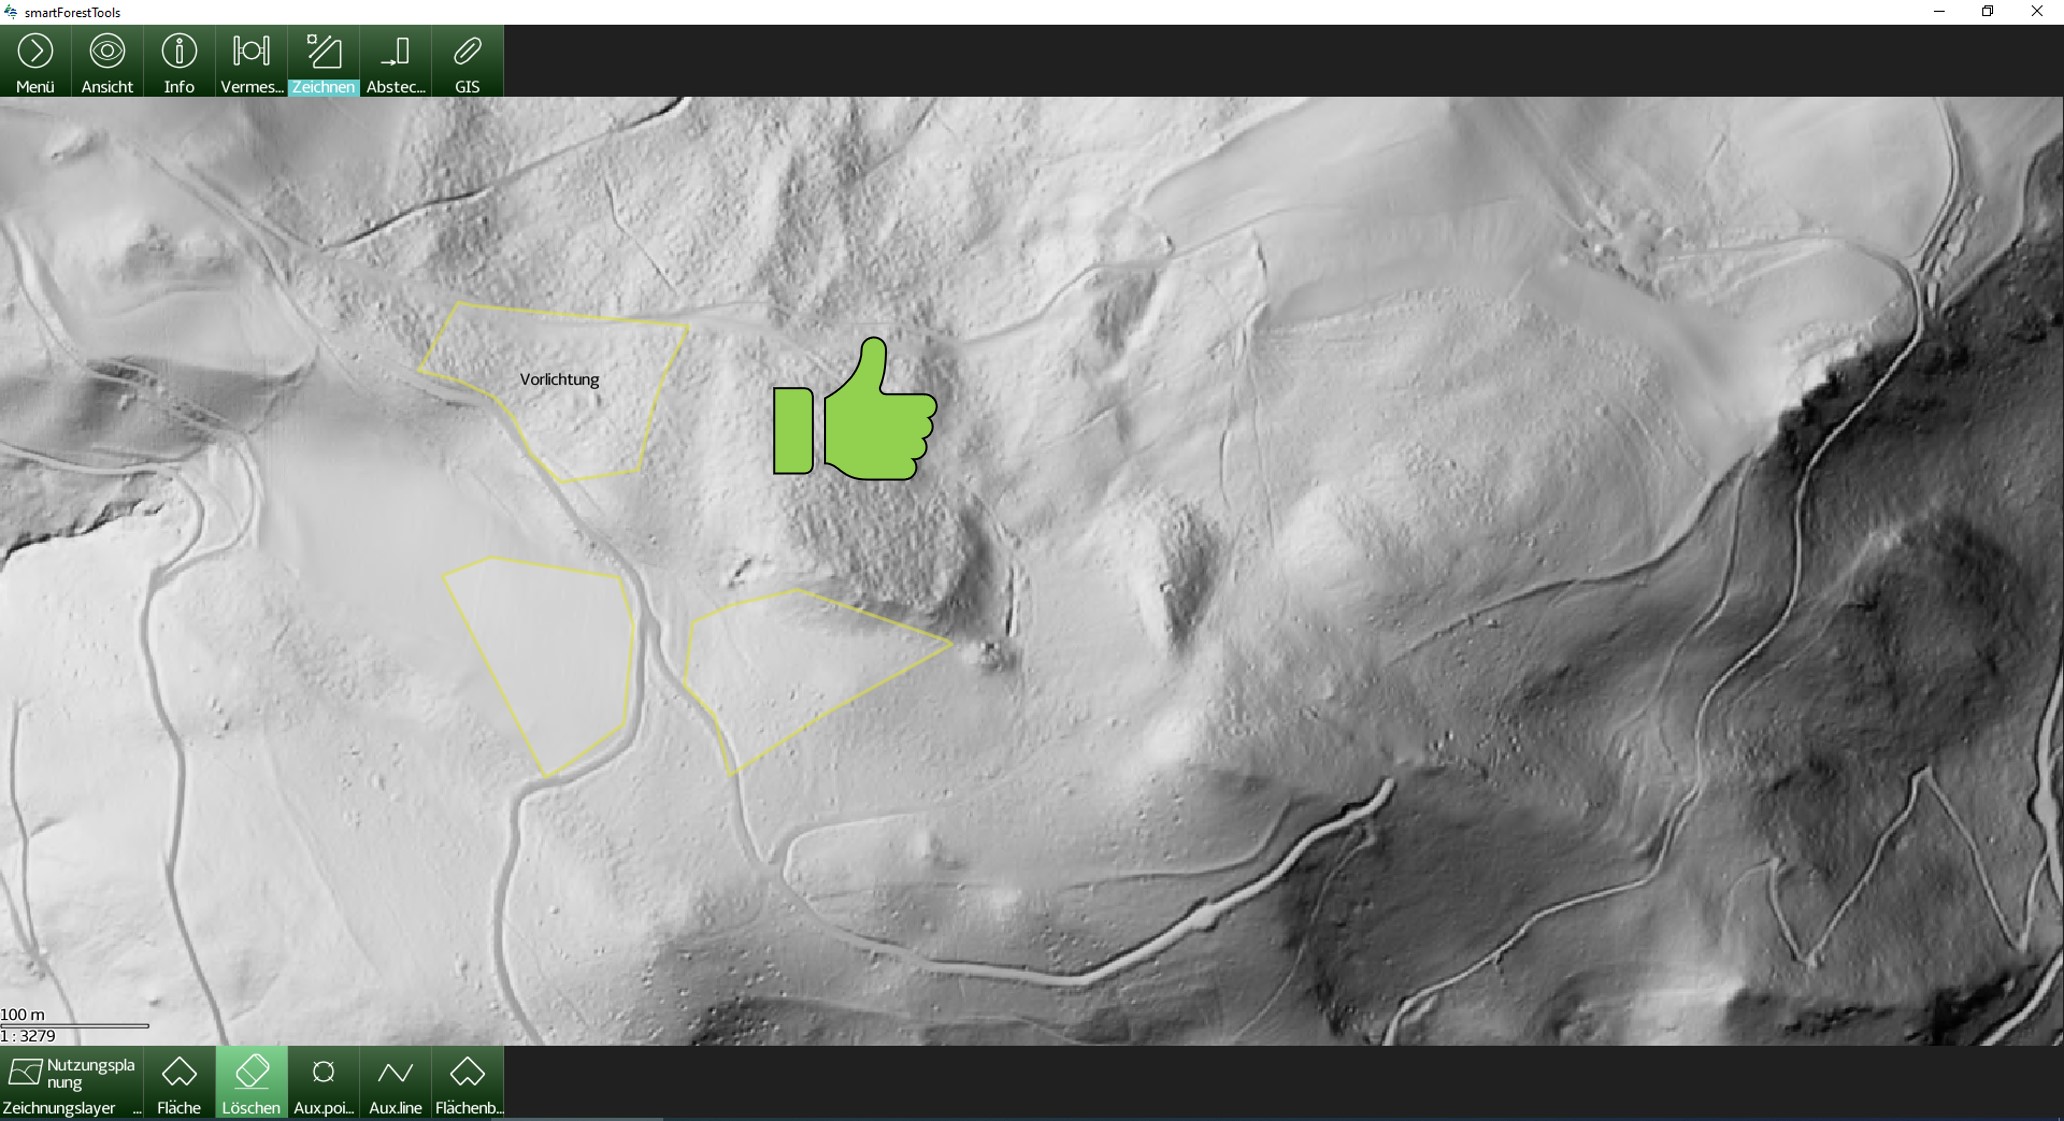
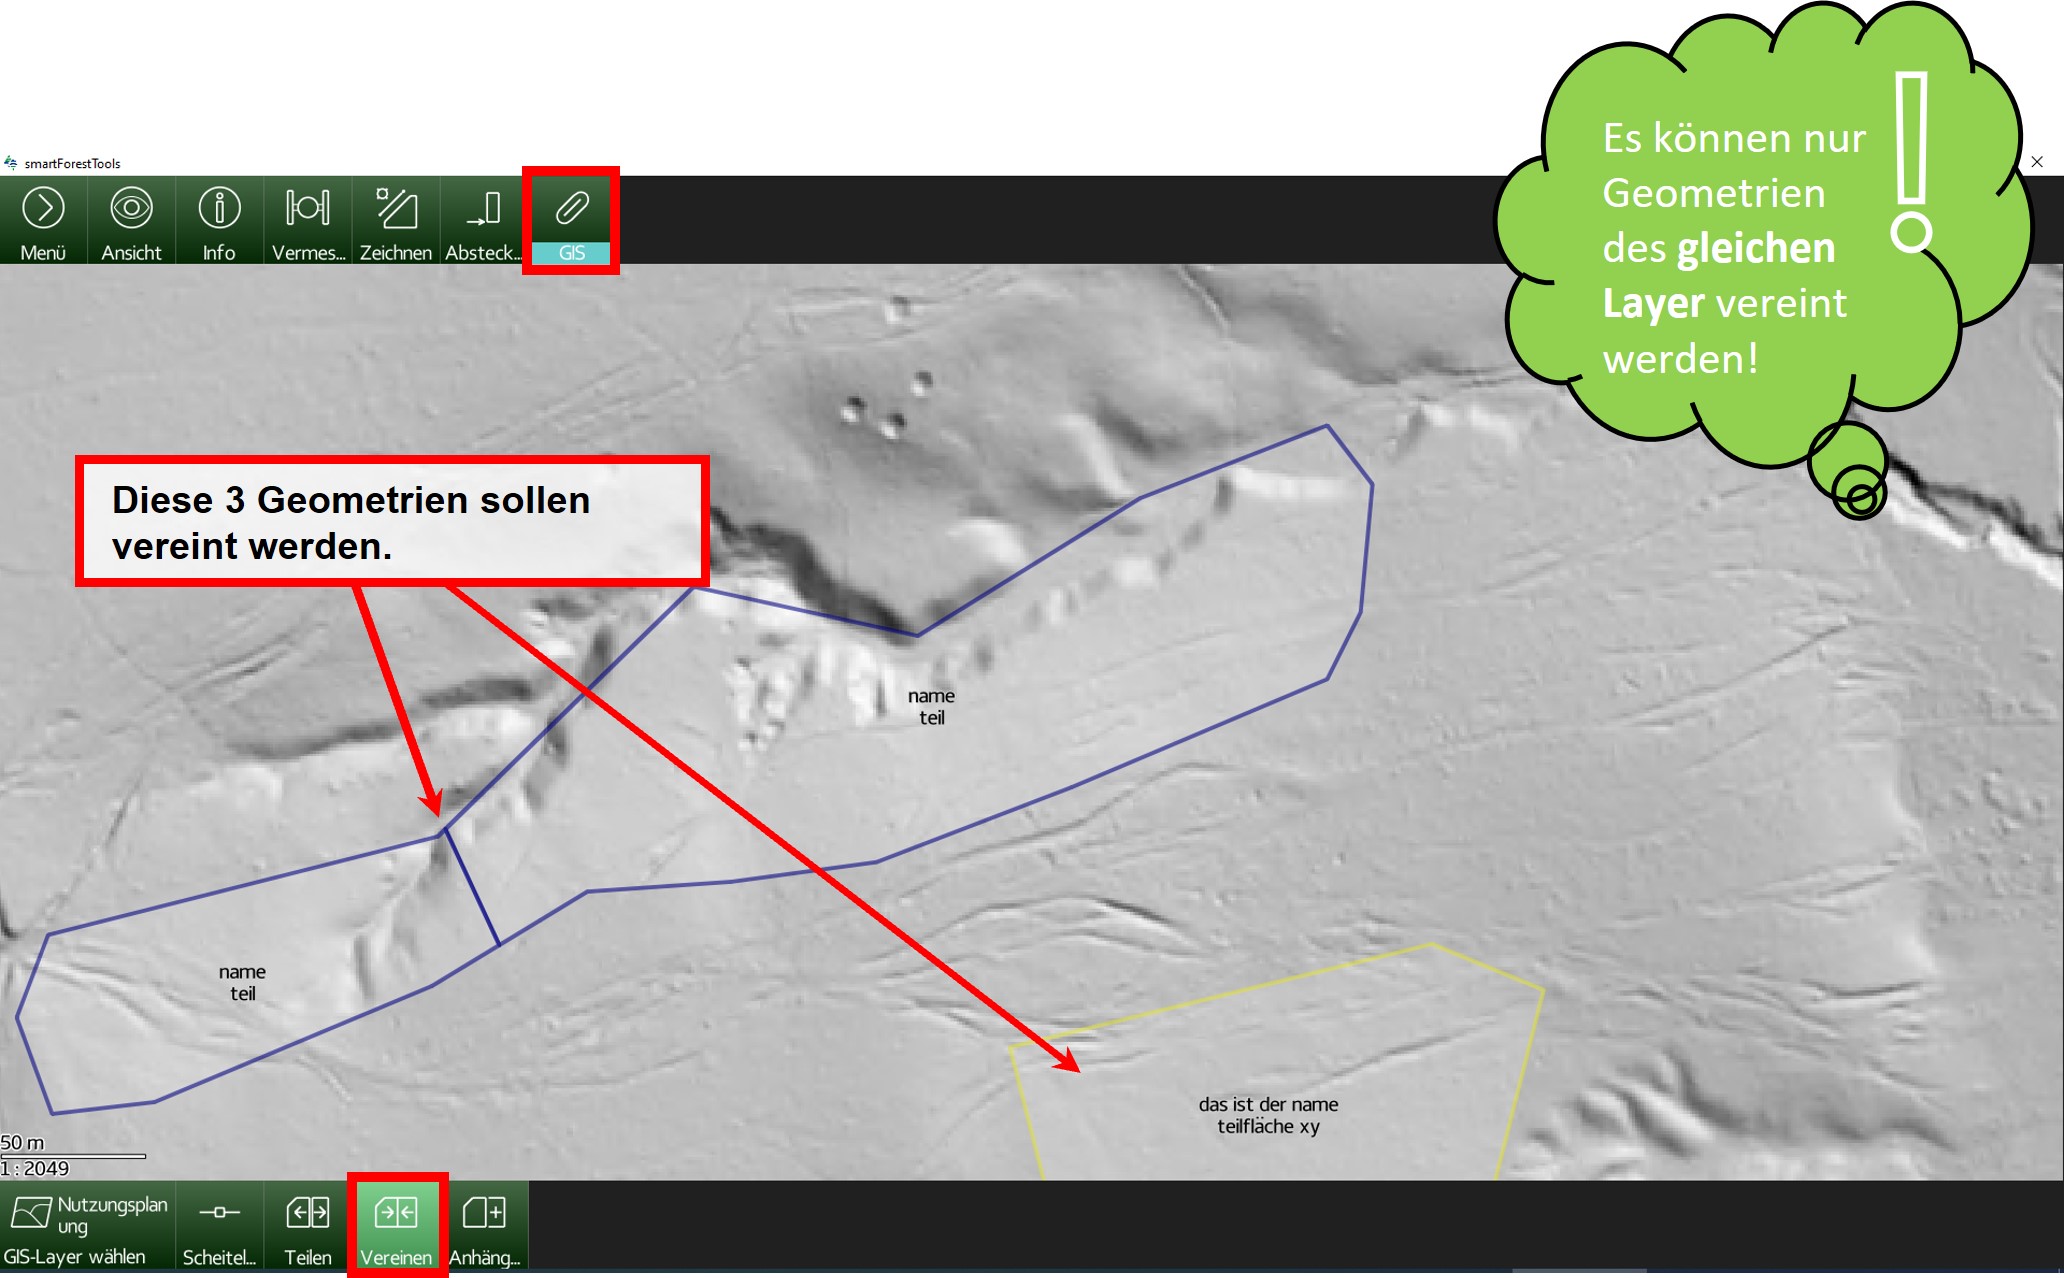
The "Draw" group is primarily used for creating and deleting geometries. Surface geometries can also be merged and "repurposed" (see "Spaghetti-Click").


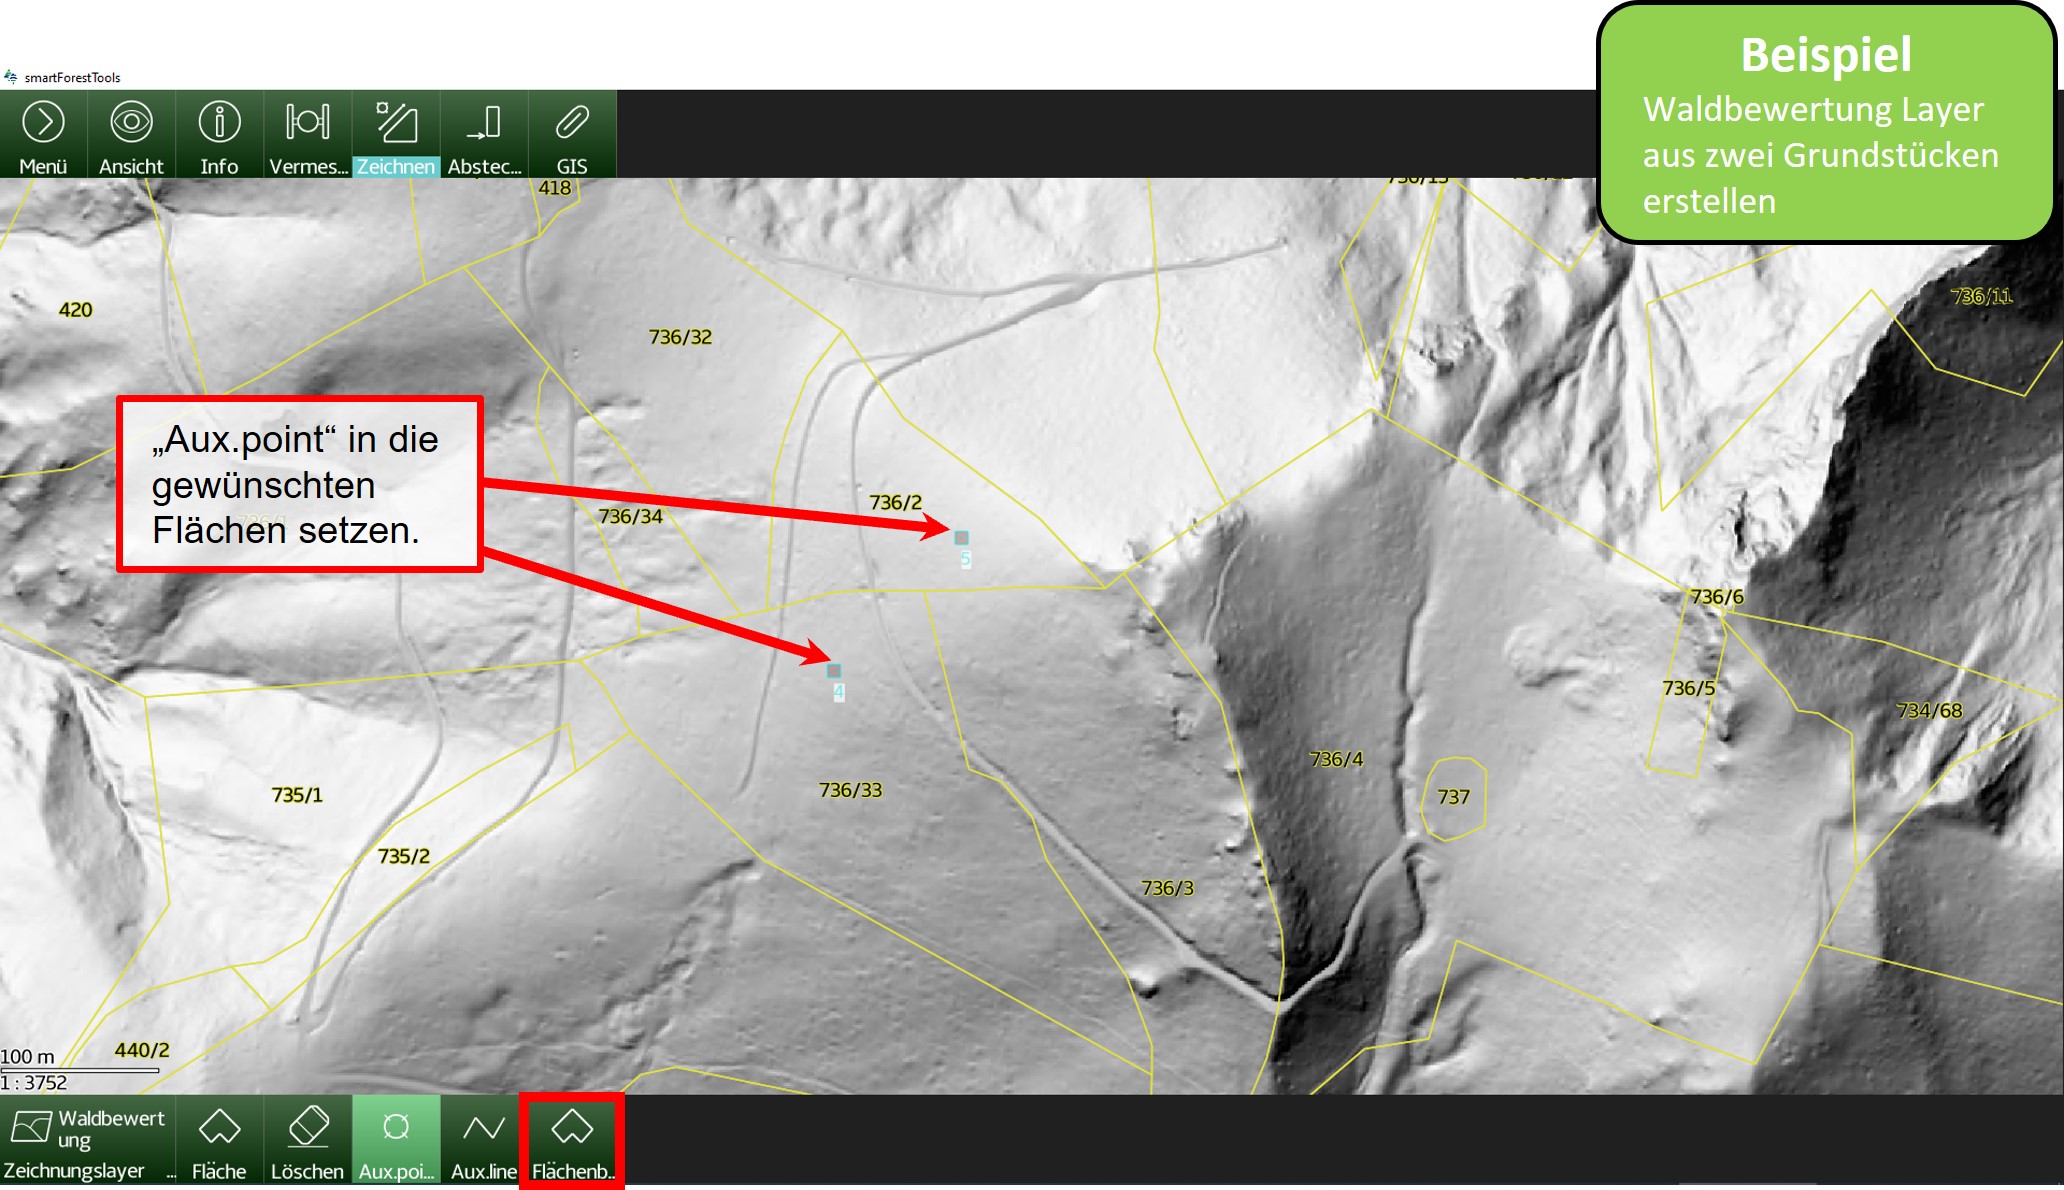

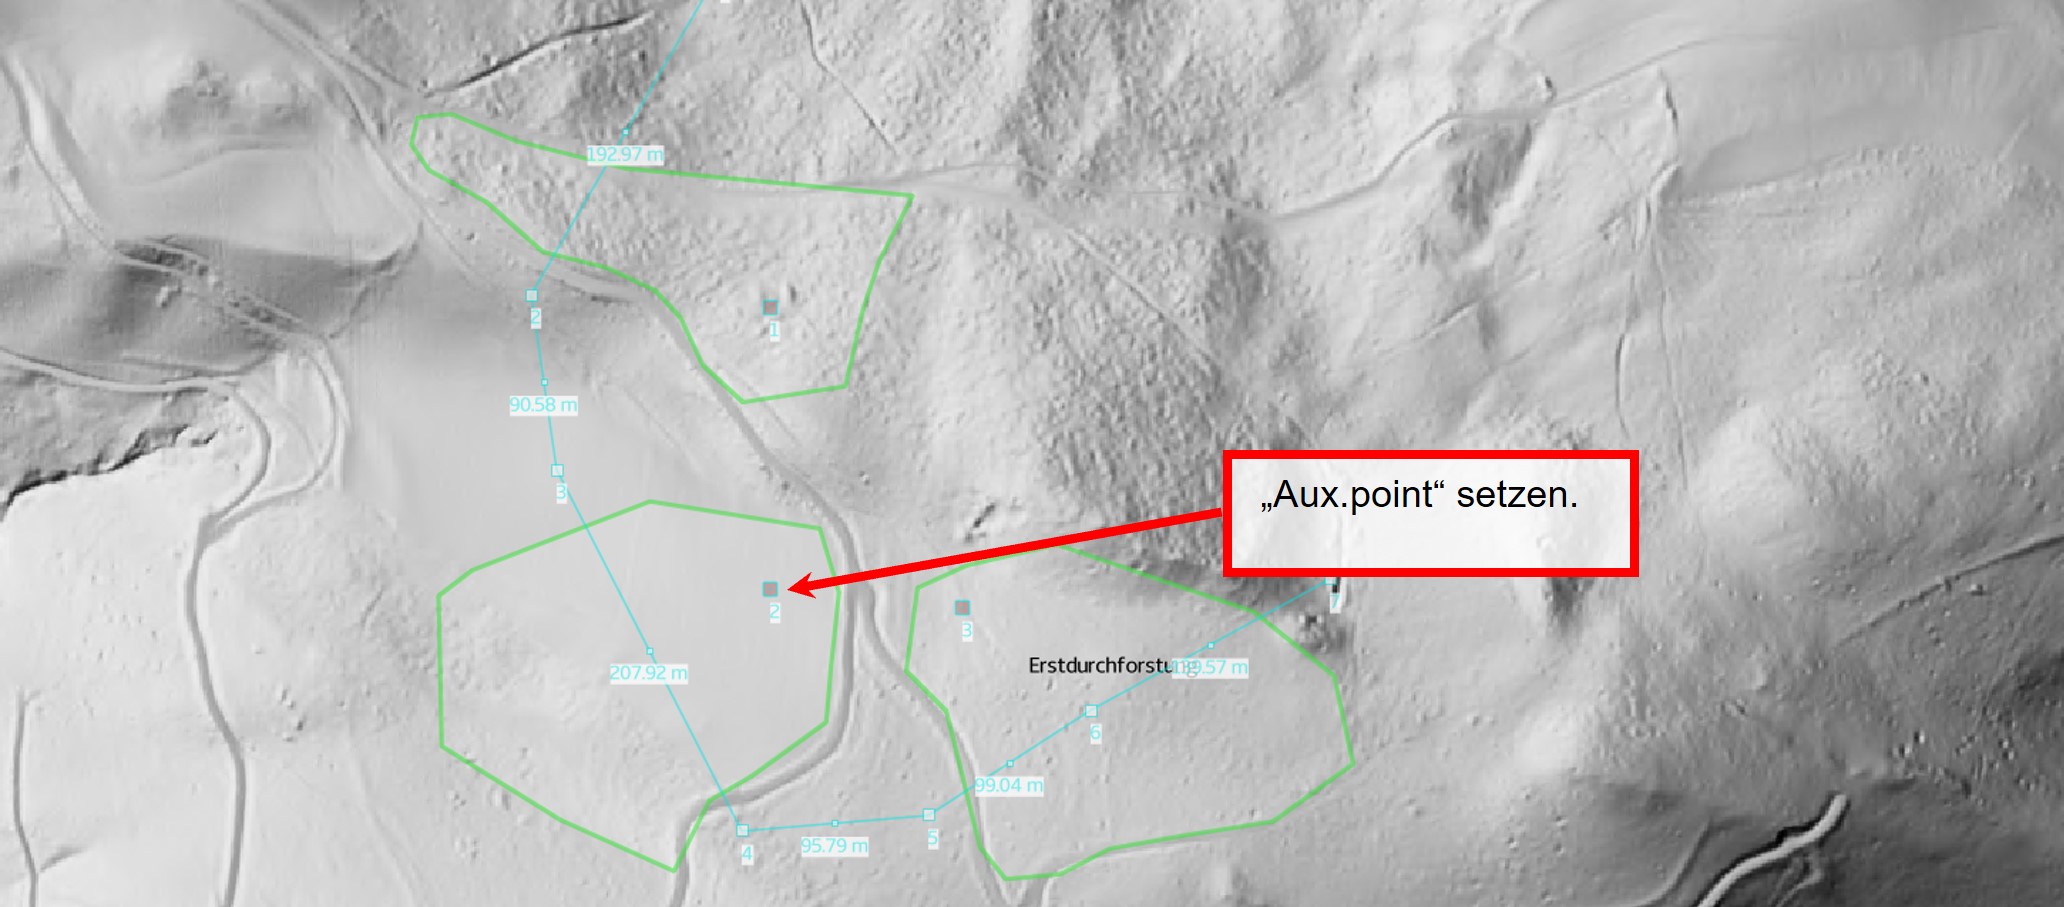
When creating new geometries with the "spaghetti-click", it is possible to divide surfaces manually with the auxiliary line ("Aux.line").


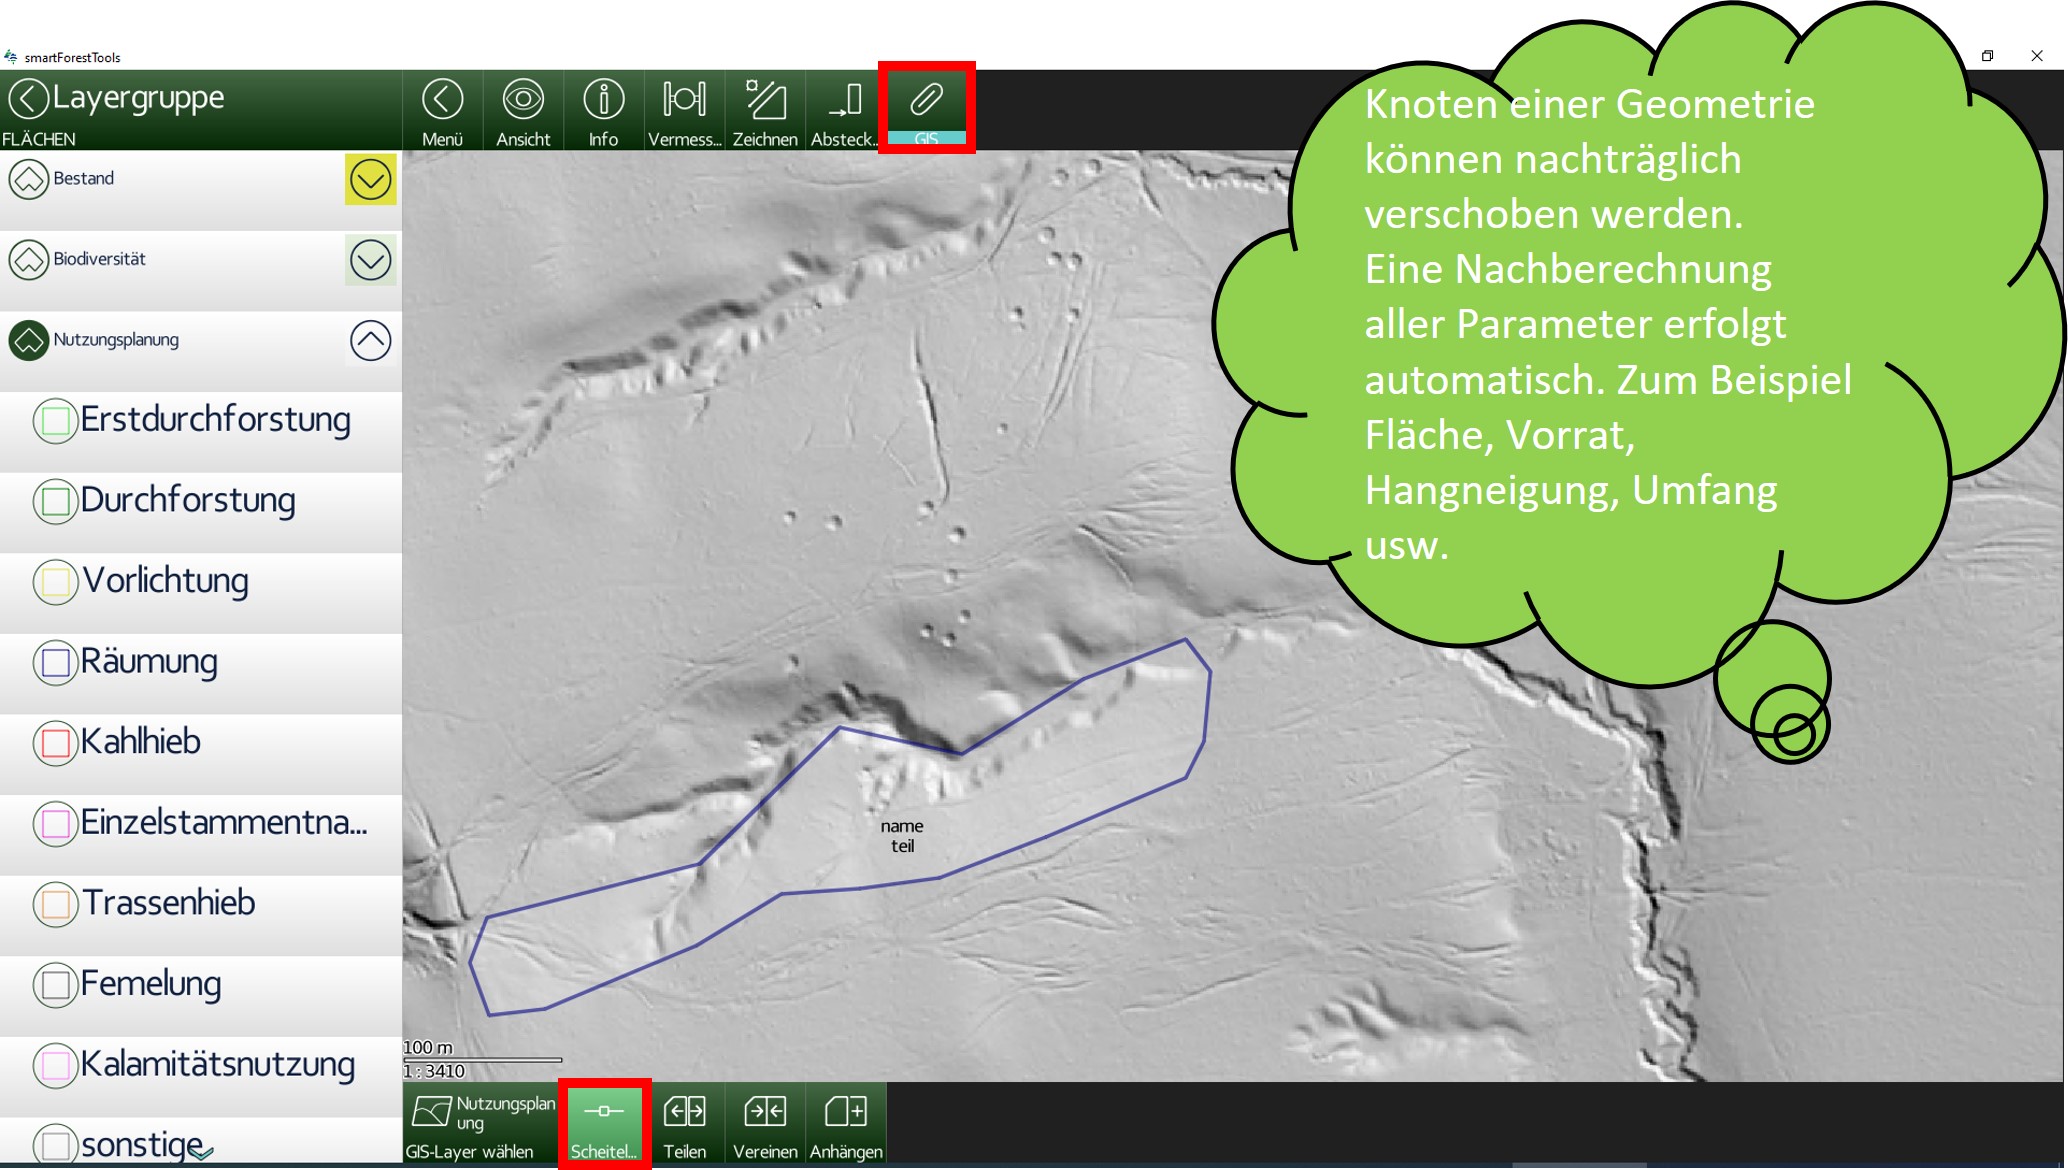


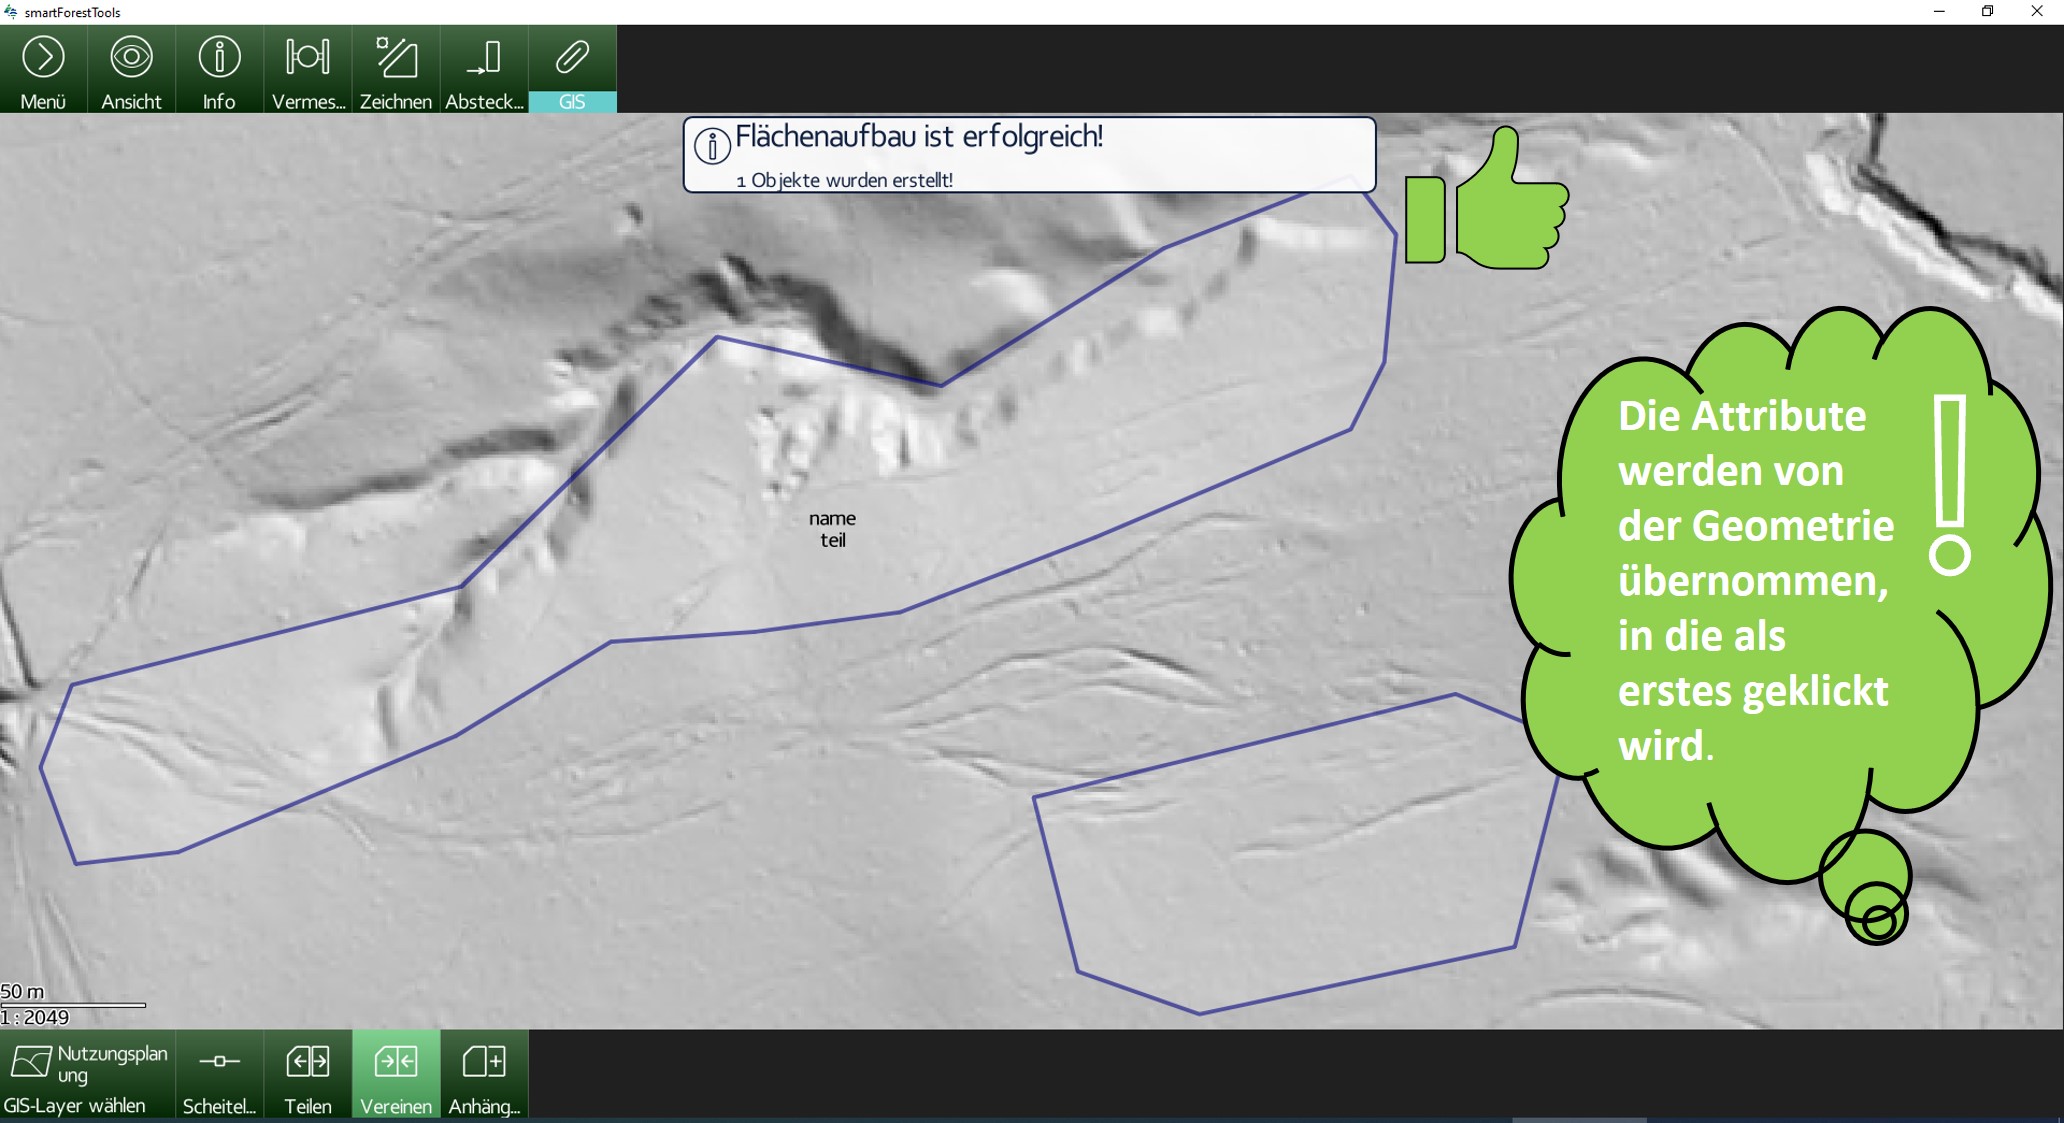
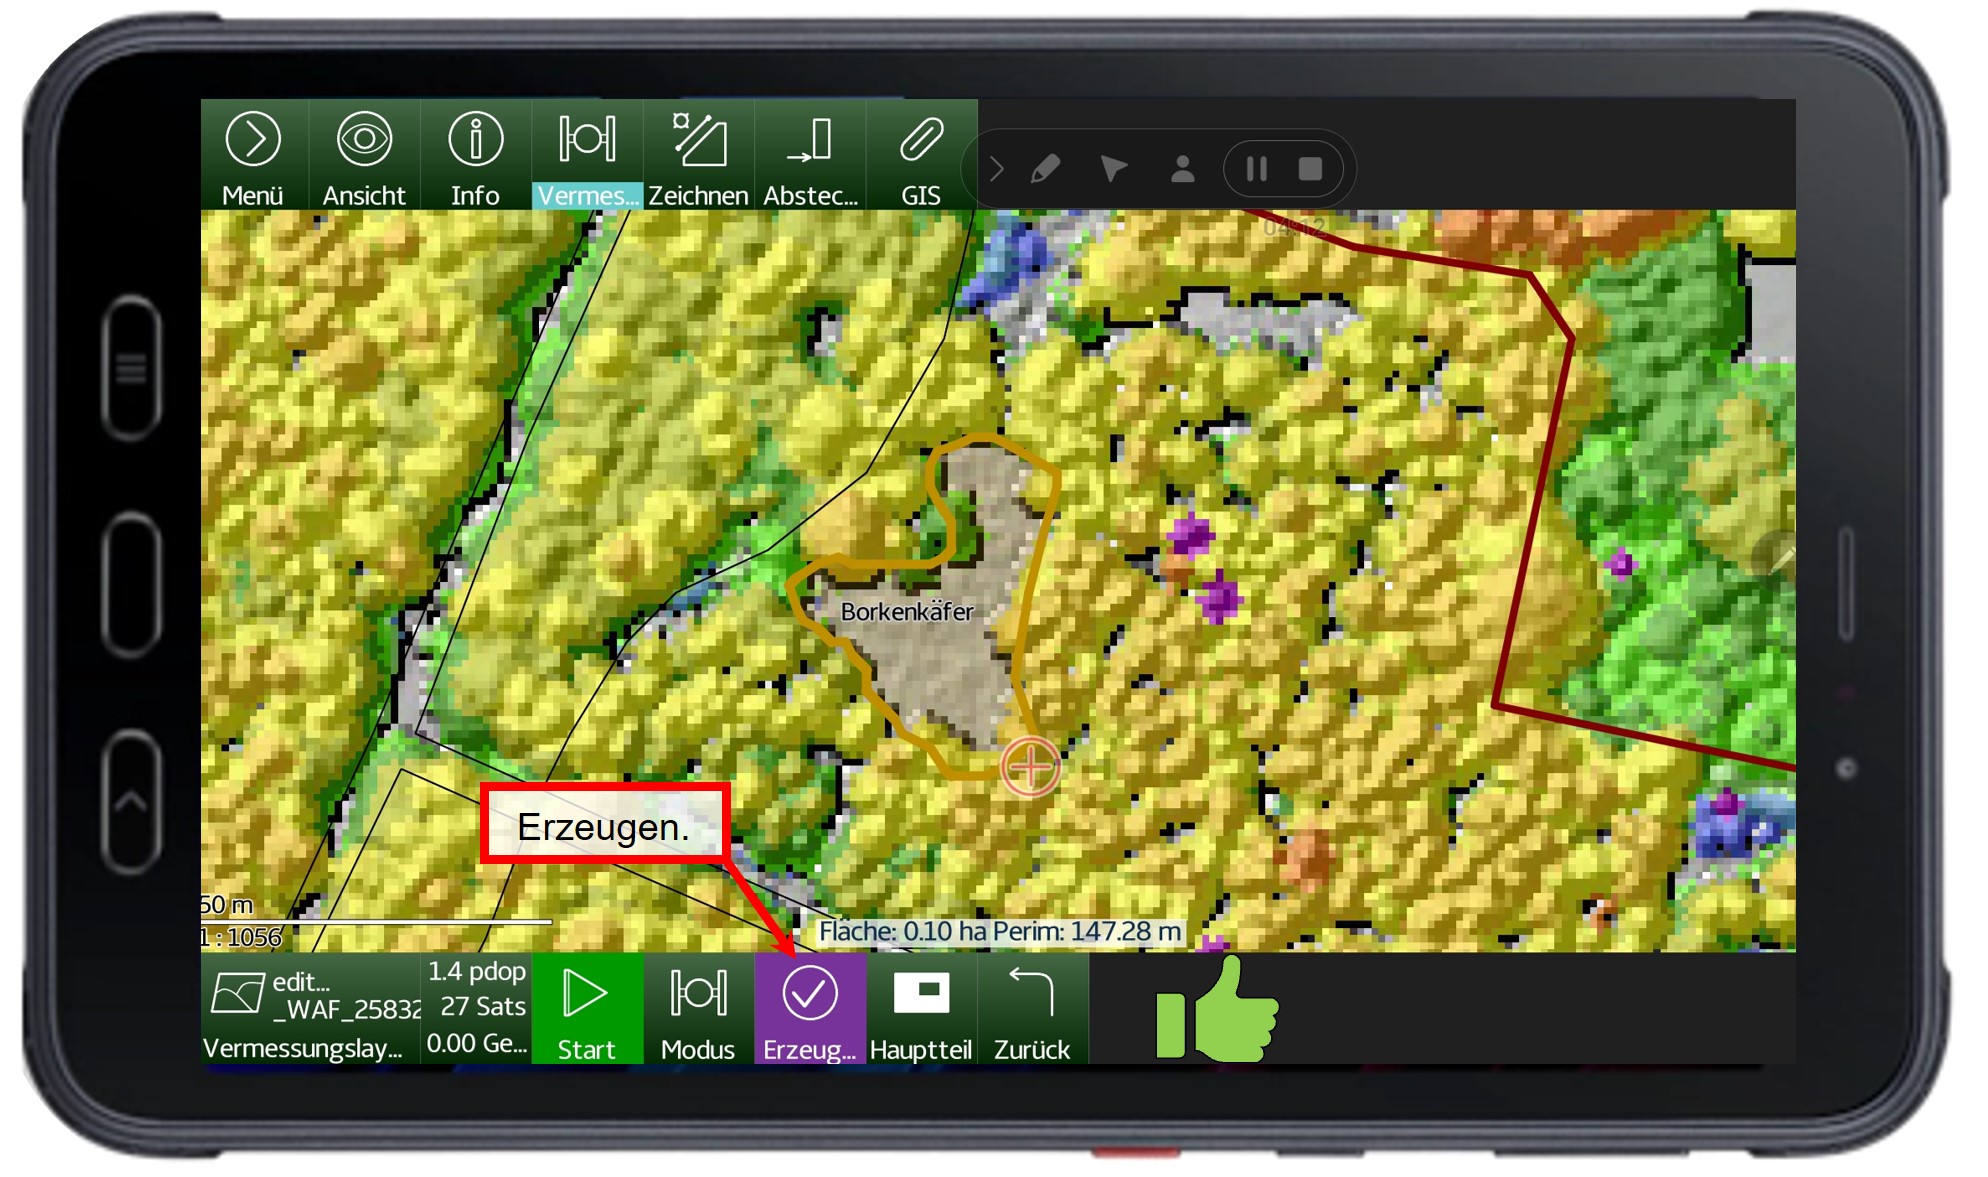
(Surface) geometries can be combined (merged). This creates a single, new geometry. The newly created geometry is recalculated automatically. For example: polygon, stock, slope, perimeter, etc.


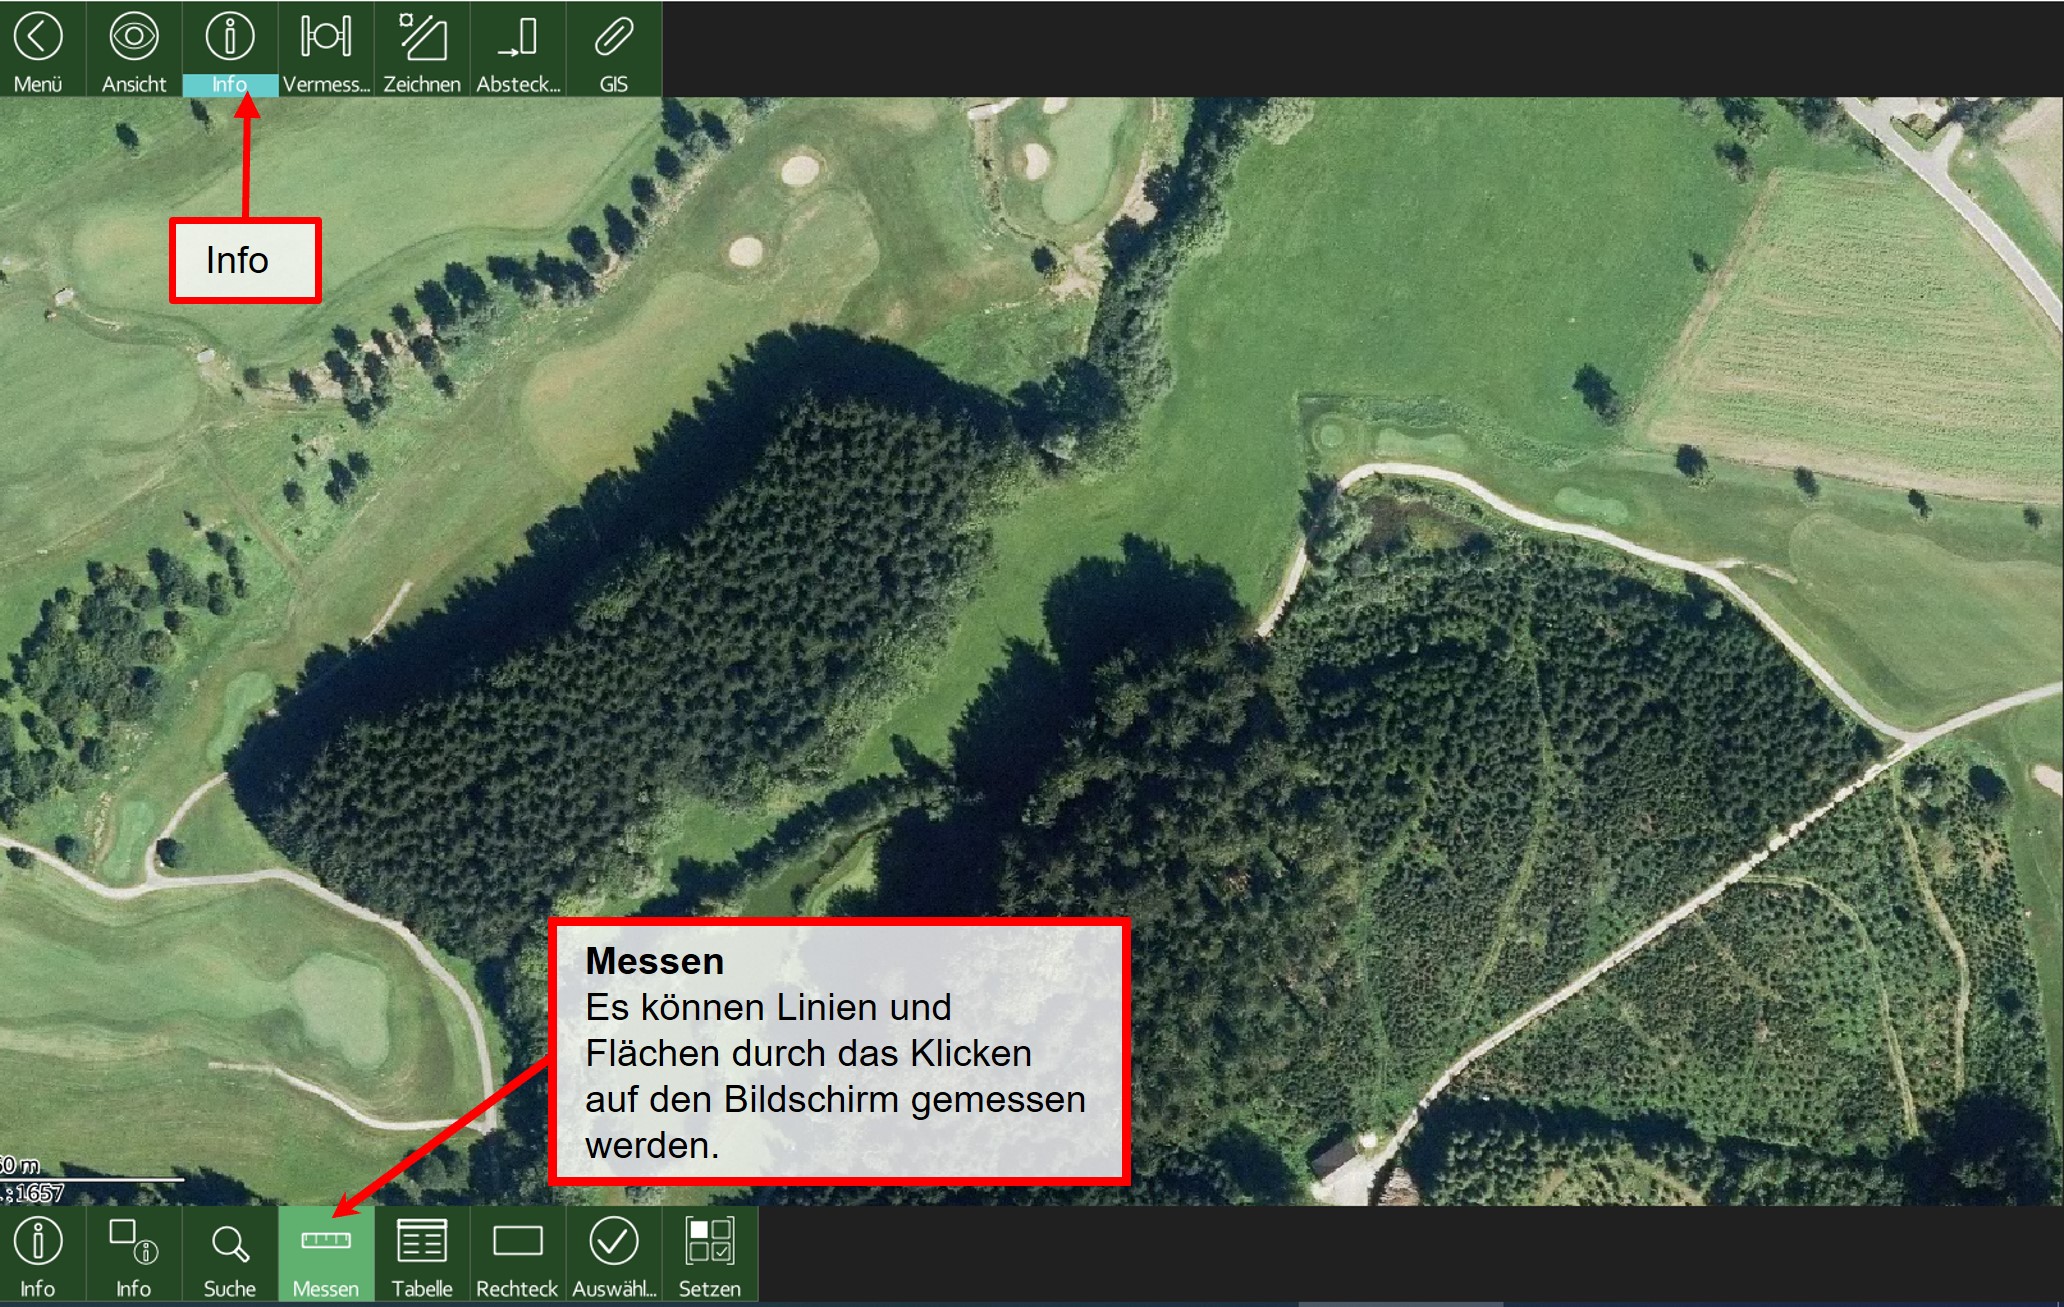
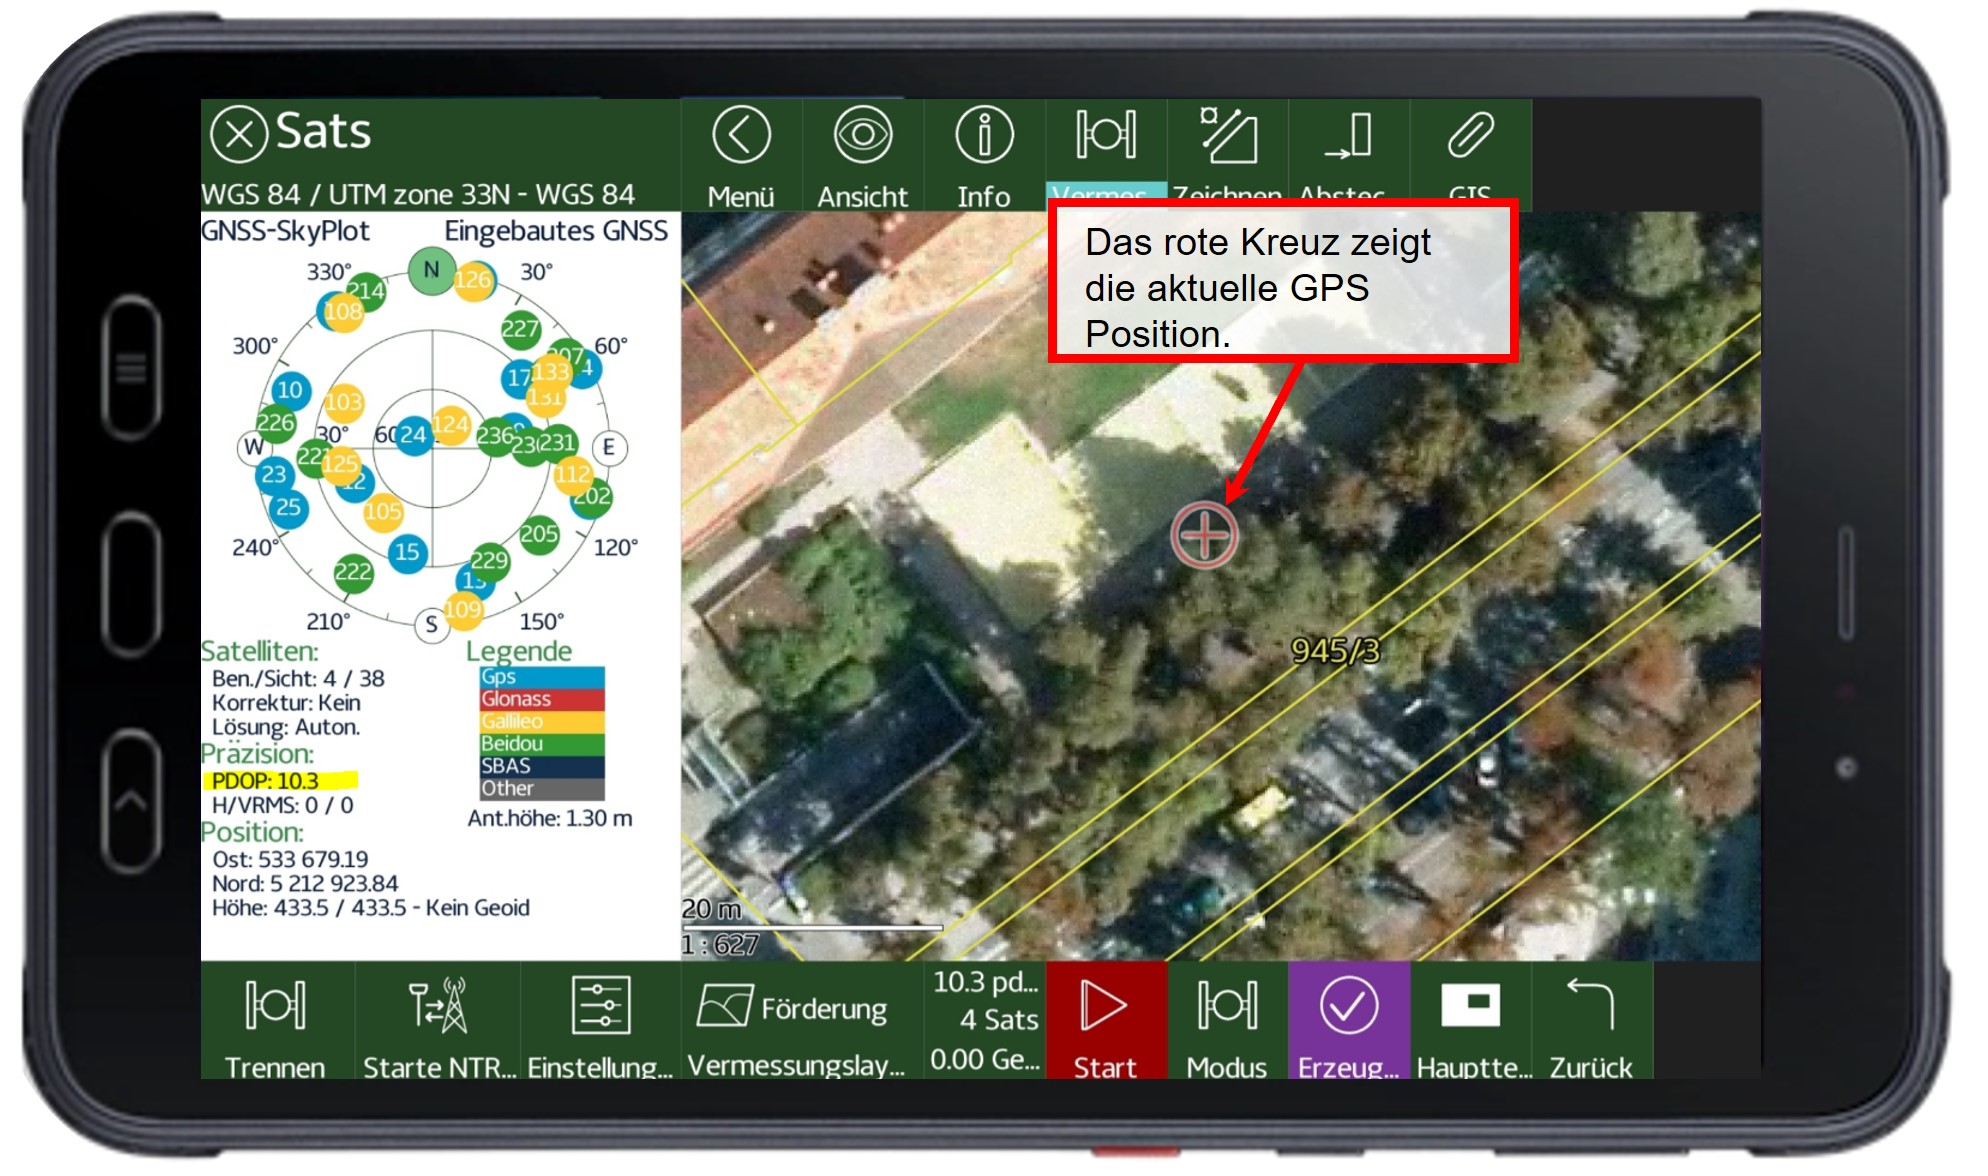
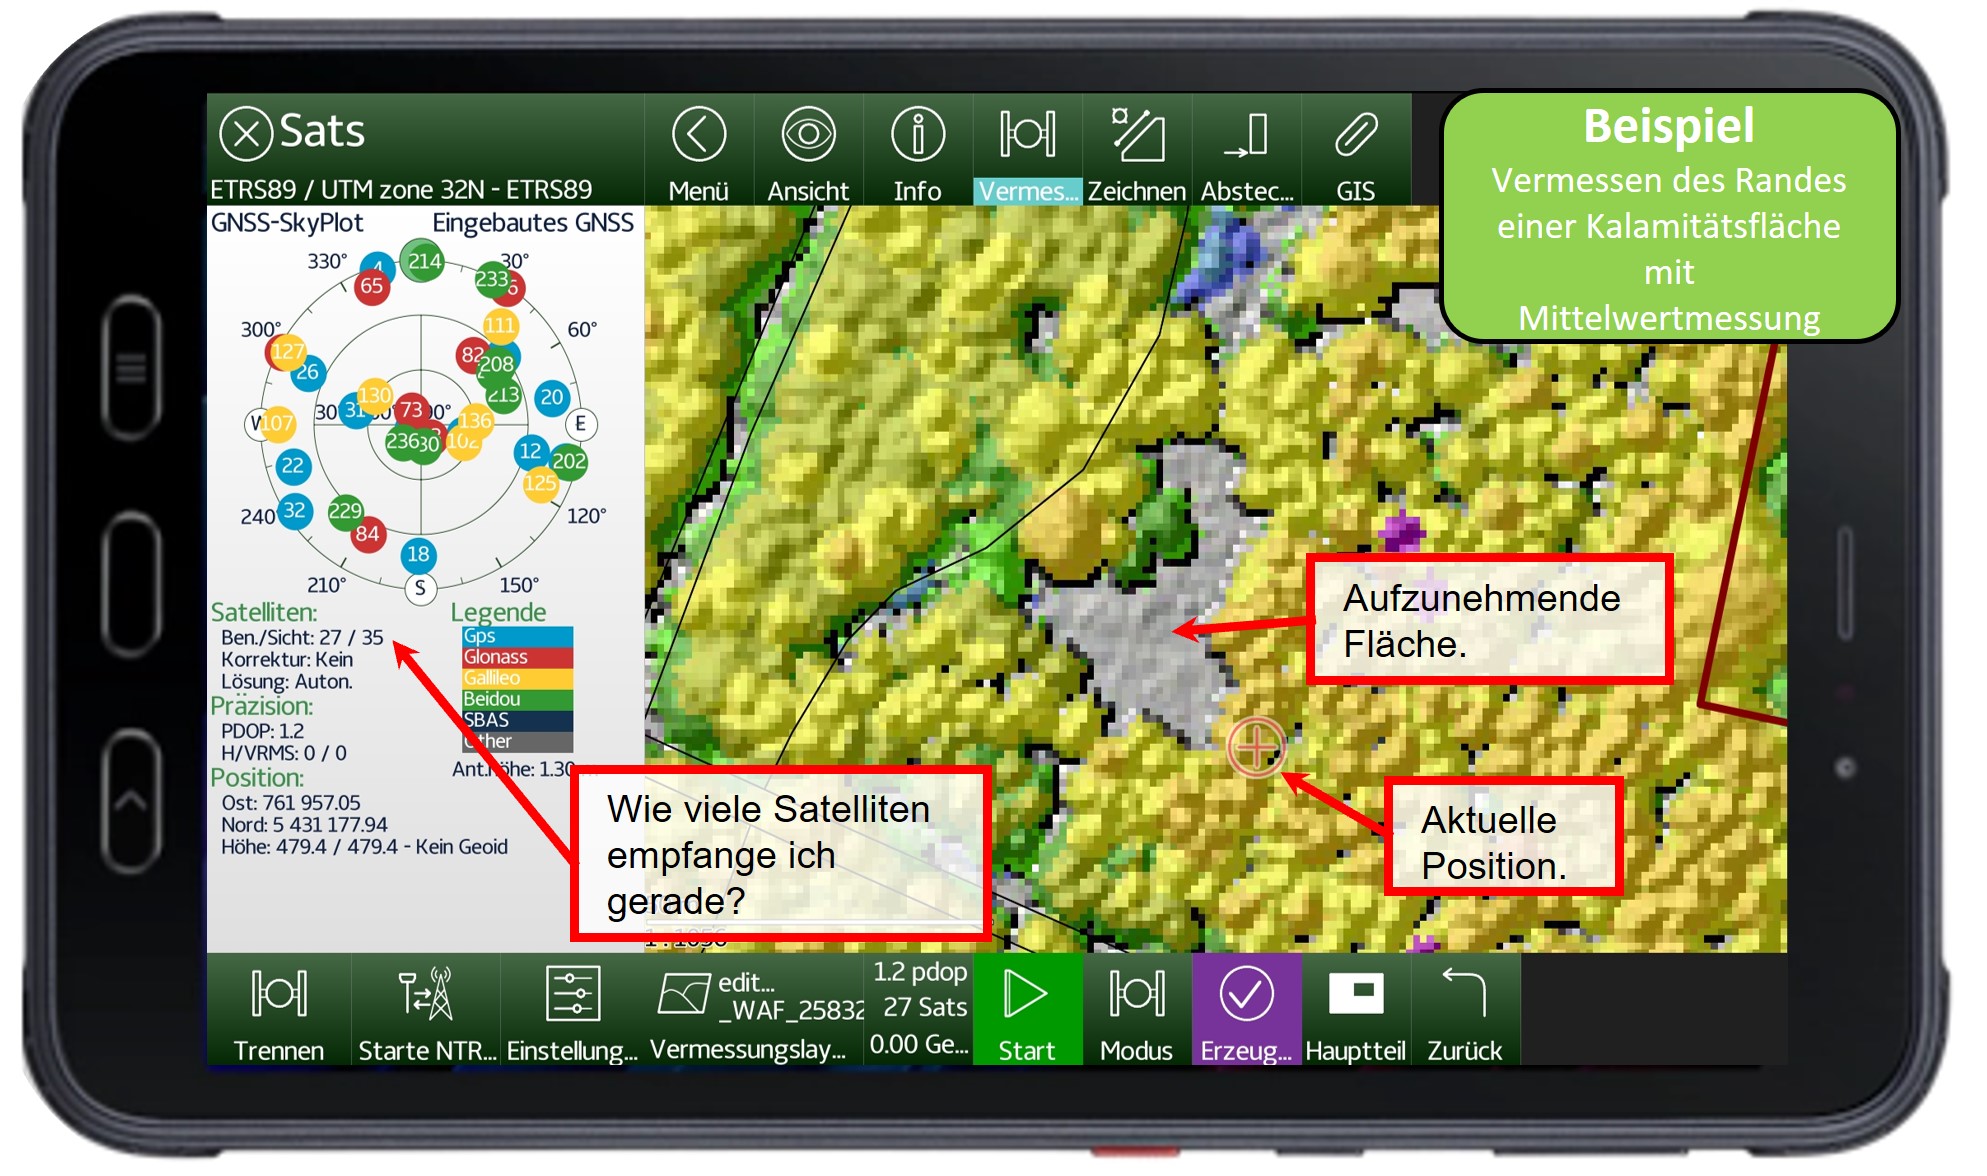
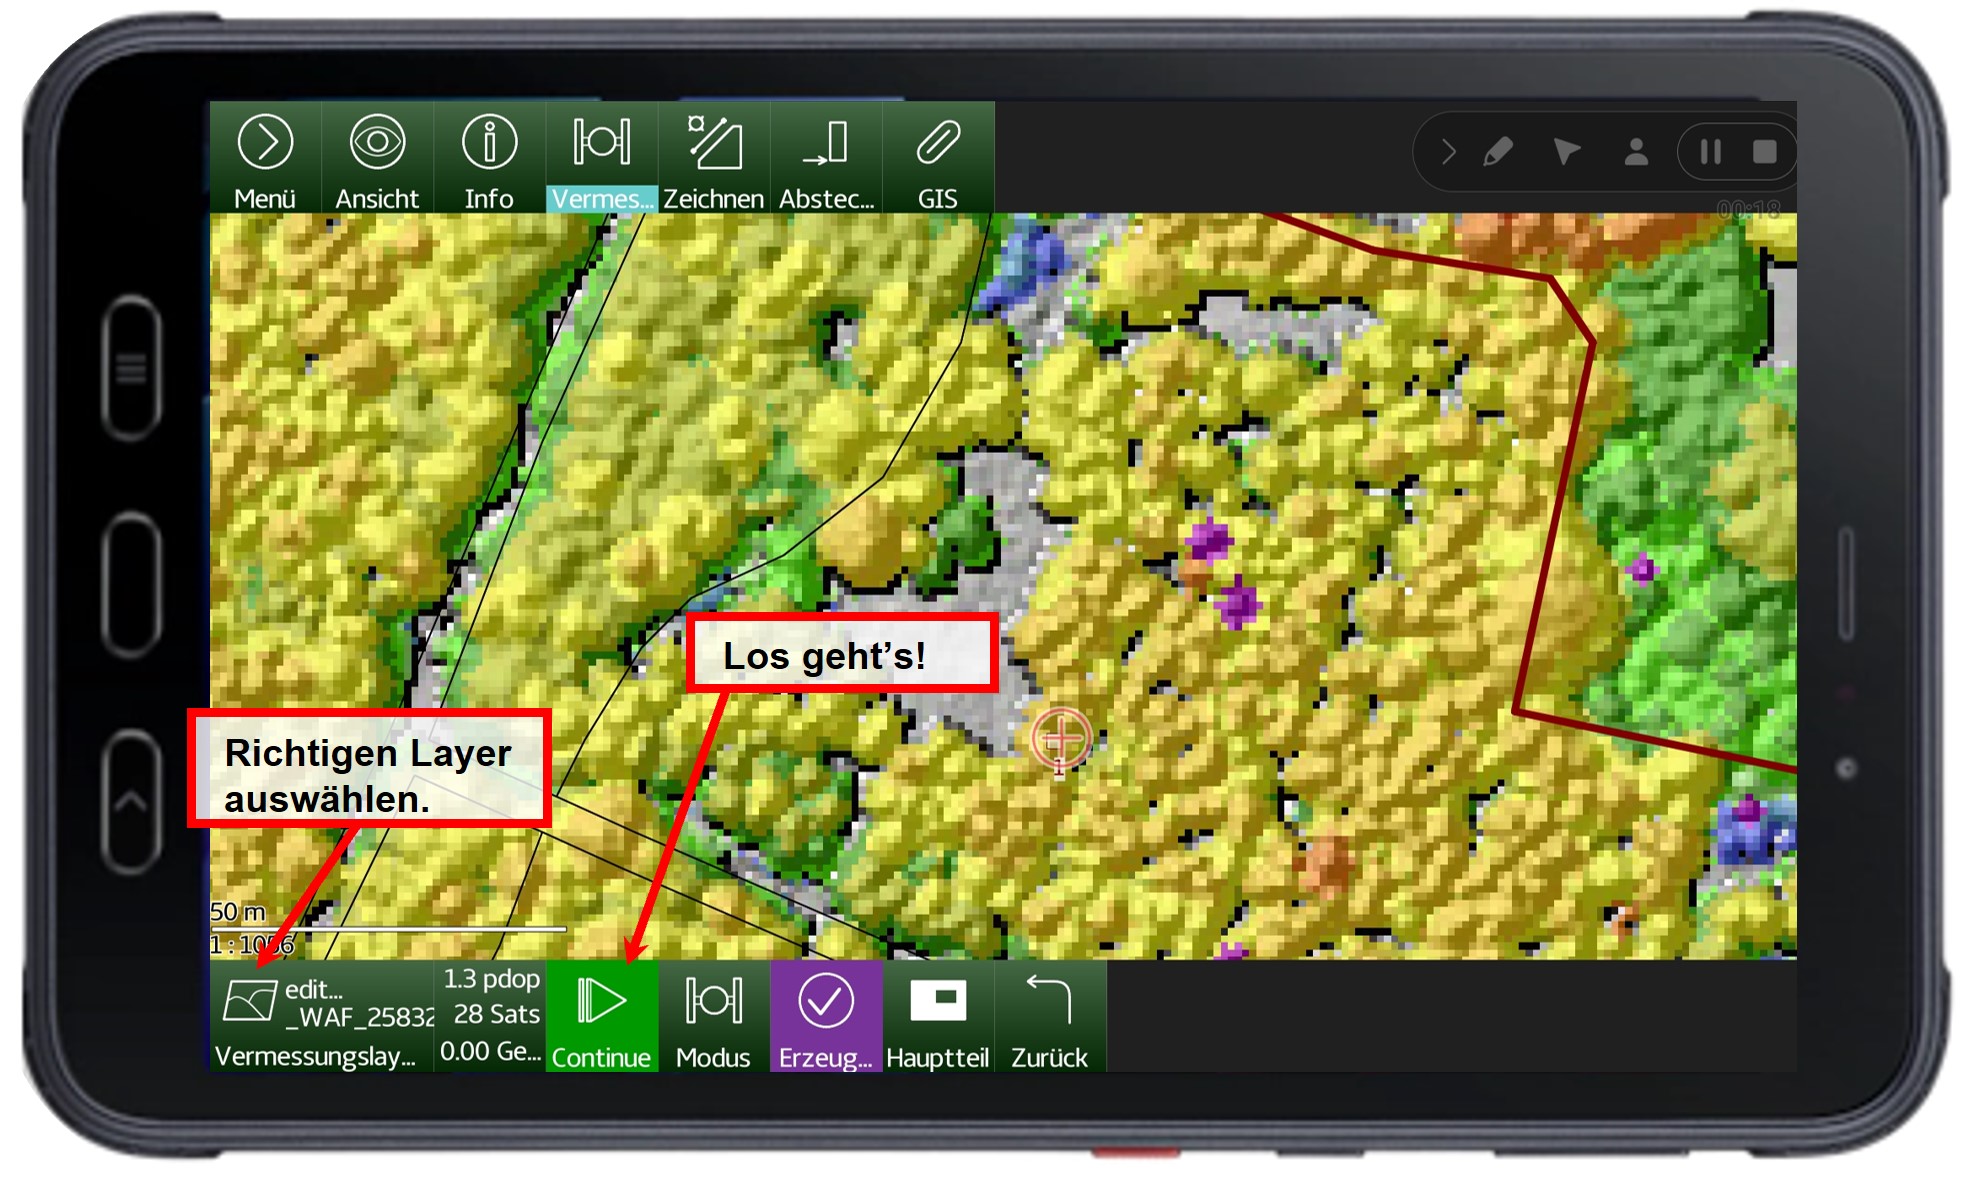
Points, lines and polygons can be measured outside with the "Measure" tool. In addition, your own location can be determined and displayed while using other tools, for example for better orientation. The function is only used on the mobile device (tablet). There has to Location feature enabled so that satellite reception can be established.
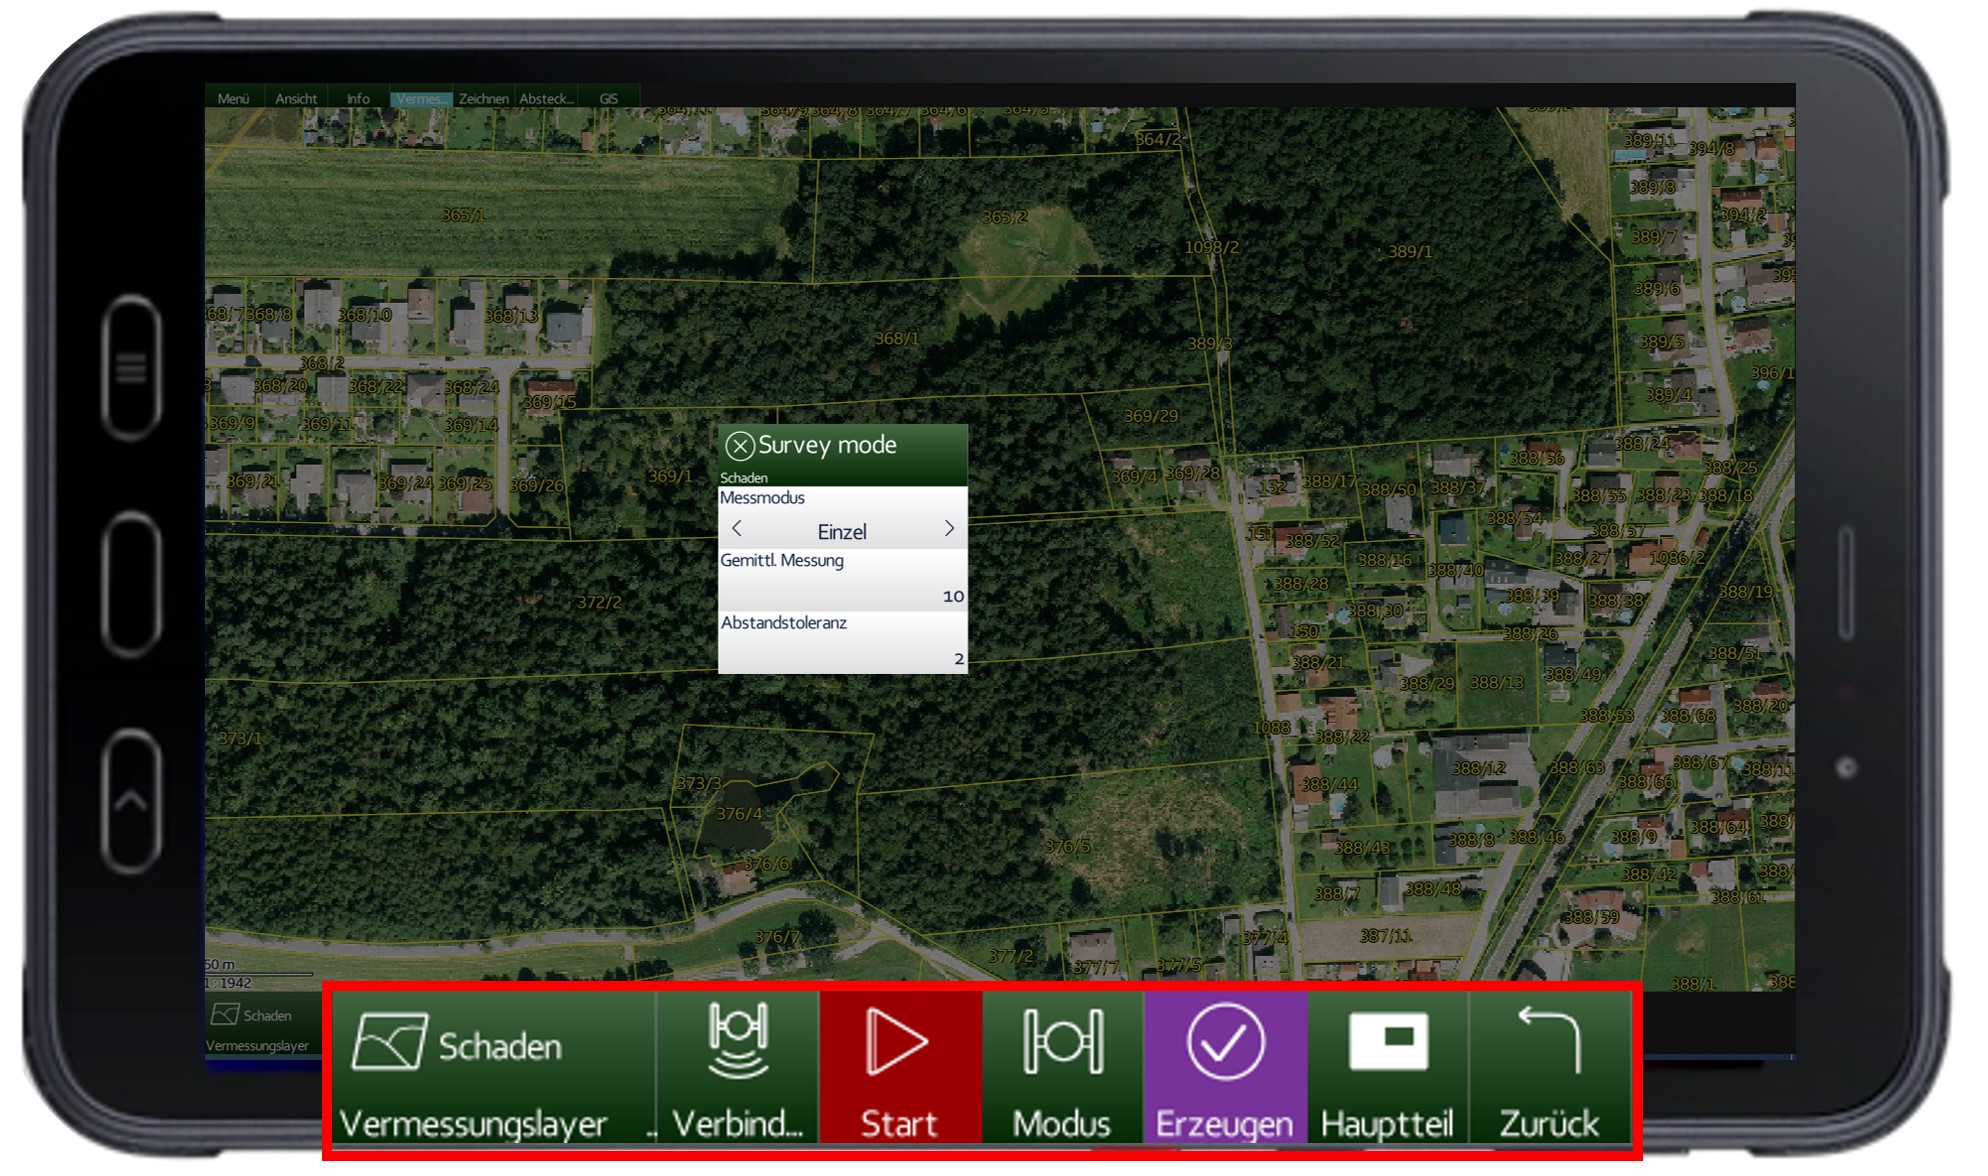
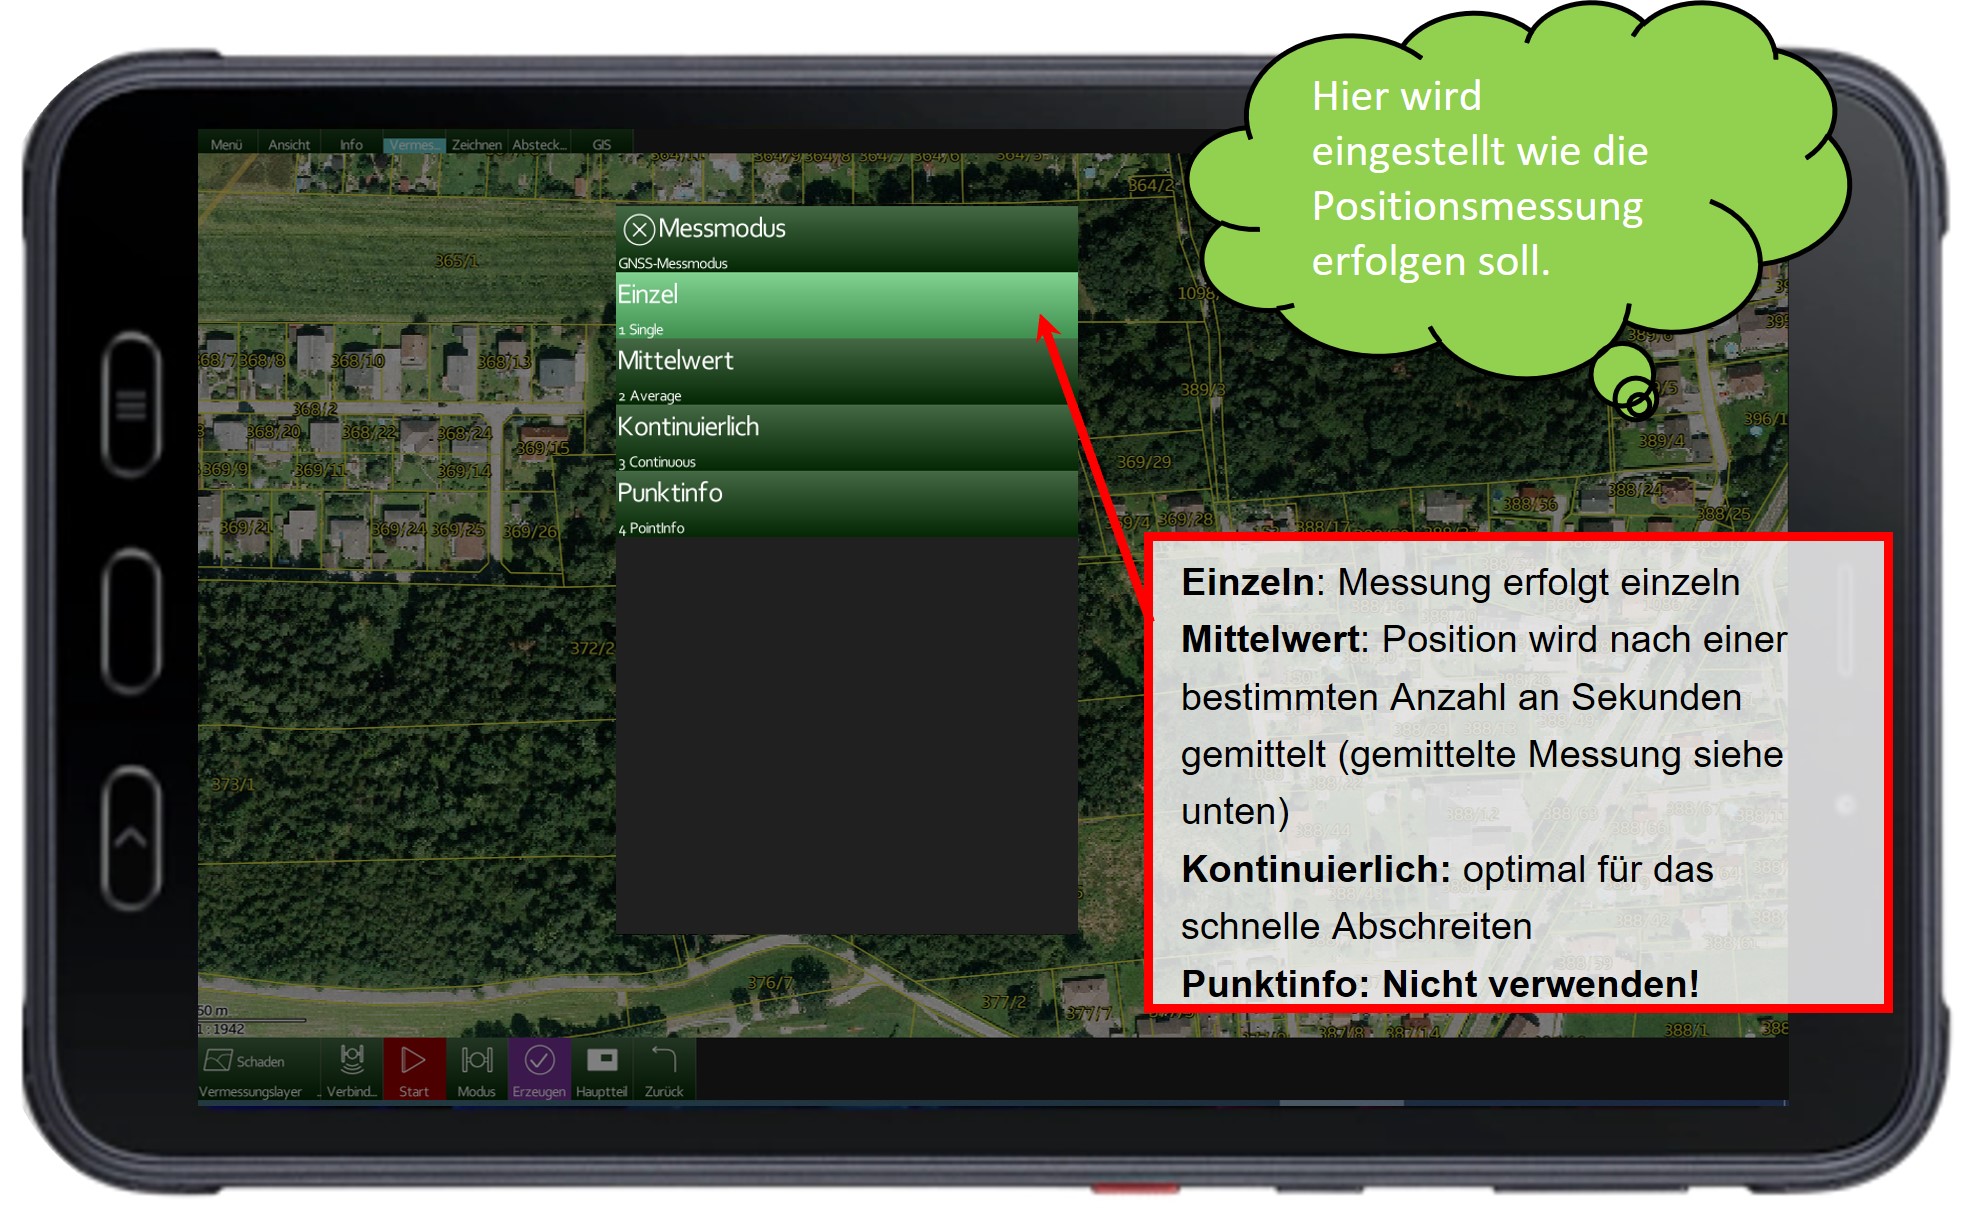
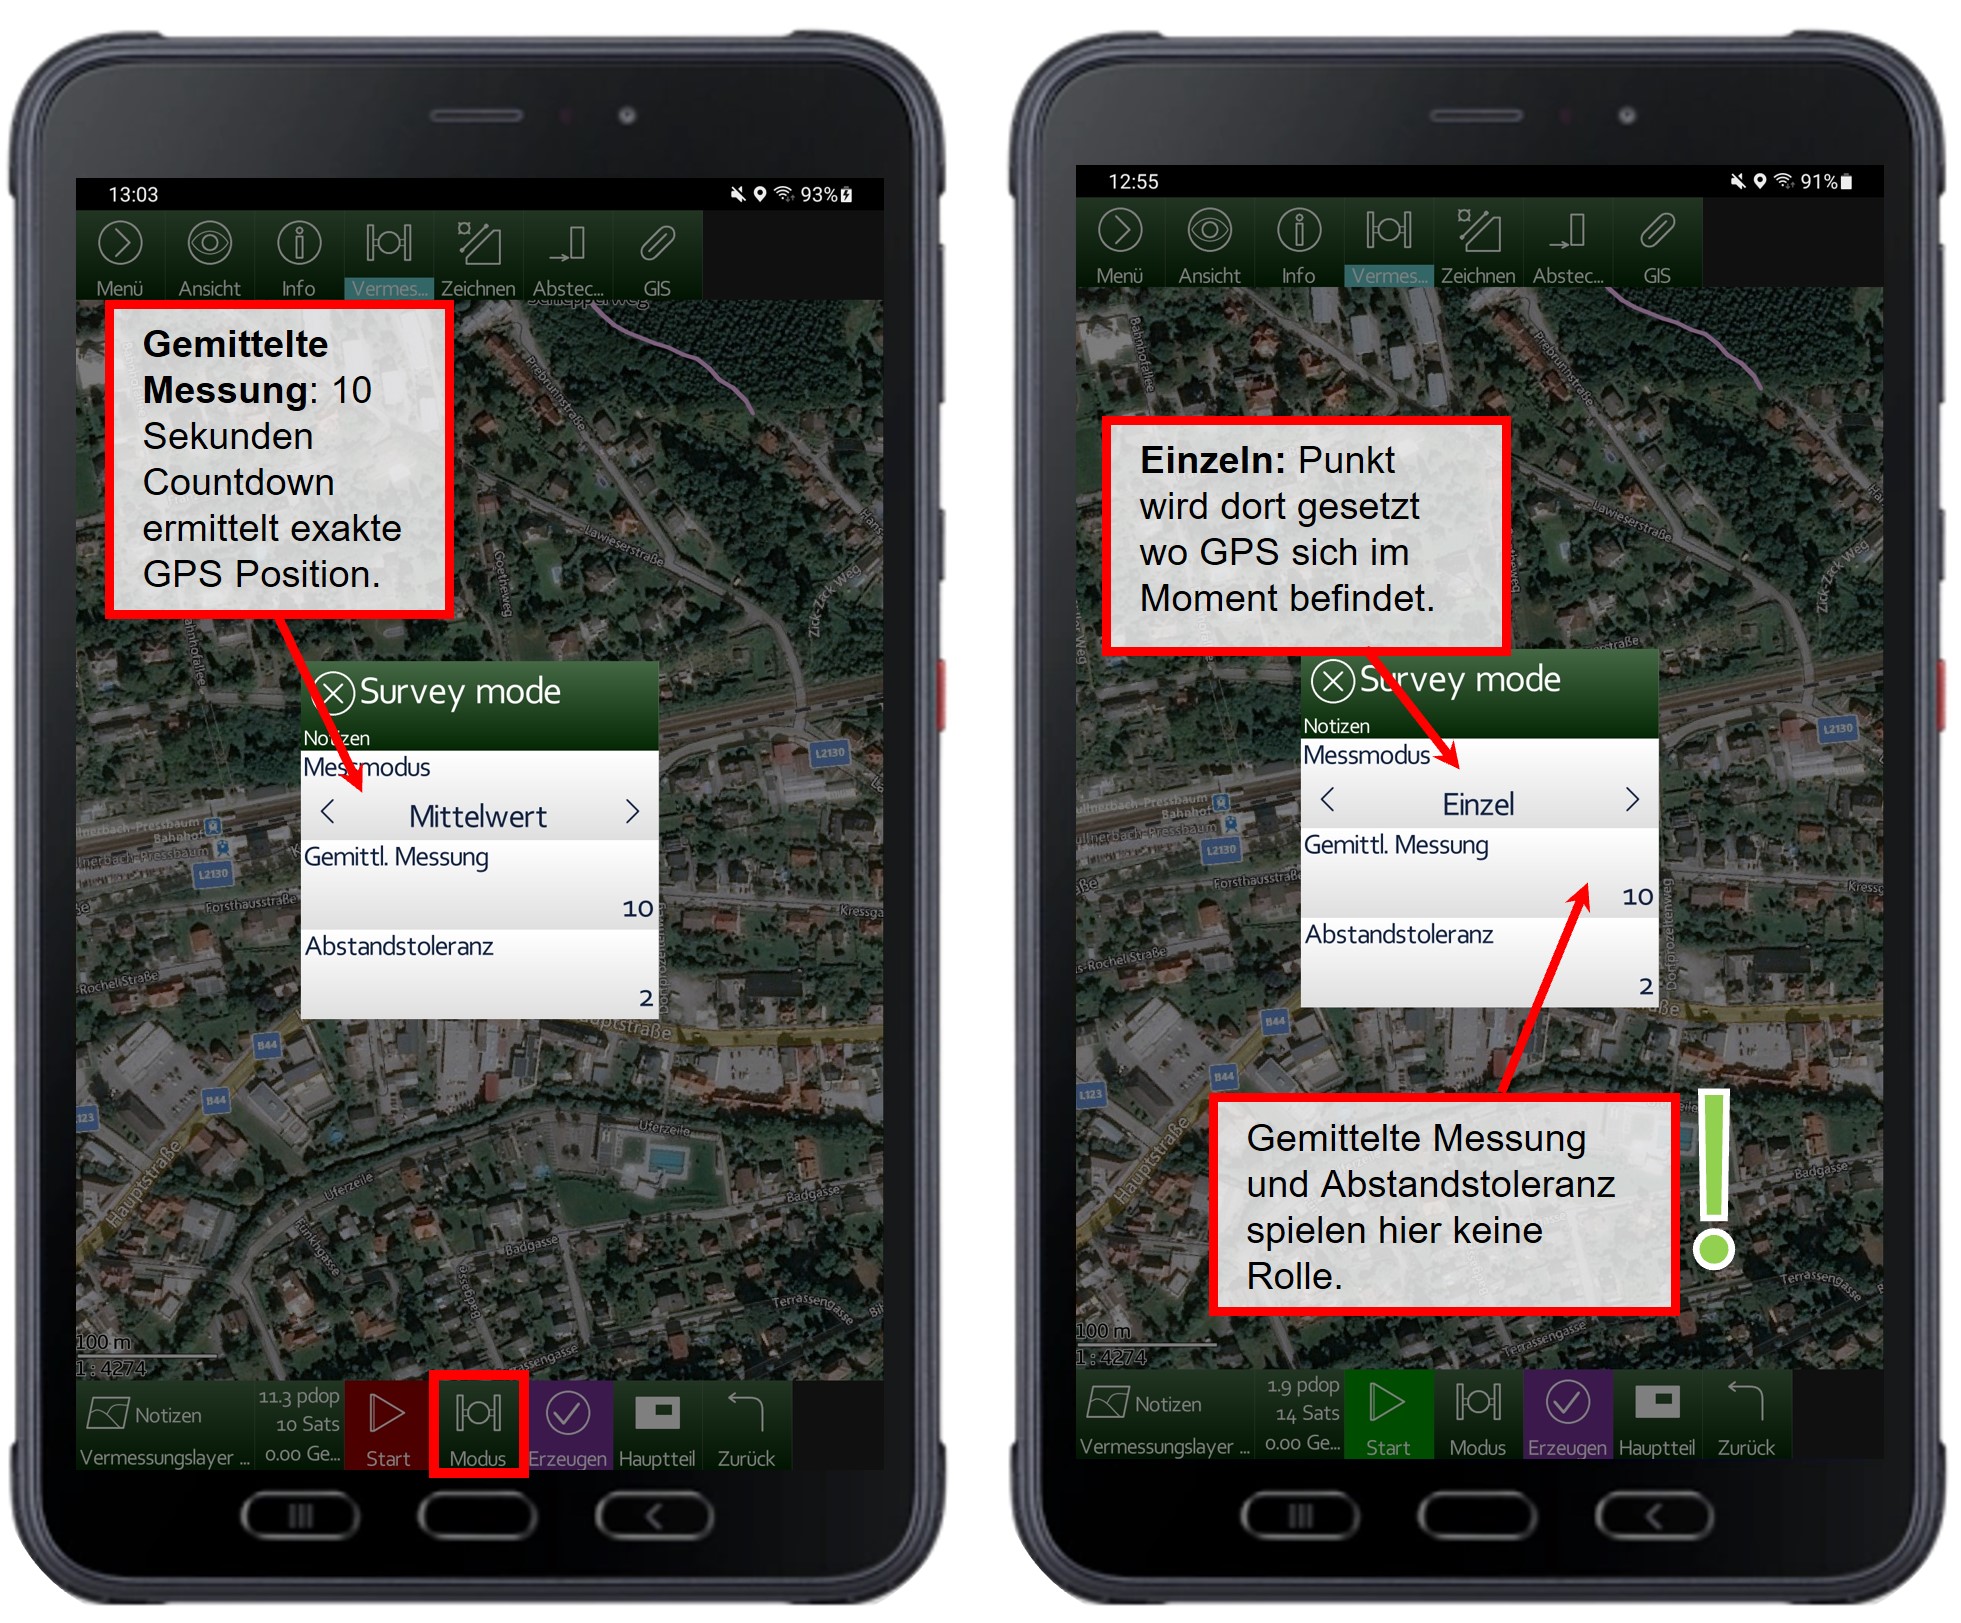
Good or bad satellite reception? Depending on the desired accuracy, the recording mode can be set to continuous or rapid recording or to average positioning(see → Rework geometries mode).
In the continuous recording the user walks a distance or polygon and a point is automatically set at a defined distance (e.g. every 5 meters) (see → distance tolerance).
Advantages: fast, not complex
In the average positioning points (vertices) are only generated when the user stops and presses the "Start" button. A countdown counts the seconds entered for the averaging and then sets a point (see → average measurement).
Advantages: more precisely, set points very specifically


The same applies to lines as to areas: If there is good satellite reception, continuous recording is recommended.In this way, a point is set at a defined distance while walking.

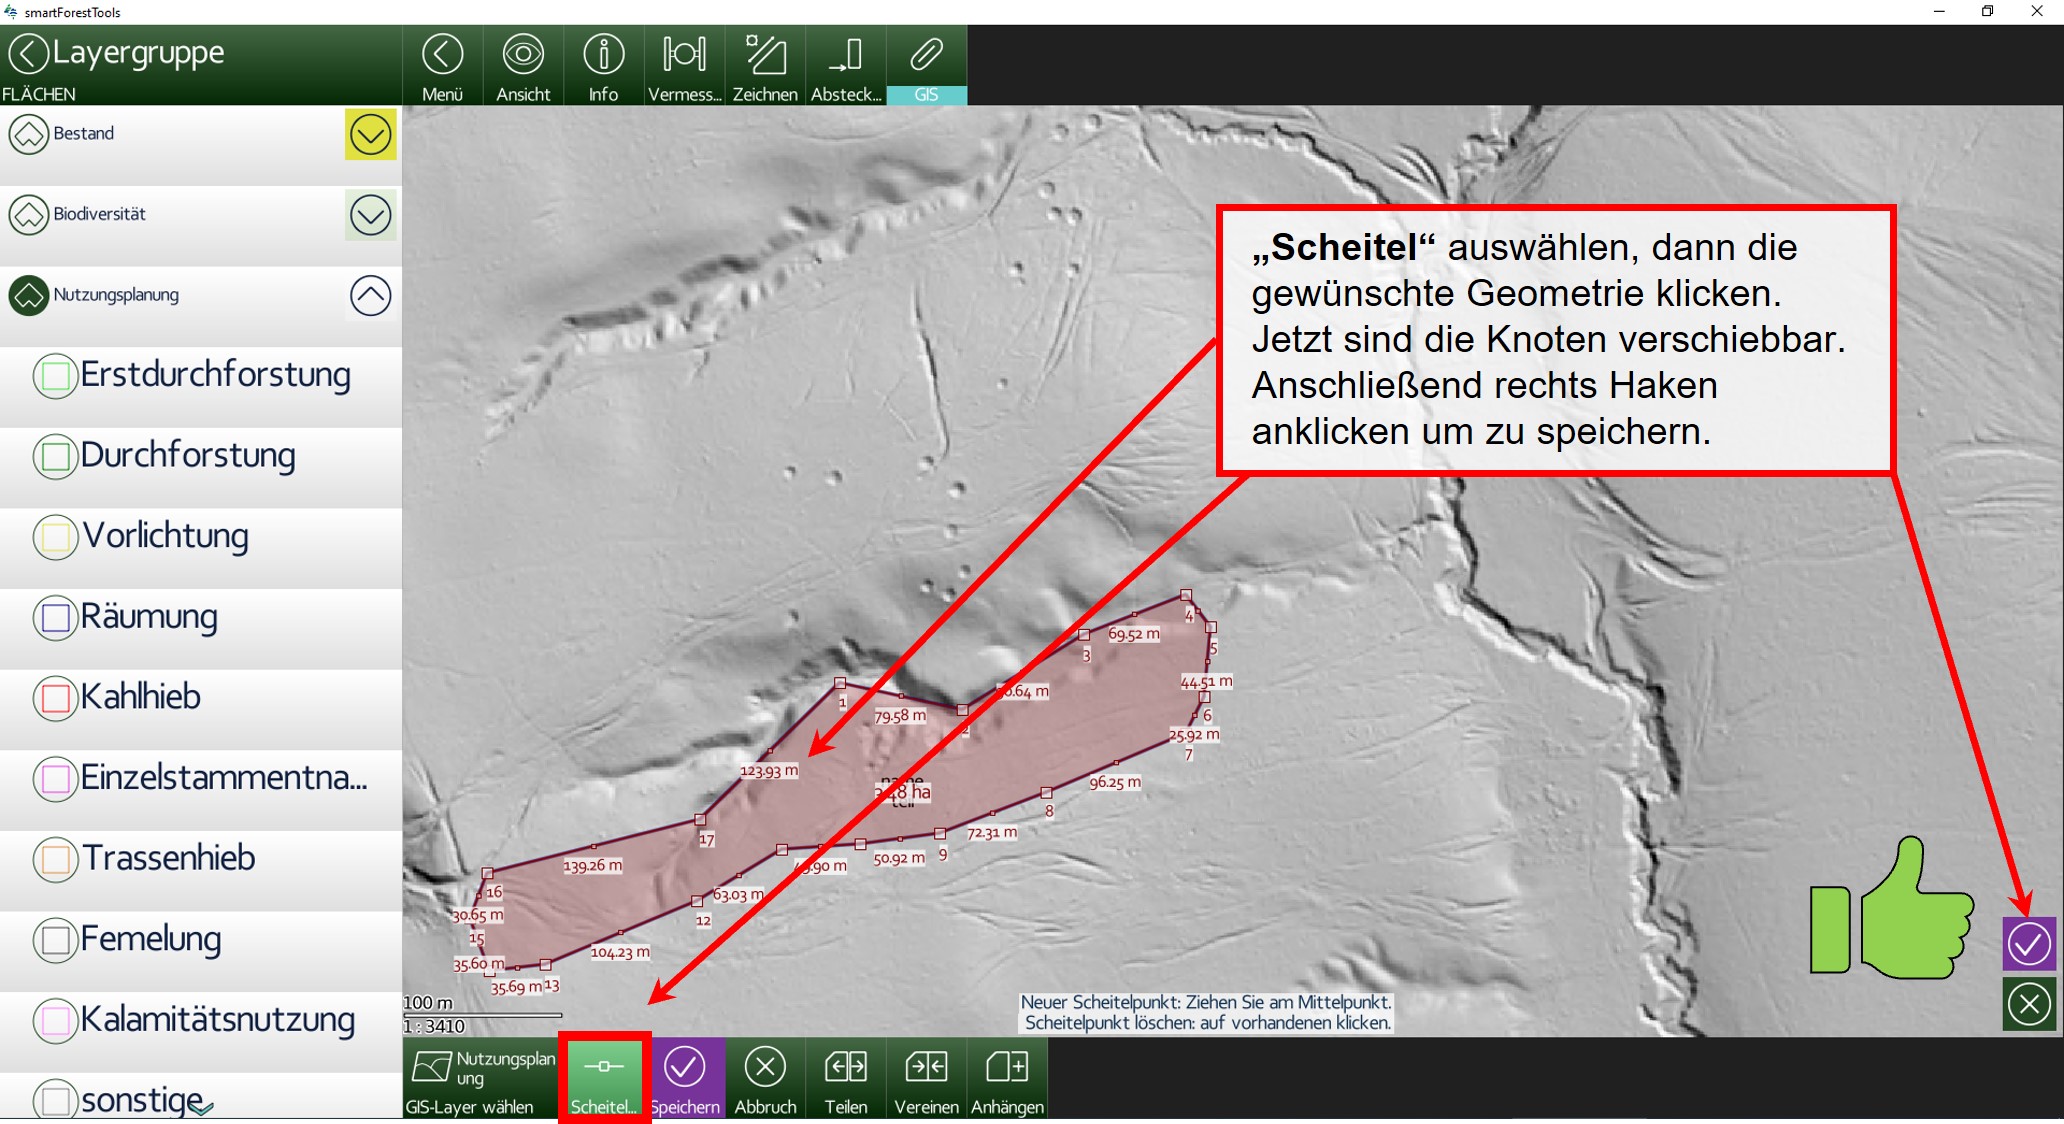
All points (vertices) can be changed or deleted later. (see → GIS/change vertices)

When measuring points using GPS, there are two ways of determining the position: Average: An average measurement. Advantage: precision Singles: Point at current position is created. Advantage: fast The following applies: Atpoor satellite visibility (few satellites) it is advisable to use the averaged measurement. For faster point setting or if the satellite reception is good, you can use the "Individual" measurement mode.
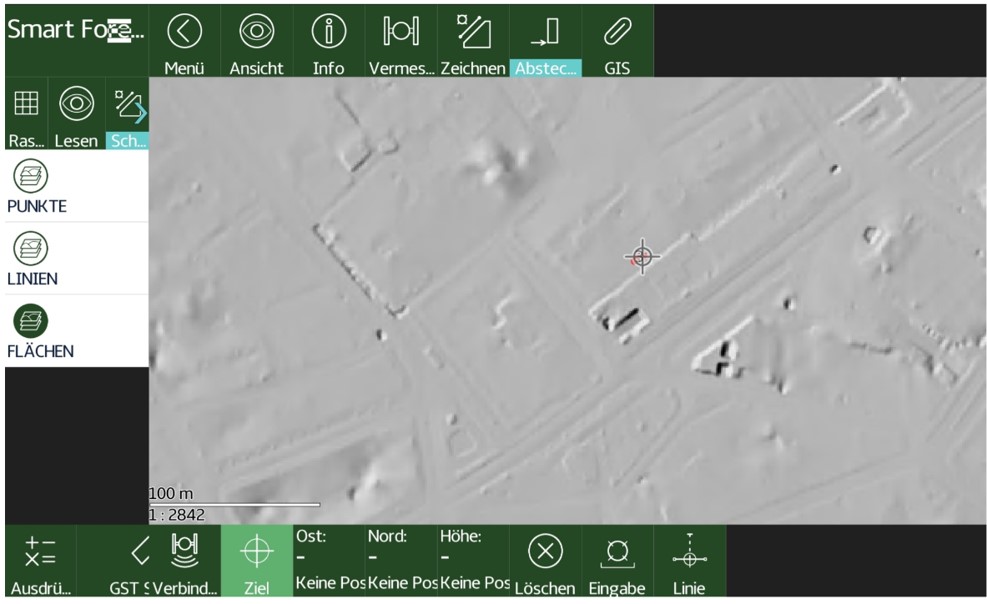
"Staking” is used to navigate to a point in the terrain. The destination can be defined by clicking on the map or by entering coordinates.

Weil bla bla bla
Weil bla bla bla
Weil bla bla bla
Weil bla bla bla
Weil bla bla bla
Weil bla bla bla